This article will help you learn how to create, organize, and customize E-Cards within the platform.
This functionality helps you design and organize E-Cards effectively—whether for recognition, communication, or celebration—while taking full advantage of customization options to reflect your brand or message.
In this article:
Log in to JobPts -> Admin Center -> Configuration & Branding -> E-cards -> Create New E-card
On the left-side panel, select Configuration & Branding, go to E-cards and click on the Create New E-card button.

Image: E-cards
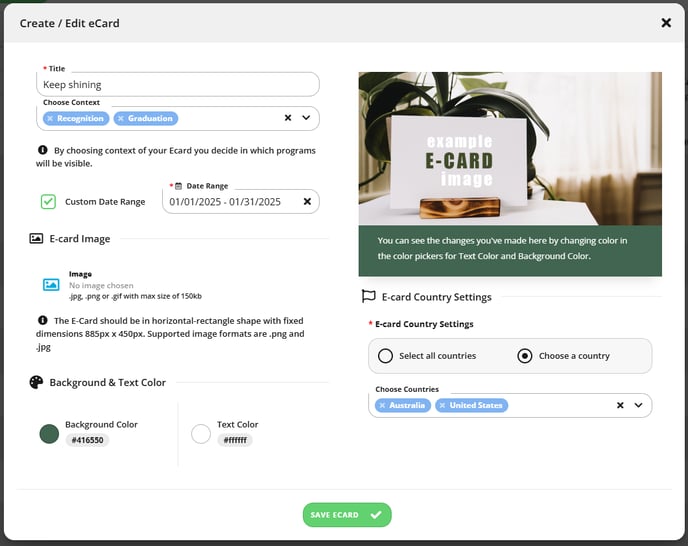
On the next screen, you will be presented with a pop-up where you will be able to:
- Title - Enter the e-card title (employees can easily search for a certain E-card using this title in the application).
*Note: The checkbox must be selected to enable searching for E-cards by title in the application. - Choose Context - Allows you to choose the contexts in which the E-card will be displayed. You can select multiple contexts, such as Anniversary, Birthday, Recognition or Nomination.
- Custom Date Range - Specify the time frame during which the E-card will be available.
- Upload E-card Image - Option to upload the E-Card image.
- Set Background Color - Allows you to choose the background color that will appear behind the text and under the E-Card.
- Set Text Color - Allows you to customize the text color for the text.
- E-card Country Settings:
- Select All Countries - If selected, E-card will will available in all active countries of the sender.
- Choose a Country - Allows you to choose the sender's countries where this e-card will be available.
Click the Save Ecard button to create your new E-Card.

- E-card Image - Shows the image that is uploaded.
- Title - Shows the title of the created E-card.
- Background - Shows the selected color that will be used as a background for the appropriate E-card.
- Text Color - Shows the color of the text presented in the E-card.
- Type - Showing all the contexts where the E-card is applied.
- eCards Sent - Displays the total number of times the e-card has been used for sending recognitions, nominations, or moments that matter.
- E-card Is Active - Indicates whether the E-card is active or inactive.
- Edit - allows you to change the Context, Image and Background and Text color for the selected card.
- Deactivate - lets you deactivate the card.
- Delete - This will delete the card. This action is irreversible and can only be performed if the E-card has not been used in any transactions.
From the new pop-up window, you can change the context, image and background and text color of the eCard.

Image: Edit E-card
Define E-Cards order
Log in to JobPts -> Admin Center -> Configuration & Branding-> E-Cards -> Order E-cards
On the left-side panel, select Configuration & Branding, select E-cards and click the Order E-cards tab.

Image: Order E-Cards
In the 'Choose Context' or 'Choose a Title' filter, select a context or title, and you will see the drag-and-drop option appear, allowing you to set a specific order for the selected configuration.


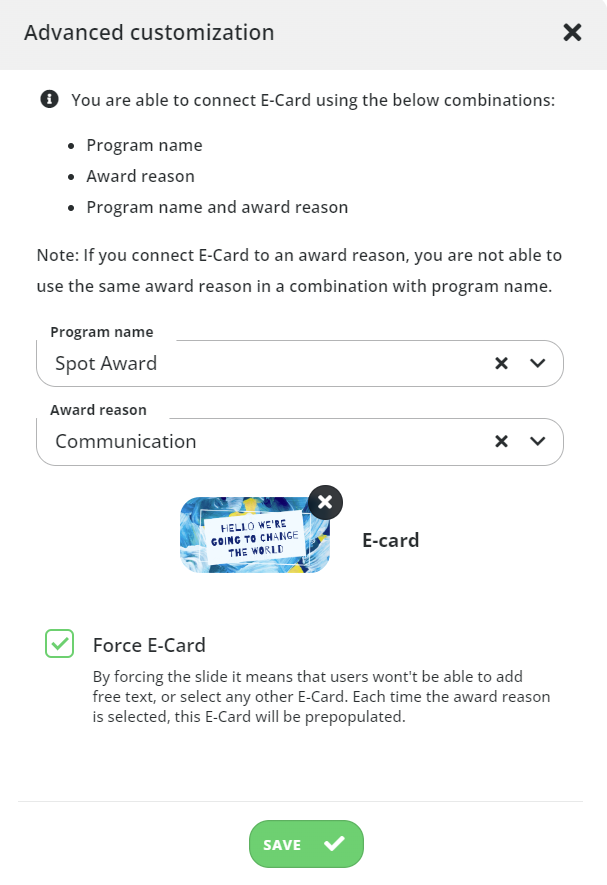
- Map E-Cards with recognition programs.
This allows for specific E-Cards to be assigned to particular recognition programs. - Map E-Cards with award reasons
This allows to connect award reasons with dedicated E-Cards. When the user selects an award reason in the program, the predefined E-Card is automatically selected.
.png?height=120&name=MicrosoftTeams-image%20(6).png)