.png?height=120&name=MicrosoftTeams-image%20(6).png)
This article will guide you how to create a campaign
Creating well-tailored campaigns makes it easier to nudge your employees towards a common goal.
Creating a campaign involves a few steps. But first, you must create a communication in the Editor tool, then this communication has to be approved by approvers and Final approver in the Approval section.
You can navigate to Admin center -> Editor -> My communications -> Approved -> Search and then do the following steps Actions -> Create campaign
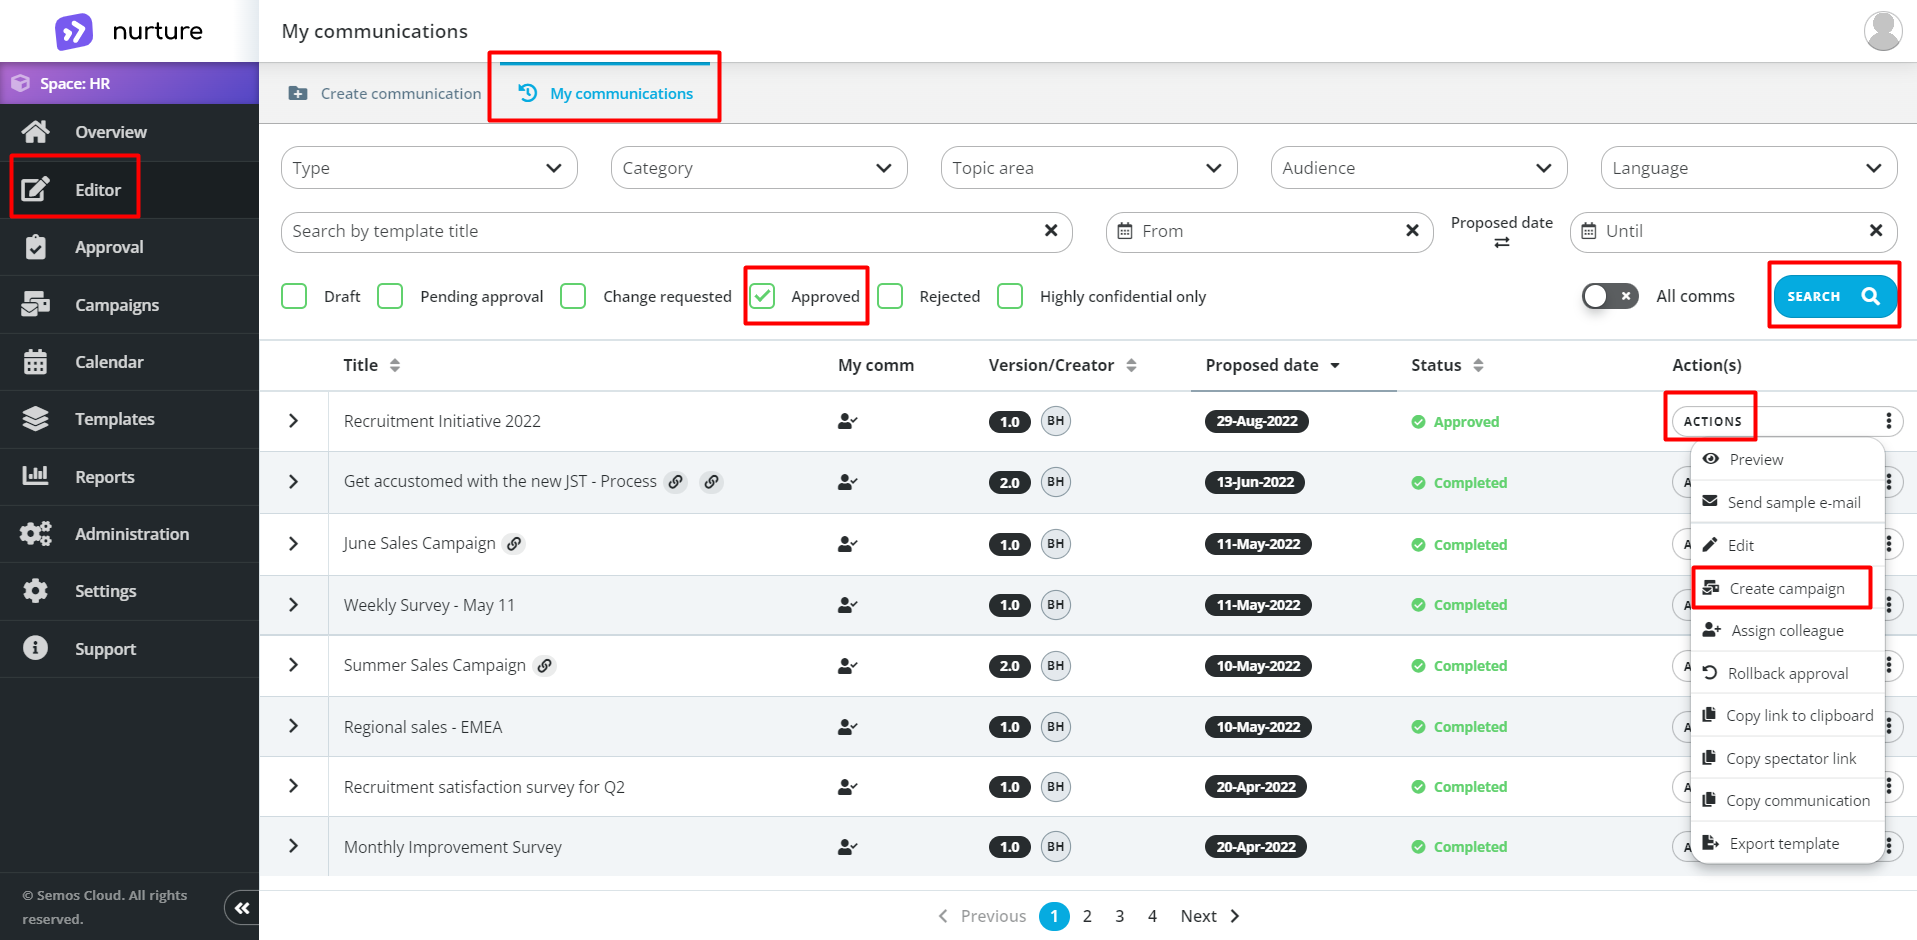
Image: Nurture Admin center – Editor – My communications
Or you can navigate to Campaigns -> Create campaigns
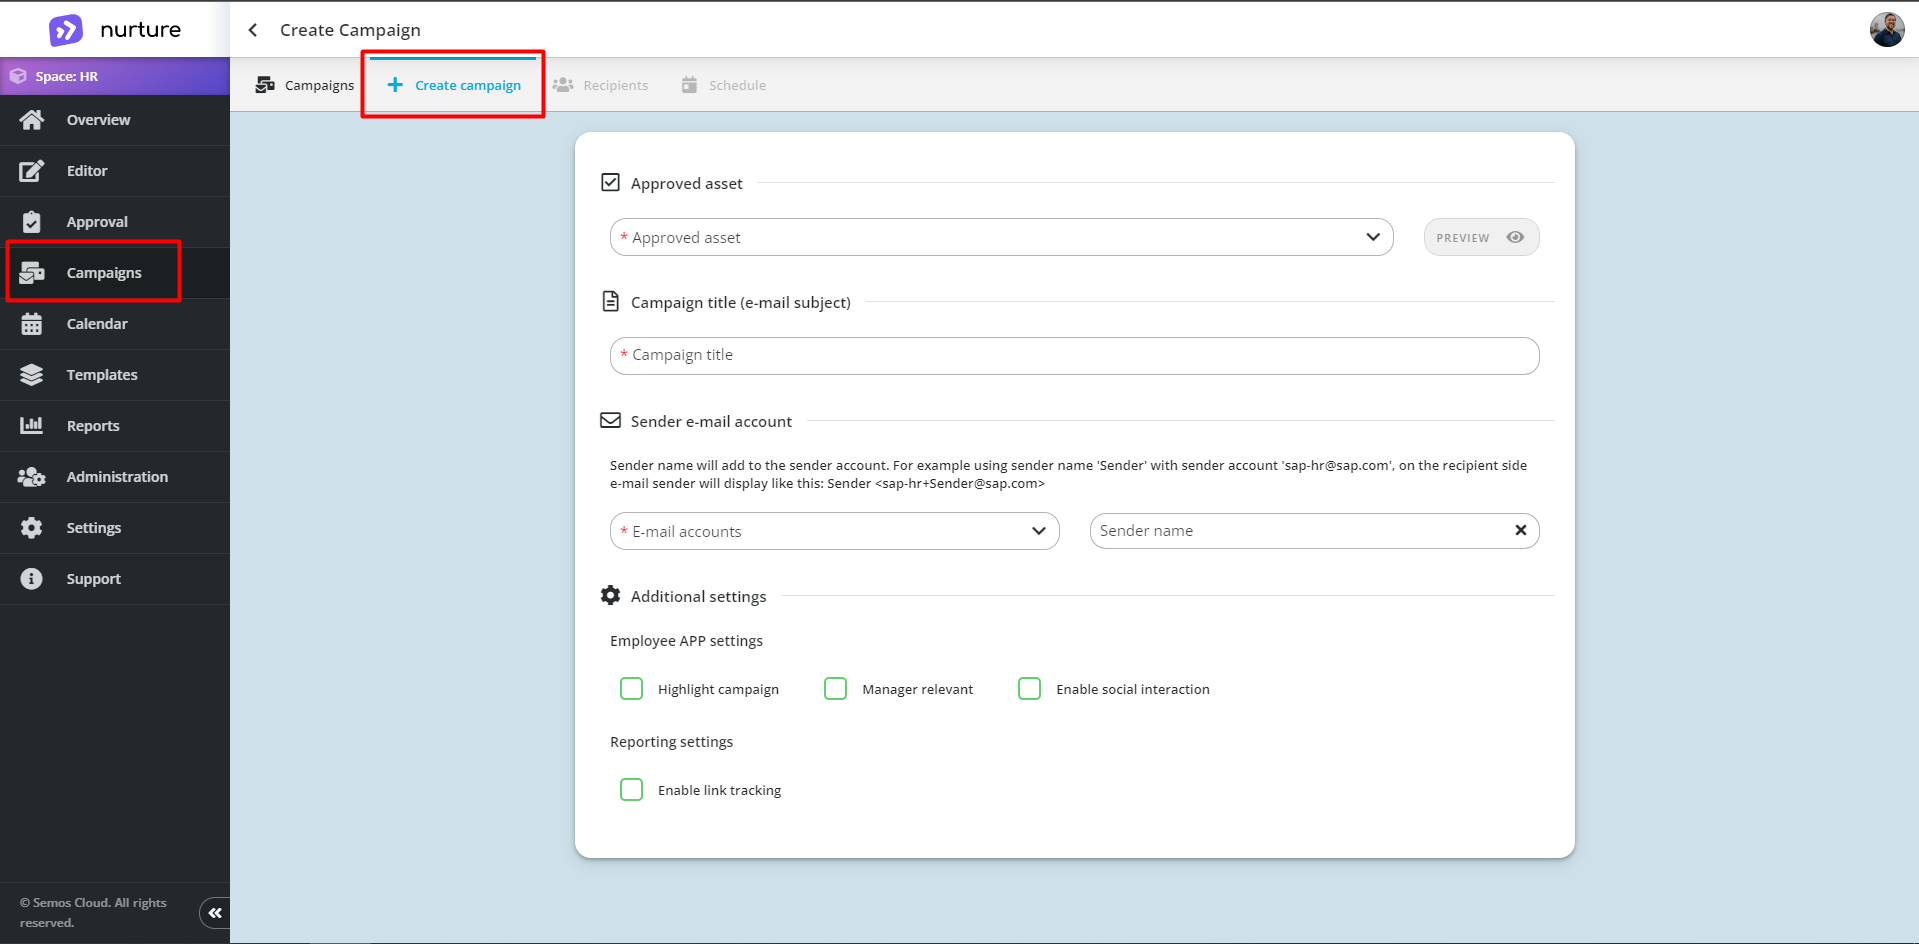
Image: Nurture Admin center – Campaigns – Create campaign
Here you must pick the Approved asset (approved communication), then pick a title for the campaign, pick a sender, and pick some additional settings if you want.
The additional settings are:
- Highlight campaign (click here for more info)
- Manager relevant (this campaign will appear in relevant in your manager role)
- Enable social interaction (click here for more info)
- Enable link tracking (allows you to keep track of how many people have opened the link/s)
After you have finished entering the campaign data, you will continue by clicking add recipients and you will be presented with options for adding recipients.
You can add recipients via filters, by manual search, and via Excel.
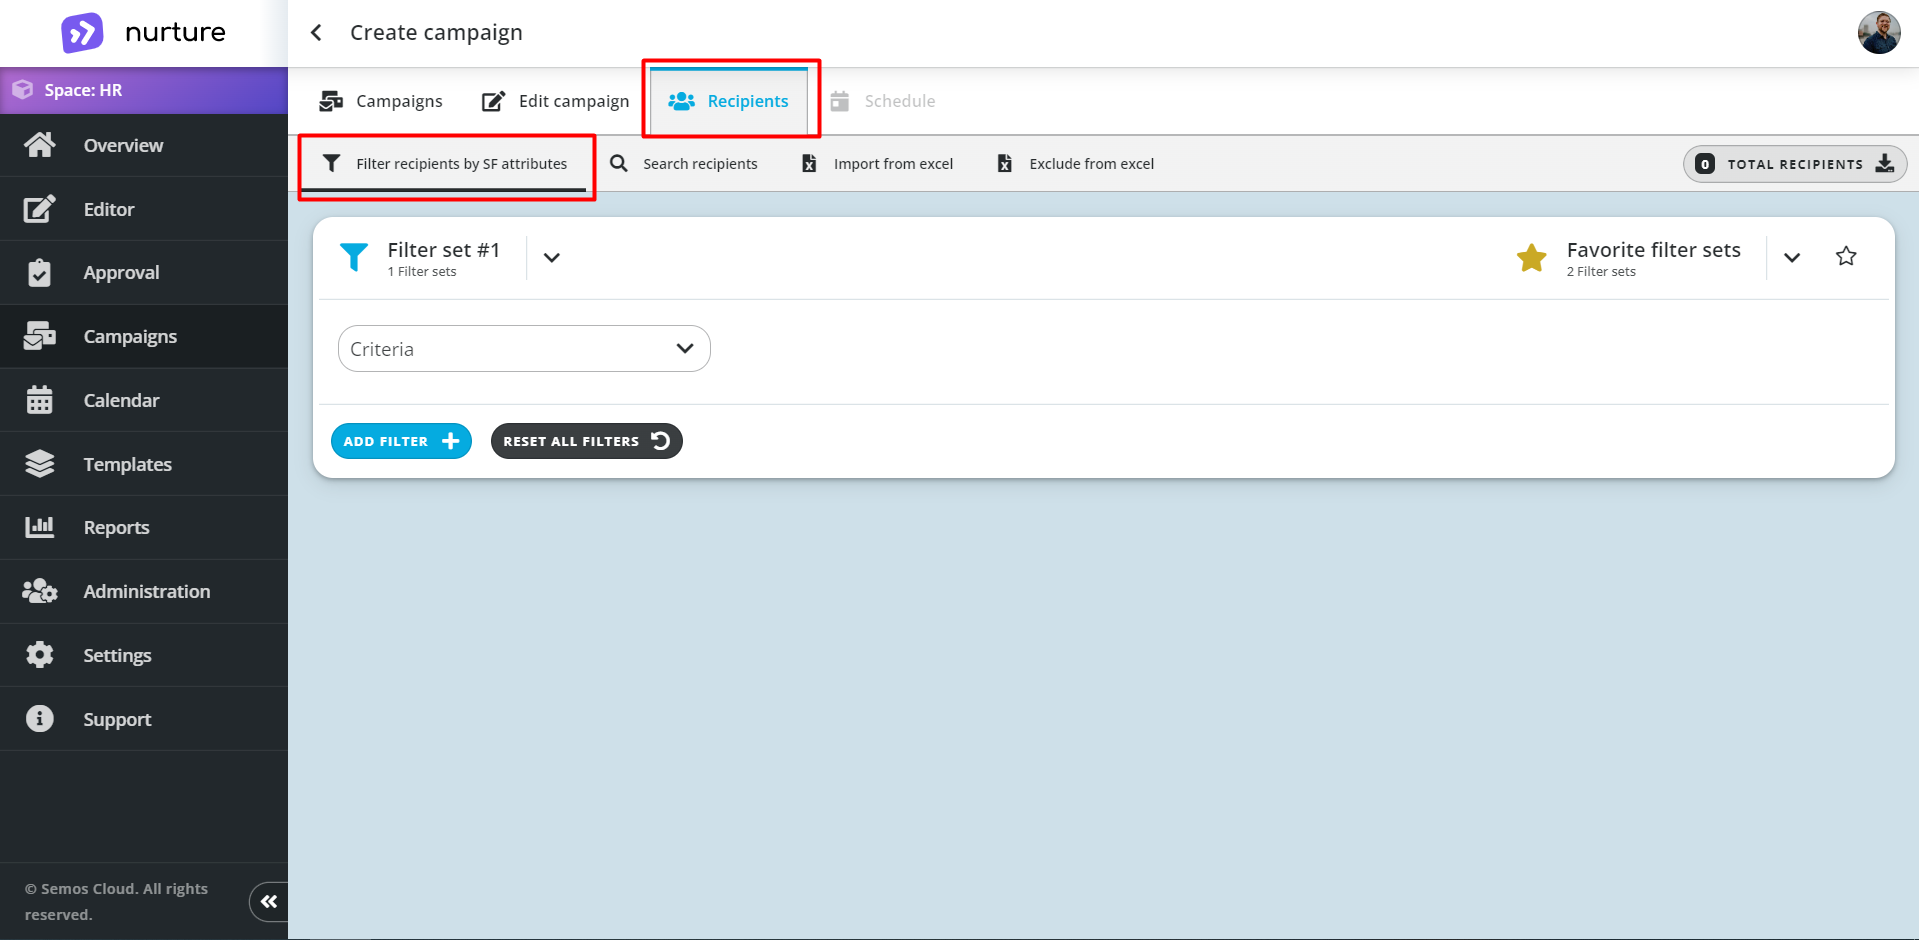
Image: Nurture Admin center – Campaigns – Create campaign - Recipients

Image: Nurture Admin center – Campaigns – Create campaign - Recipients
You have to pick a criteria, operator and then search for what you need.
Criteria is the foundation of the filter sets. Operator is whether we want the criteria to be included or not, and Search is what we want to include or exclude.
Let’s say that you want to send a campaign to all US employees. To do this you will pick Country as a Criteria, then in as Operator, and in Search, you will pick the United States.
Search recipients
Search recipients is used for manually adding recipients to the campaign. You can add recipients by typing in their name, username, or e-mail and then click on the green plus button.
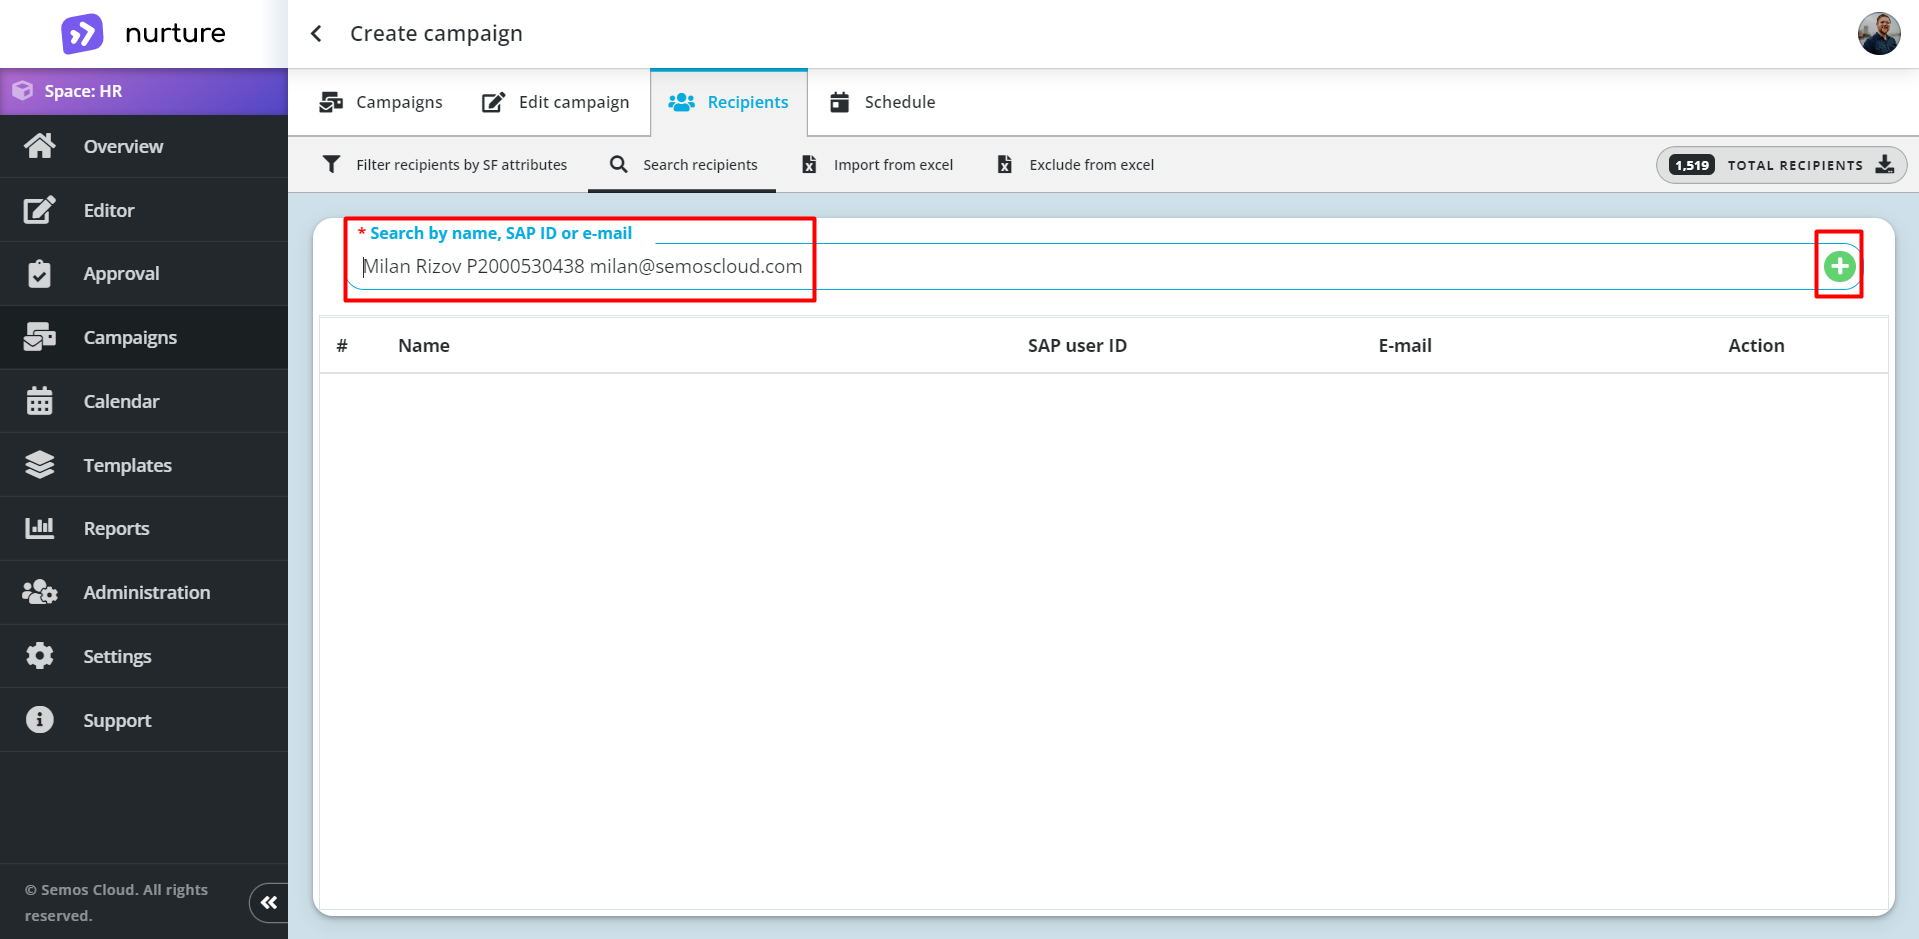
Image: Nurture Admin center – Campaigns – Create campaign - Recipients
After clicking on the “plus” button, the recipient should appear in the table below and you should also get a pop-up message.

Image: Nurture Admin center – Campaigns – Create campaign - Recipients
You can also delete these recipients by clicking on the red “remove” button.
You can also add recipients via Excel files.
Schedule the campaign
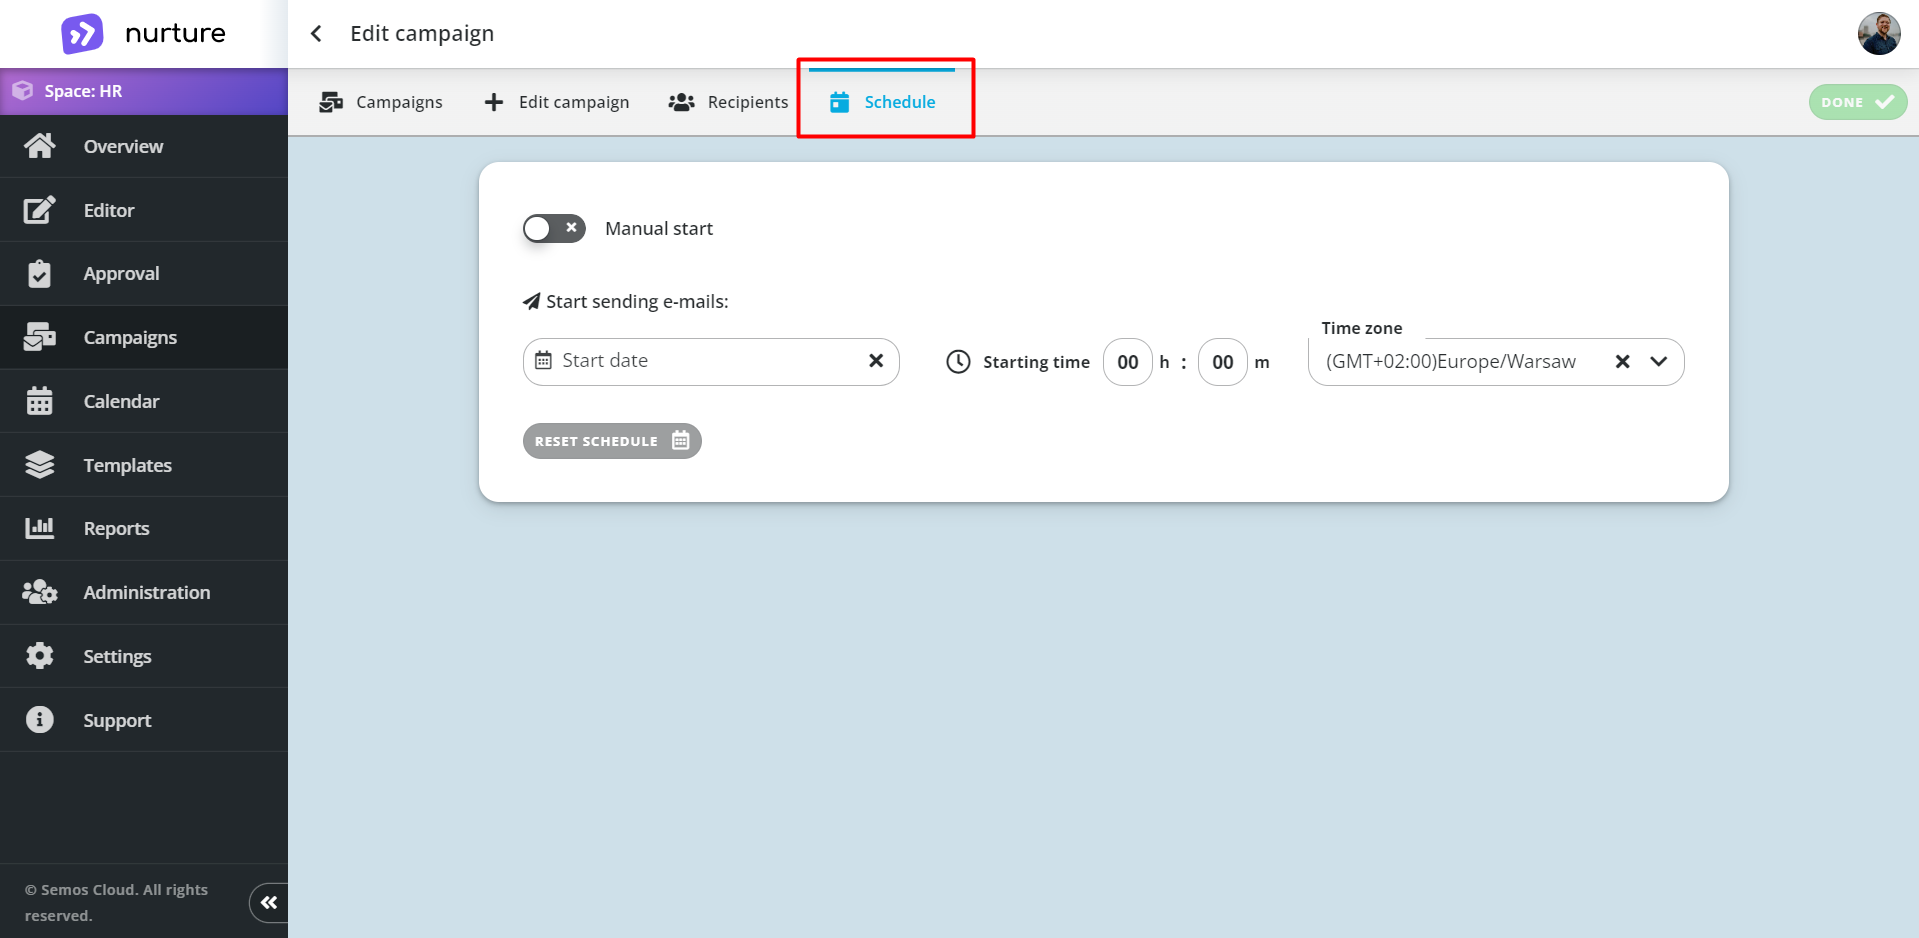
Image: Nurture Admin center - Campaigns - Create campaign - Schedule
The schedule subtab allows you to create a start date for the campaign or to send it immediately.
To create a schedule, you need to click on the Start date field (a dropdown calendar will appear). On the dropdown calendar, click on a date (for when you want your campaign to be sent)
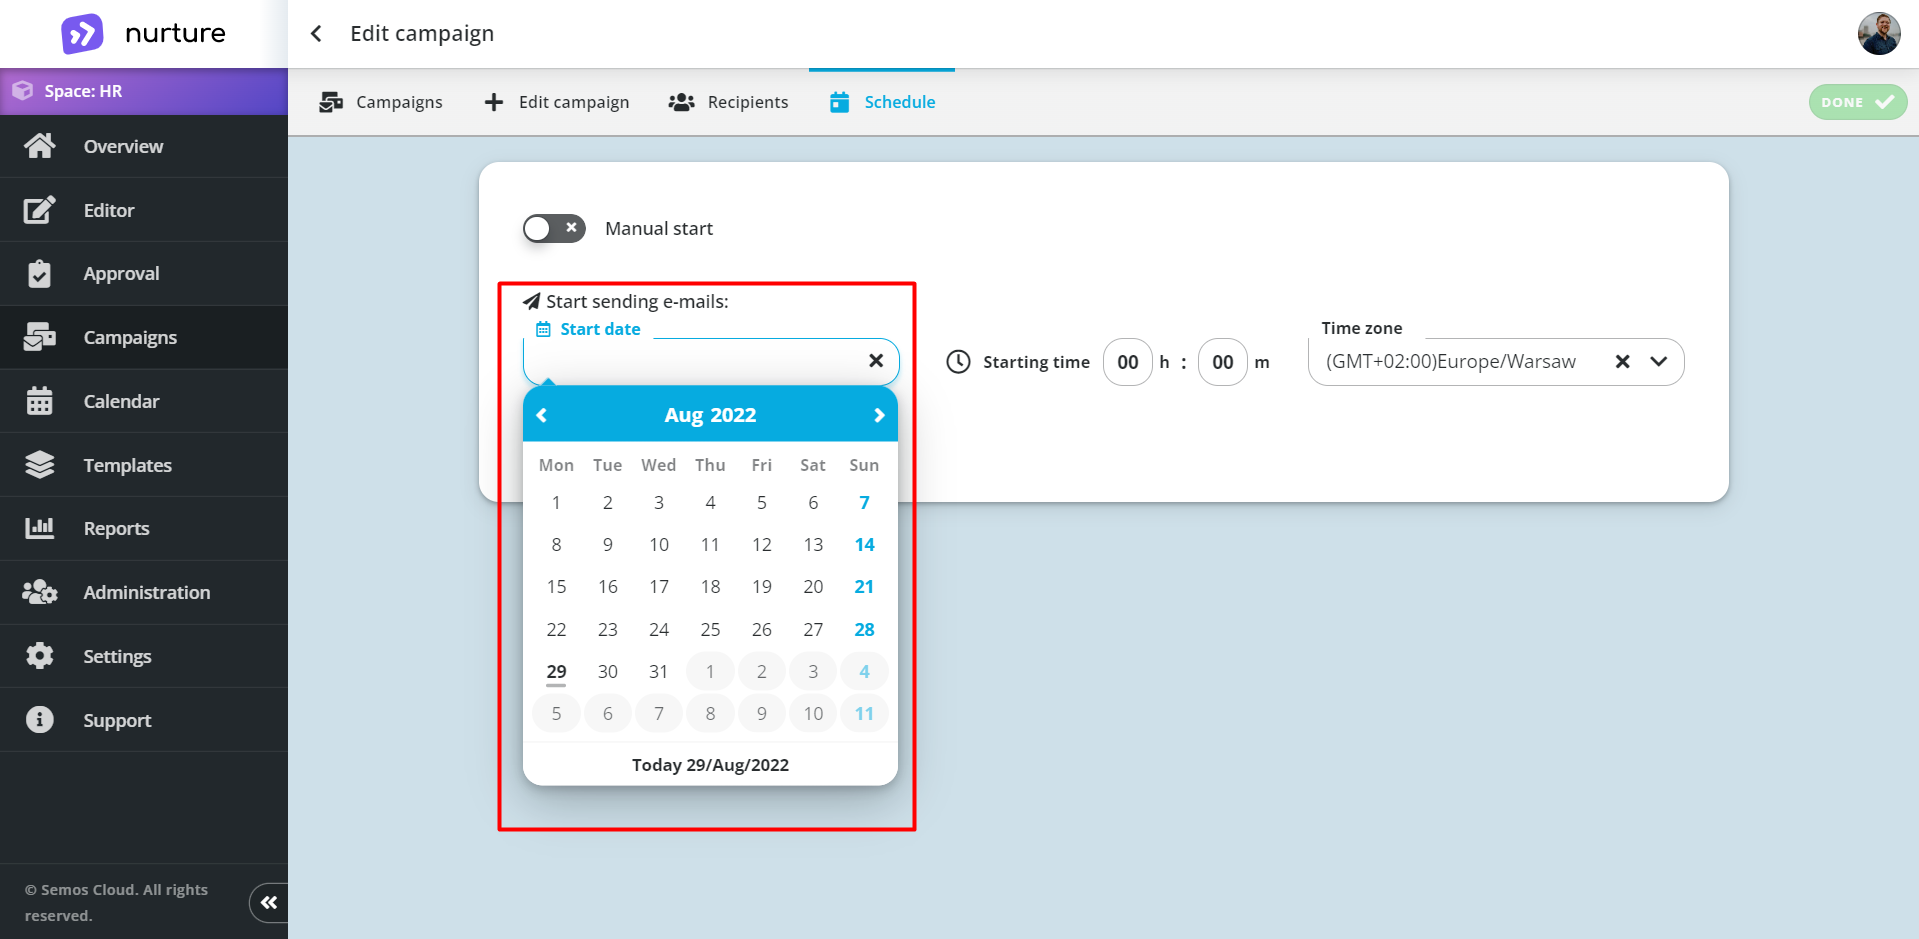 Image: Nurture Admin center - Campaigns - Create campaign - Schedule
Then click on hour & minutes icons and select a time
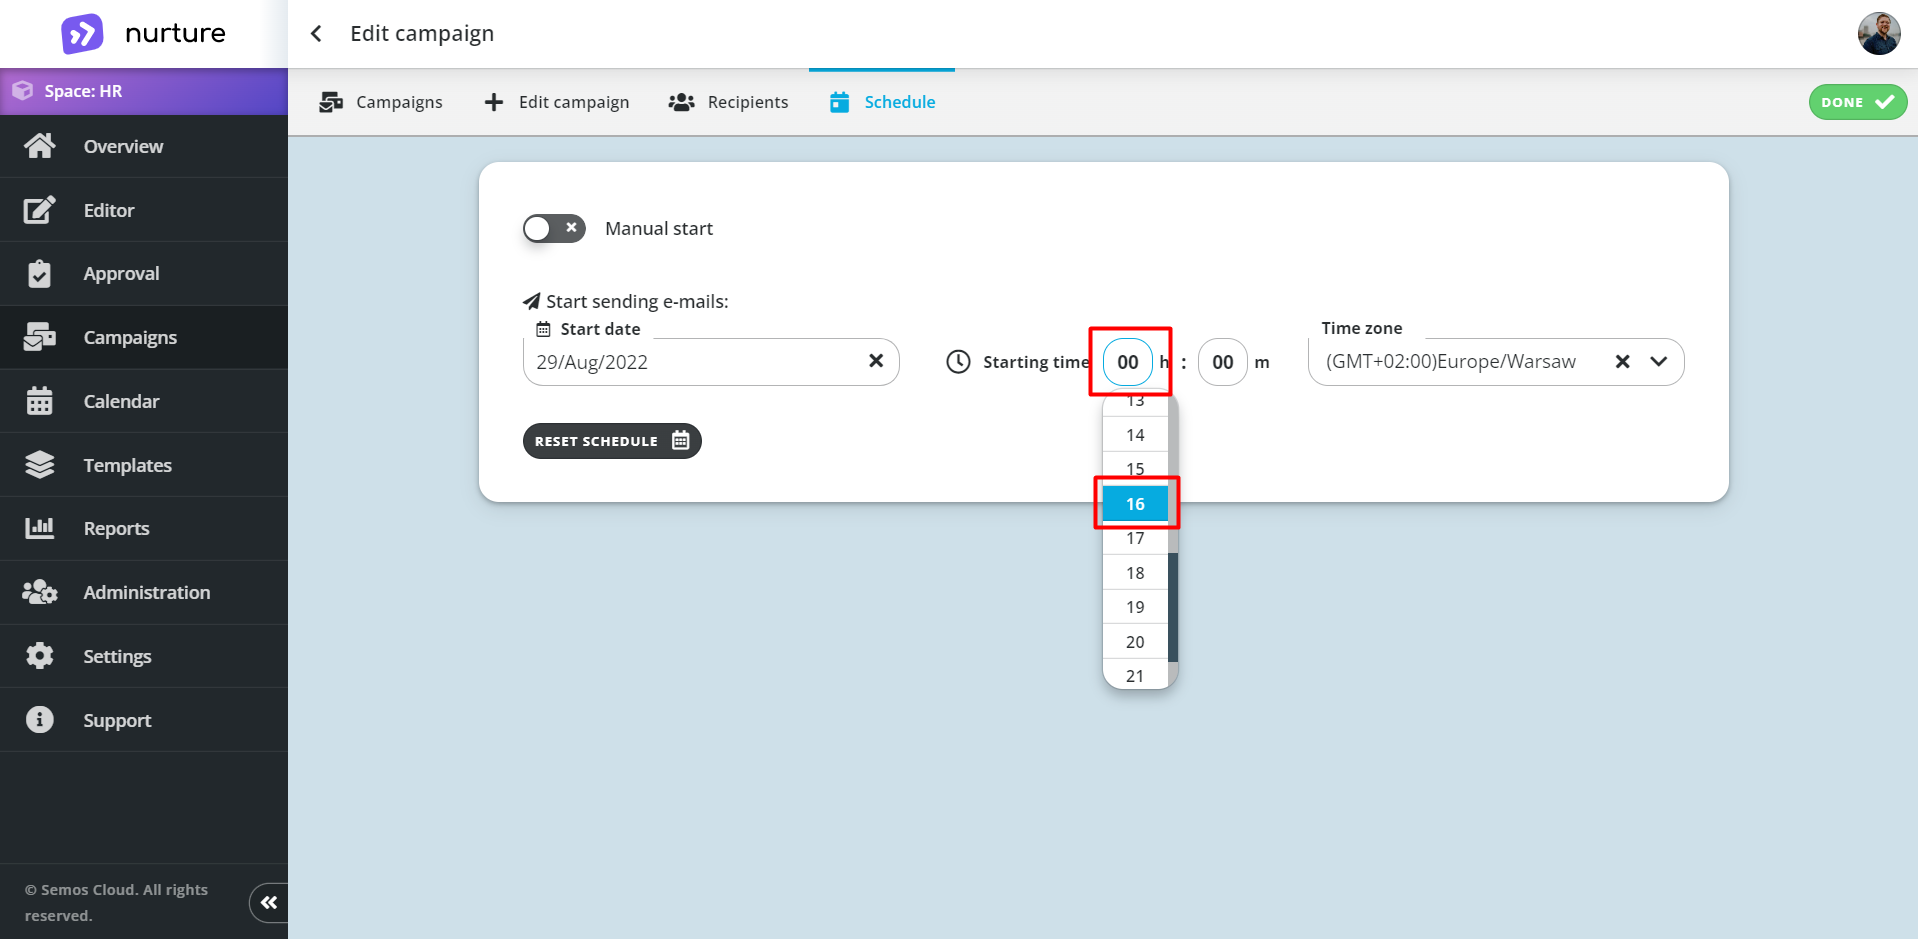
Image: Nurture Admin center - Campaigns - Create campaign - Schedule
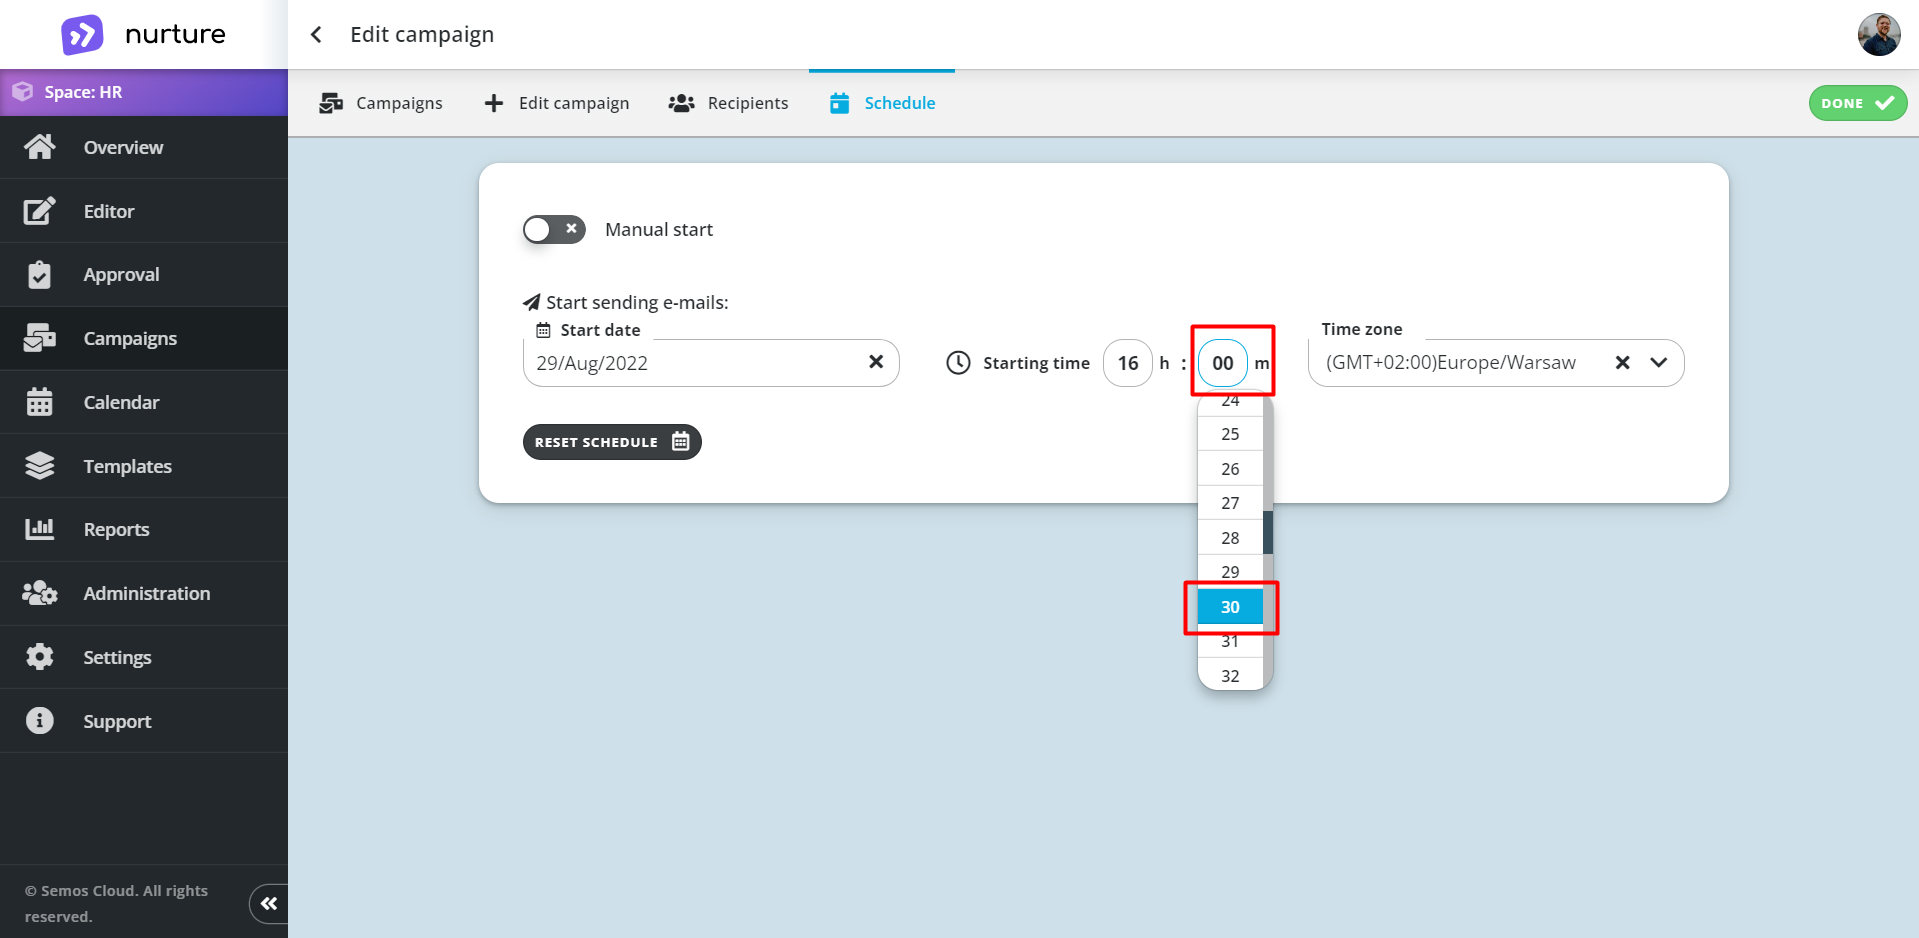
Image: Nurture Admin center - Campaigns - Create campaign - Schedule
Then you can select a different time zone if you want by clicking on the Time zone input field
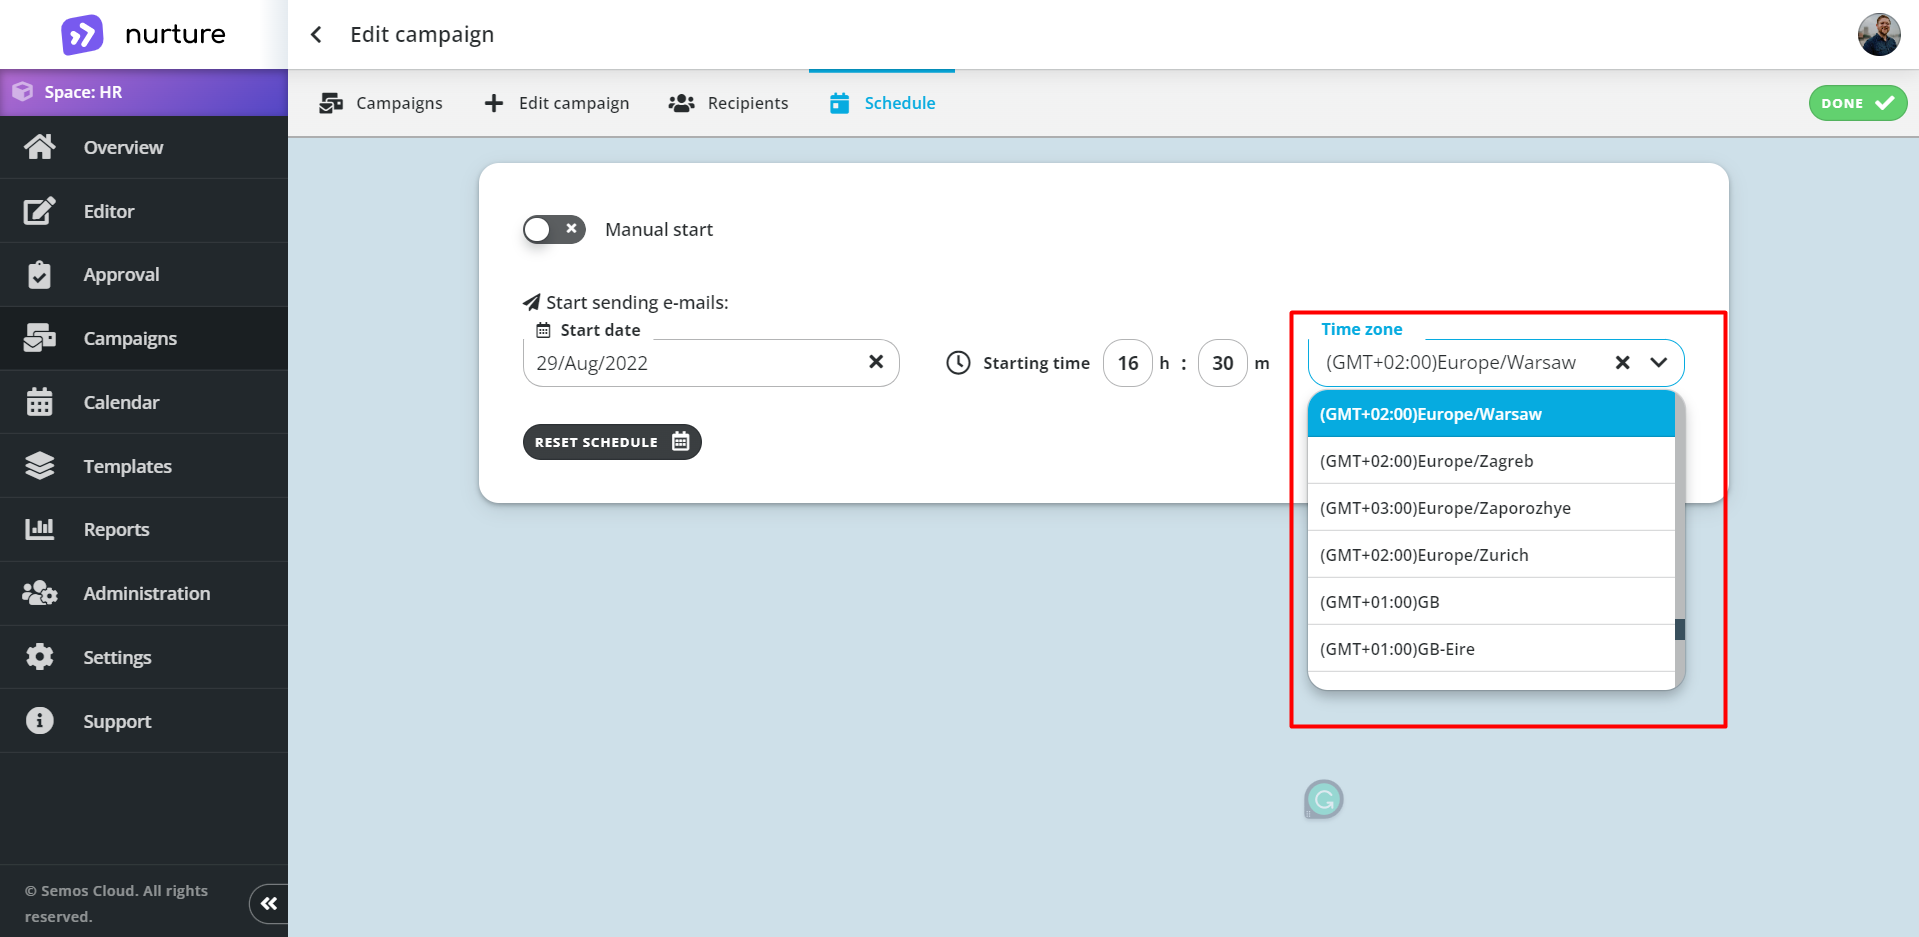
Image: Nurture Admin center - Campaigns - Create campaign - Schedule
After setting-up, your schedule, click on the "done" button on the top right corner and your campaign is ready.
Alternatively, you can immediately send your campaign by clicking on the Manual start switch (to turn it on) and then clicking on the "send immediately" button on the top right corner.
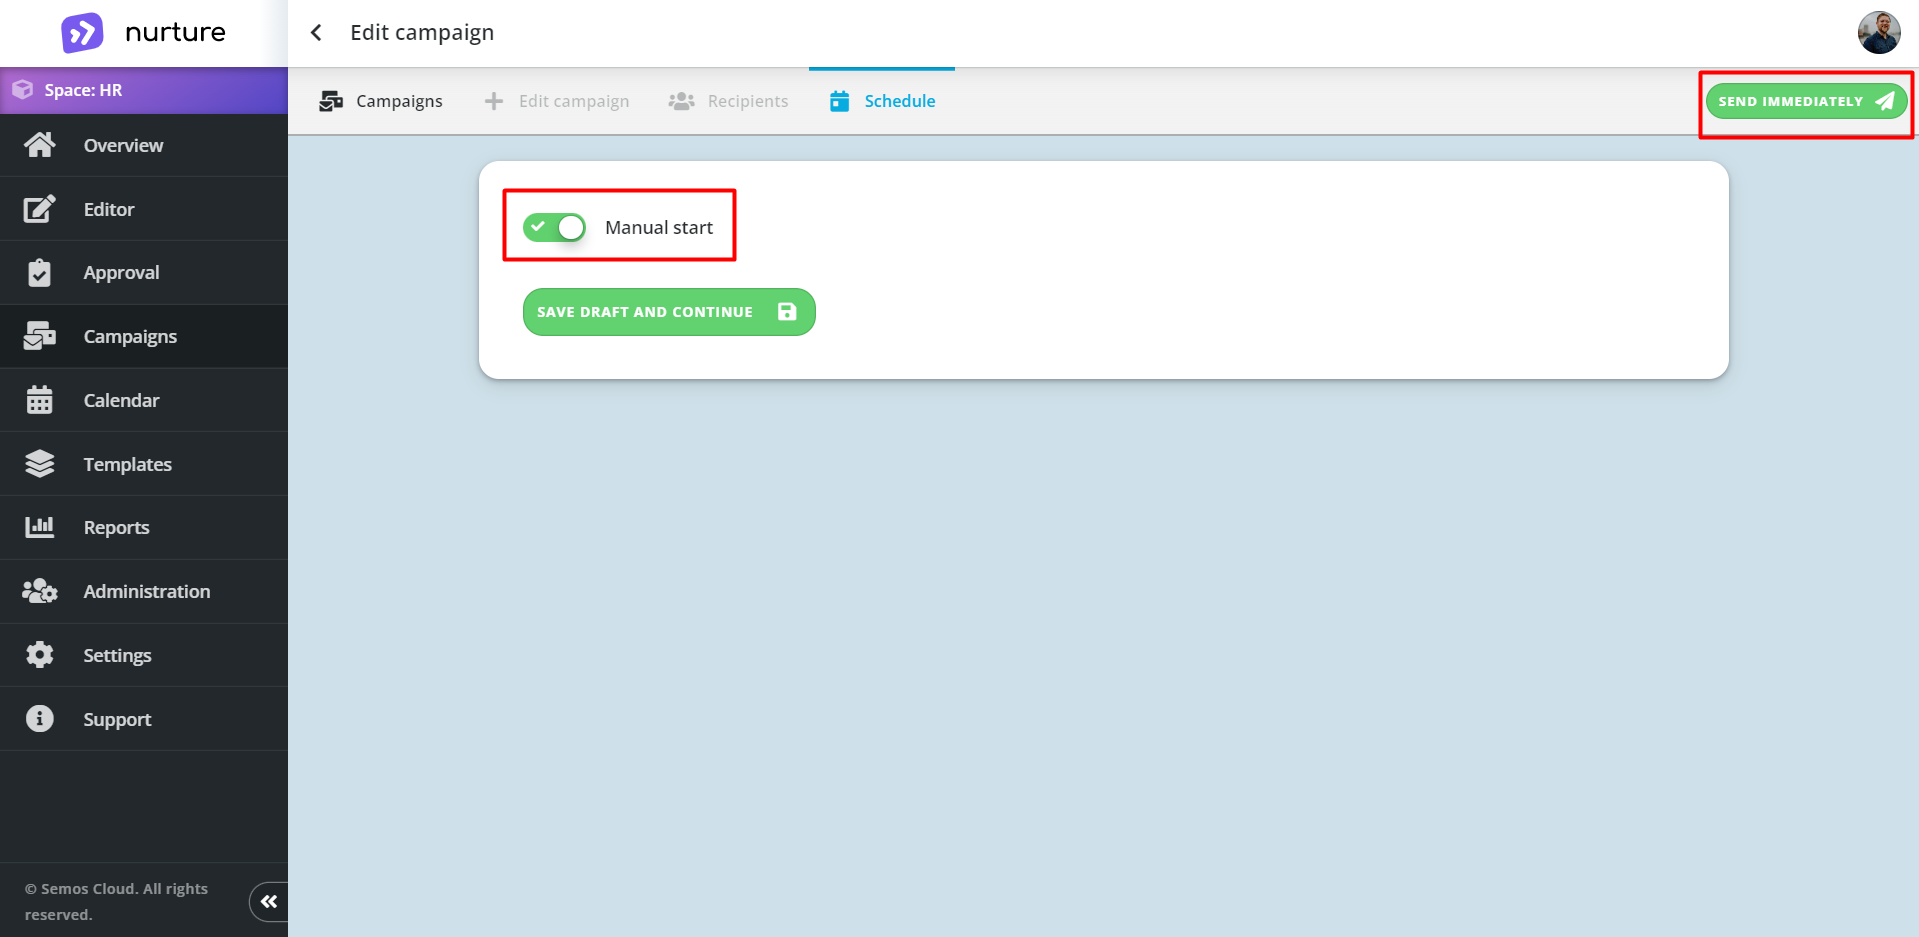
Image: Nurture Admin center - Campaigns - Create campaign - Schedule
If this article left your questions unanswered, please submit a Support Form, and we can clarify this topic.