.png?height=120&name=MicrosoftTeams-image%20(6).png)
This article will cover the Performance Intelligence feature, powered by AI, which helps users generate high-quality feedback based on the recipient's job title and skills.
This AI-driven tool supports users who may find it difficult to write feedback or need inspiration, ensuring the messages are unbiased and well-expressed.

Image: Performance Intelligence Program – Social Feed Home Page
On the social feed page on the top left corner a welcoming message will be displayed with the user’s name and picture including the count of Received and Sent feedback for this particular type of program.
In the top right corner, there is a slider with three different options:
- AI Suggestions will display up to 5 slides, with the type of slide indicated in the top-left corner. The suggestions are as follows:
- From Your Team: Colleagues under your manager, excluding those you have given feedback to in the last month.

Image: Performance Intelligence - AI Suggestion > From Your Team - Your Manager: Will show your manager only if you haven’t sent any feedback to them in the last month.

Image: Performance Intelligence - AI Suggestion > Your Manager - If You're a Manager: It will list your direct reports, excluding those to whom you have sent feedback in the last month.

Image: Performance Intelligence - AI Suggestion > Direct Report
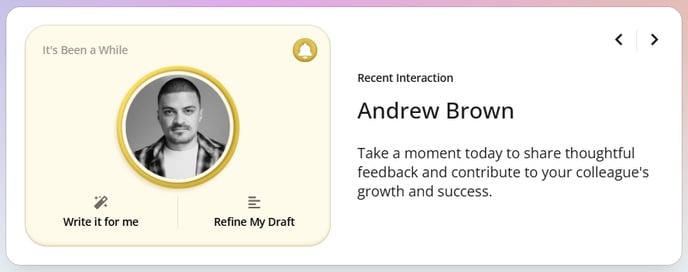 Image: Performance Intelligence - AI Suggestion > Recent Interaction
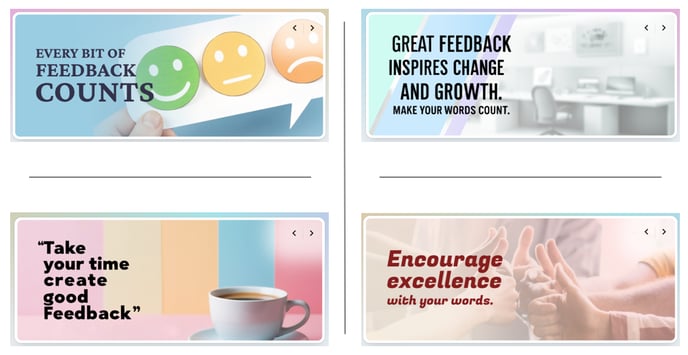
3. Quote slider – There are 6 predefined quotes and the user will see a different one each time they refresh the page.
Create Feedback - Select Your Writing Flow
Below the user and the slides, in the center of the social wall, there is an option for users to choose between writing a feedback with the help of AI or refining the existing feedback based on a feedback message.

Image: Performance Intelligence - Create Feedback Modal
Write it for me
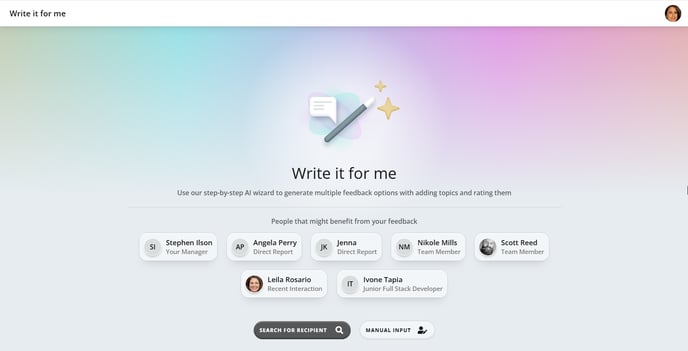
Image: Performance Intelligence - Write it for me
In this section, suggested recipients will be displayed based on:
- Your Team
- Your Manager
- If the logged-in user is a manager
- Recent Interactions
There are two options for creating feedback: Search for Recipient and Manual Input.
-
Search for Recipient: This option follows the familiar workflow, allowing you to search for users in the database based on your criteria and send feedback directly to the selected recipient.
-
Manual Input: Choose this option if you want to generate feedback without sending it through the tool. Instead of searching the database, you will provide the recipient's name and job title in a modal. You can then copy the generated feedback and send it externally.
Both, search recipient, or manual input will open a modal to add the recipient to whom this feedback should be send.

Image: Performance Intelligence - Search for Recipient
*Note: Only one recipient can be selected at a time. If you select a new recipient, it will replace the previous selection.

Image: Performance Intelligence - Manual Input
When the user selects 'Manual Input,' they are required to fill out the following fields:
- First Name (required)
- Last Name (required)
- Job Title (required)
- Department (required)
Once a user is selected, their details will appear in the top-right corner. This view is the same for both manual input and searched recipients. The displayed details will include:
- Profile Picture (or initials if no image is available)
- Full Name
- Job Title, Org Unit
- Role Label (e.g., Team Member, Manager, Direct Report, or no label if none of these apply)
An "X" at the top right of the modal allows you to remove the selected user and return to the previous selection screen.
If the recipient is selected manually, the image section will display the initials of their first and last name. Below their name, their job title will appear. Additionally, instead of the usual team member, manager, or direct report label, the label "External Contact" will be applied.

Image: Performance Intelligence - Manual Input > External Contact
When a recipient is selected, you will be taken to the next step, which includes two sections:
- Feedback Behaviors - Based on global company behaviors
- Job Areas - AI-generated topics based on the job title for the selected user.

Image: Performance Intelligence - Write it for me > Choose Behaviors & Job Areas
*Note: Company behaviors will appear only if enabled in the program configuration & the user must select at least one behavior or one job area theme to proceed.
When viewing the behavior info, a modal will open displaying its description and the behavior image defined in the admin settings.

Image: Performance Intelligence - Behavior Info
The next page is for selecting topics. Based on the selected themes, AI provides different topics. The sections are organized according to previous selections, whether from behaviors, job title, or custom topics.

Image: Performance Intelligence - Regenerate Topics
*Note: An option to regenerate topics is available if needed.
At the bottom of the page, there are three buttons:
- Go Back: Takes the user back to the previous page where themes are defined.
- Add Custom Topic: Opens a modal for users to add a custom topic if the desired one isn't available.

Image: Performance Intelligence - Add Custom Topic Modal - Add Selected Topics: Moves the user to the next page to rate the selected topics.
Rate Topics Page
The user must rate at least one topic to generate a personalized message, or add a custom topic for more specific feedback.

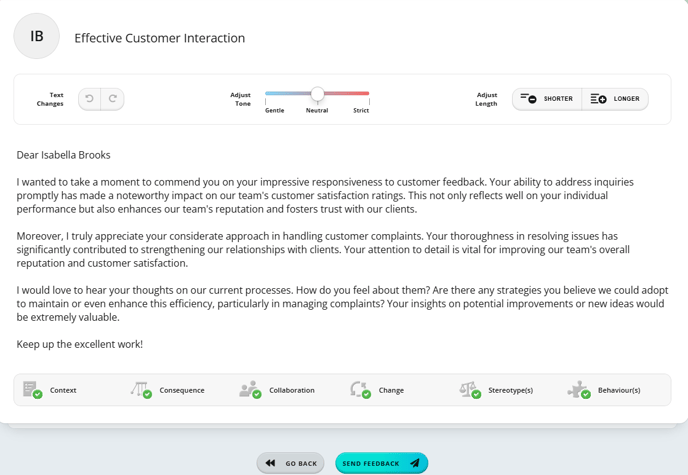
Adjust Tone - (default: Neutral): Choose from Gentle, Neutral, or Strict.
Adjust Length – By default, this will display the shorter version, with the option to expand to the longer version.
Text Changes: The "Undo" and "Redo" options apply once you start to enter your text manually, not to AI-generated content.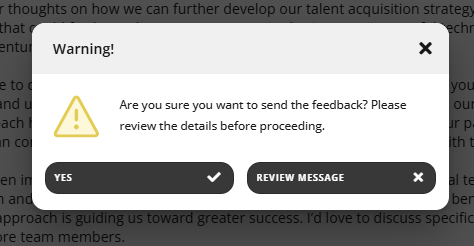
Refine my Draft
The first step in the "Refine My Draft" flow is to select the recipient and send the refined feedback, or manually input the recipient's details to create a draft message that will not be sent.

Image: Performance Intelligence - Refine my Draft

Image: Performance Intelligence - Refine my Draft
At the bottom of the page, there are two buttons available:
- Go Back: Returns the user to the previous page to select the feedback recipient.
- Refine My Draft: Takes the user to the next page, where the message will be enhanced with AI.
*Note: In this flow, providing context for the message is essential. Without context, AI cannot effectively refine the draft.
Adjust Tone - (default: Neutral): Choose from Gentle, Neutral, or Strict.
Adjust Length – Choose either a 'Shorter' or 'Longer' message.
Control Changes: 'Undo' and 'Redo' options. Once you start typing your message, you will be able to undo. This applies for the manual input, not when it's generated by AI.Sent/Received Feedback
The "Received" and "Sent Feedback" tabs are located on the left side of the page. Transactions are displayed below the selected tab, ordered from most recent to oldest.


Image: Performance Intelligence - Sent & Received Feedback
To view specific feedback, just select the desired entry from the list on the left side of the screen. The next page will show all relevant details, including the recipient, the sent feedback message, the date it was sent, as well as the highlighted keywords and selected topics.

Image: Performance Intelligence - Sent Feedback
This view enables an initial analysis of the feedback, providing the option to see whether the user has improved in a specific area or not.
The 'Show More' option offers a full overview of the sent feedback message.
*Note: If a feedback was previously saved as a draft, it will appear with a 'Saved Feedback' label.

Image: Performance Intelligence - Saved Feedback
The same logic applies to the 'Received' feedback tab. To view the feedback messages you’ve received, simply select the desired entry from the list on the left side of the screen, and the relevant details will be displayed as described above.

Image: Performance Intelligence - Received Feedback
If this article left your questions unanswered, please submit a Support Form, and we can clarify this topic.