This article explains how to create and setup spaces
Space is represents a virtual department or topic area, making it an important tool for creating well-tailored campaigns. Space allows for better brainstorming of ideas, better campaigns for each department, and it makes creating department-based campaigns much easier.
Login to Nurture -> Spaces
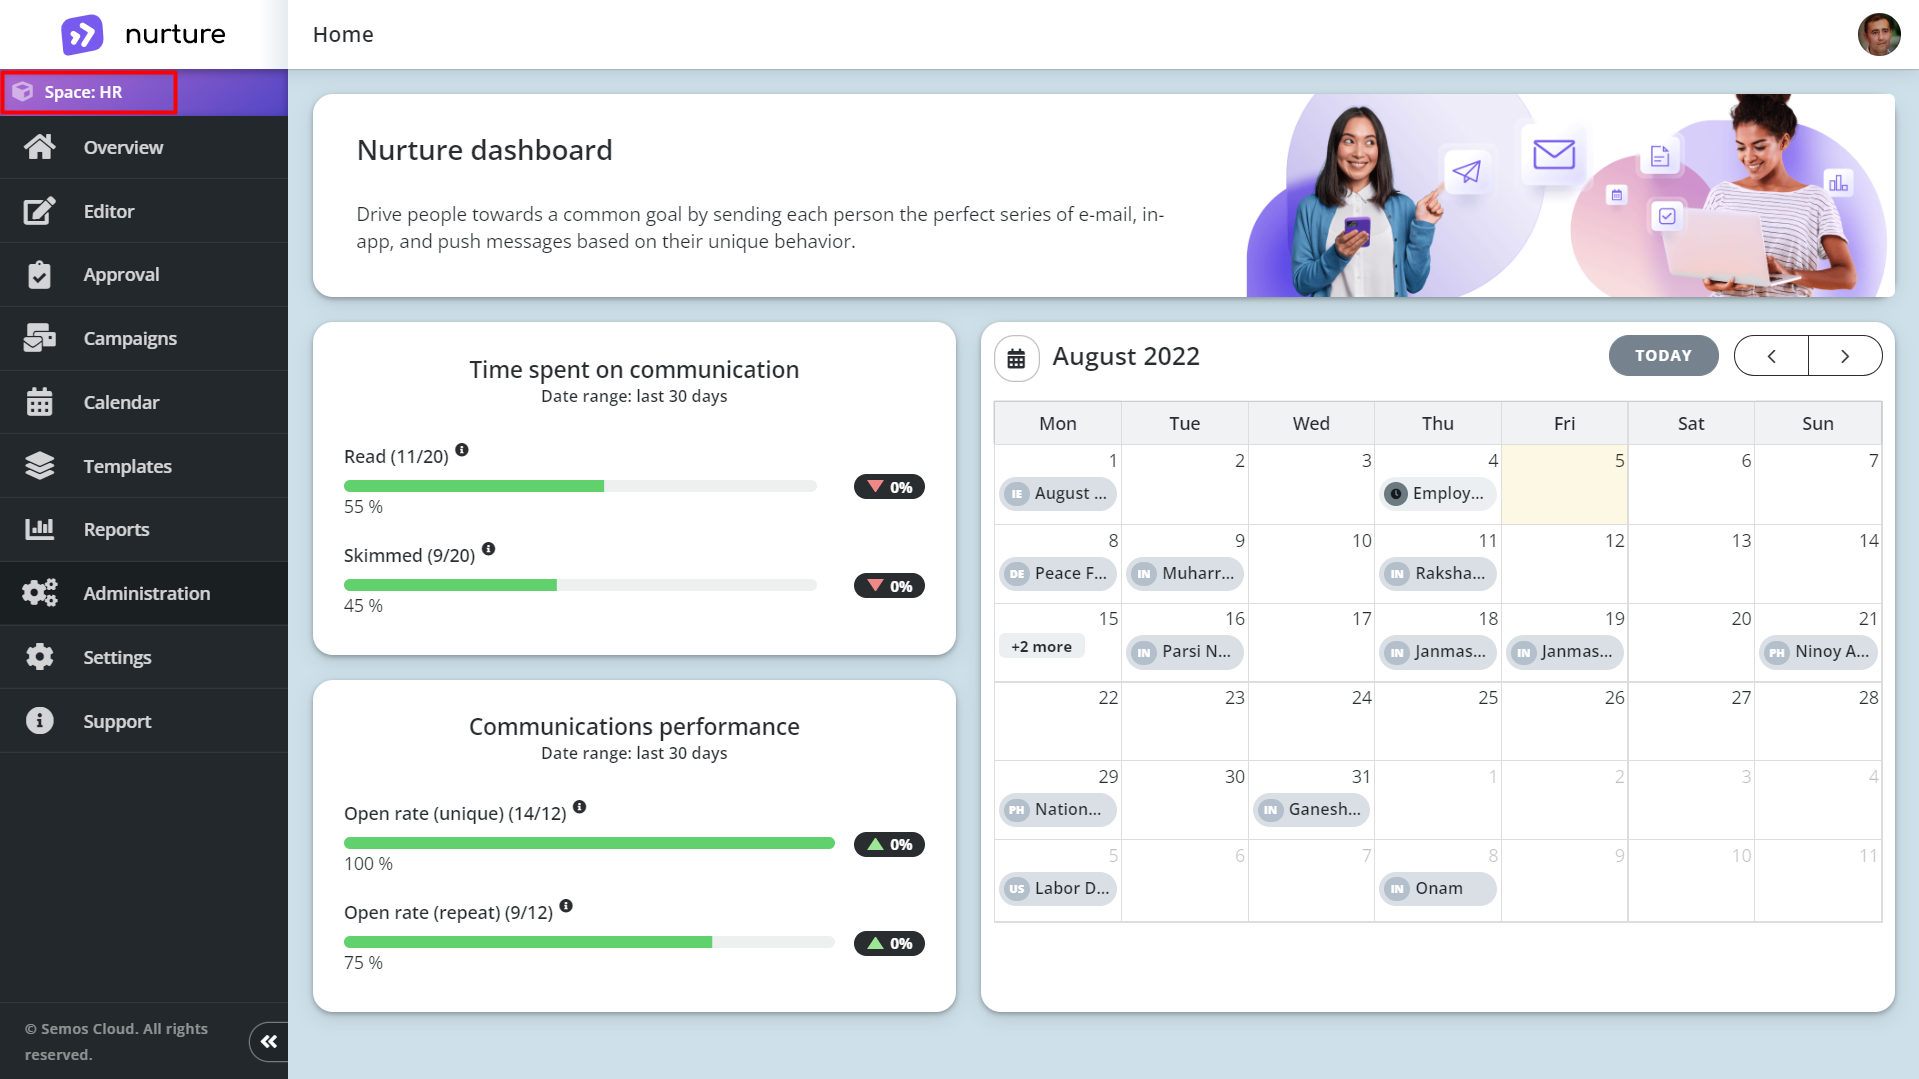
If you are not directly taken to the Spaces page, click on top of the side bar menu on the Space: <current space>.
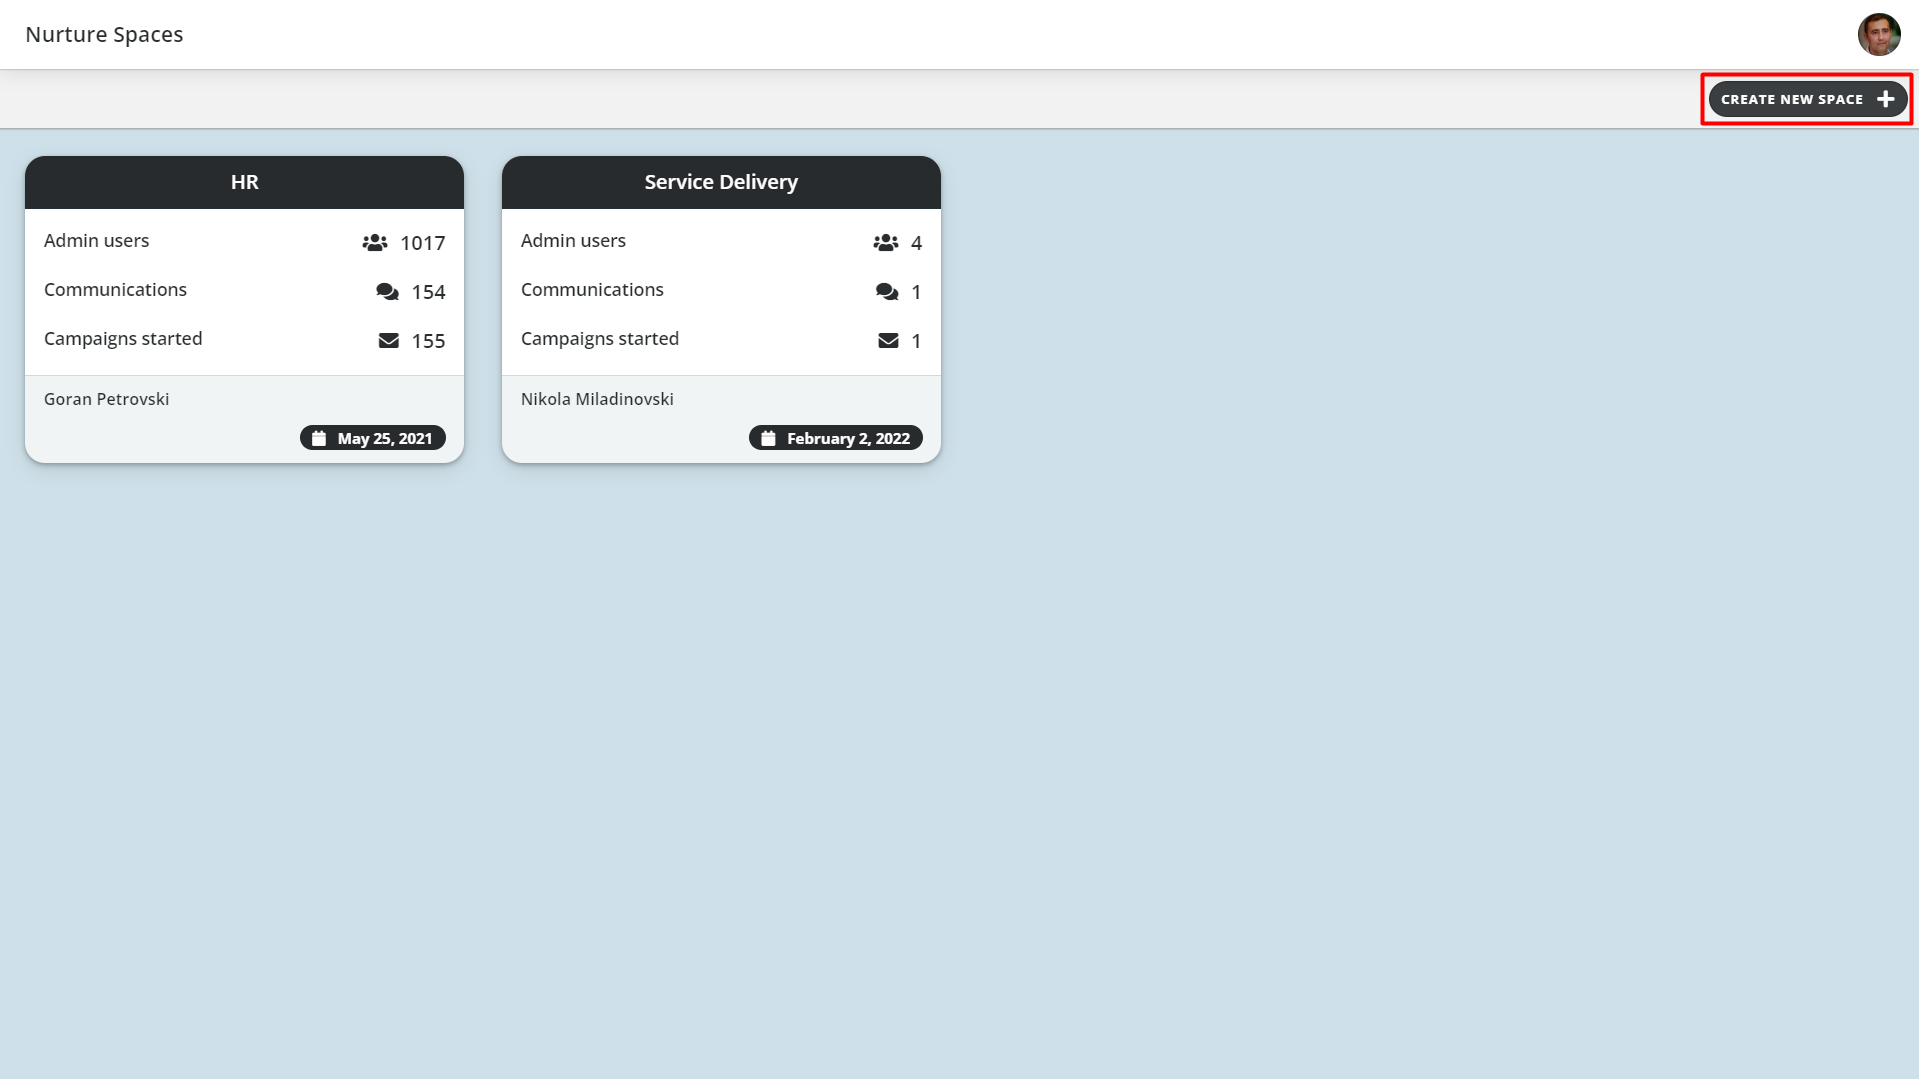
This will open the “space page” where you can start creating a new space by clicking on the Create new space button:
This button will open a pop-up window that allows you to create a new space.
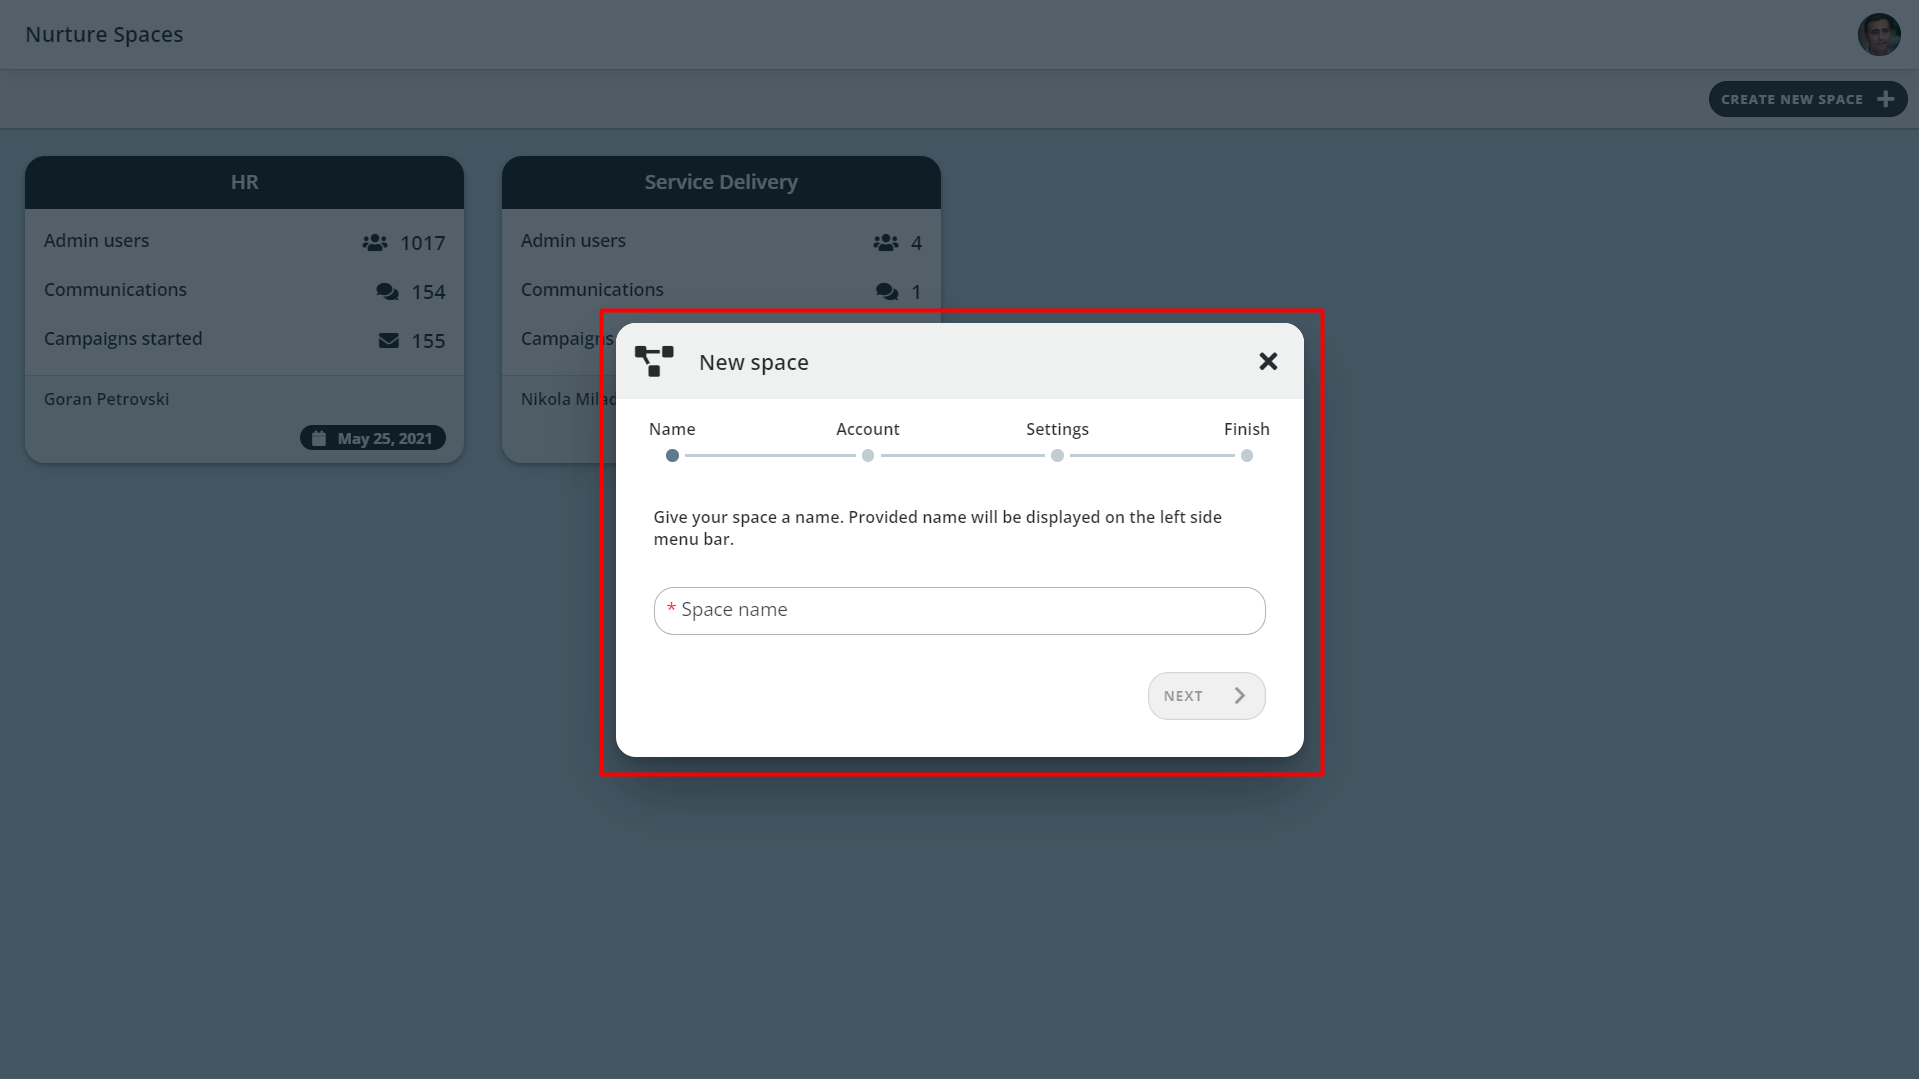 As you can notice, the pop-up window is a 4 steps wizard required for creating a new space.
- The first step is to write a space name (as shown in the picture above).
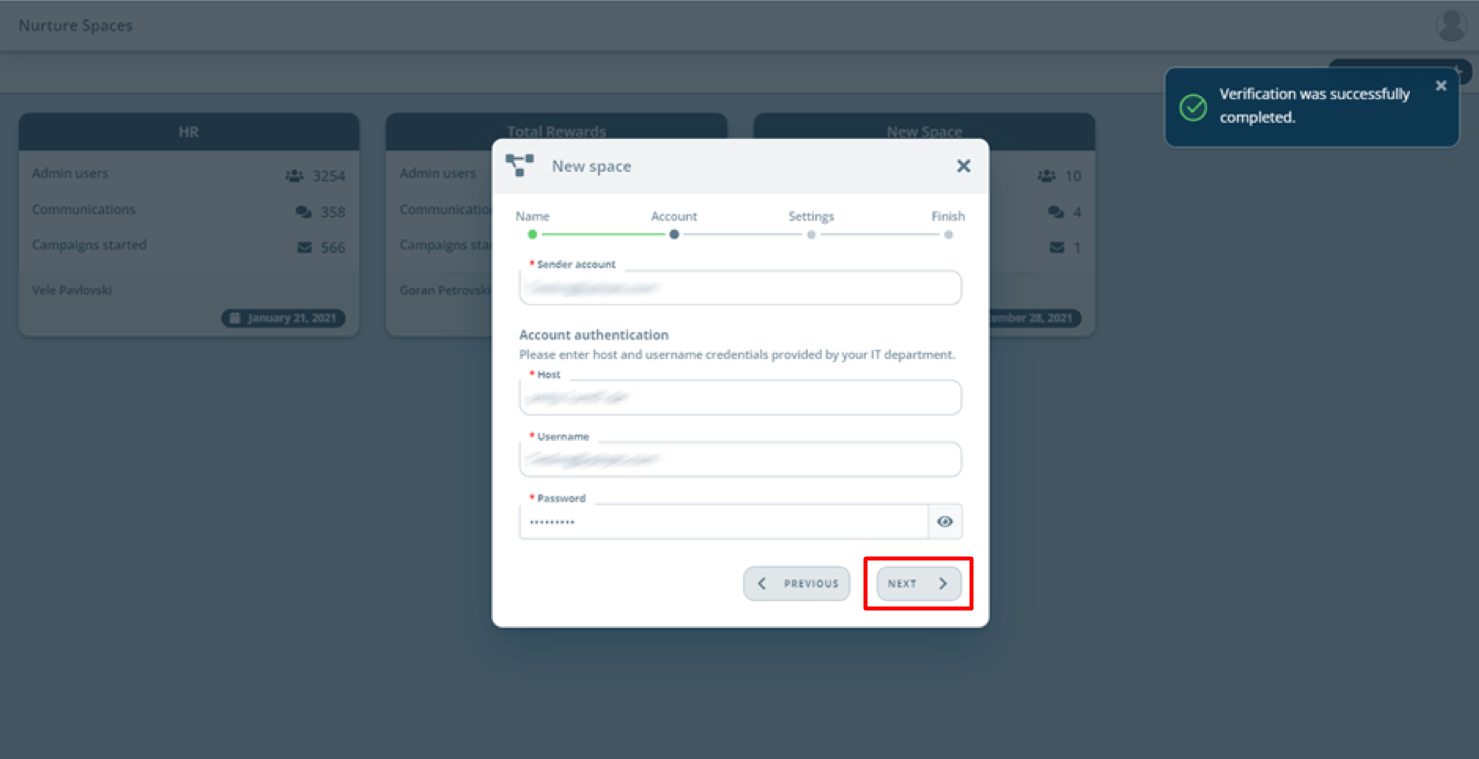
- The second step is to add a sender account, host, username, password, and after that click on verify e-mail.
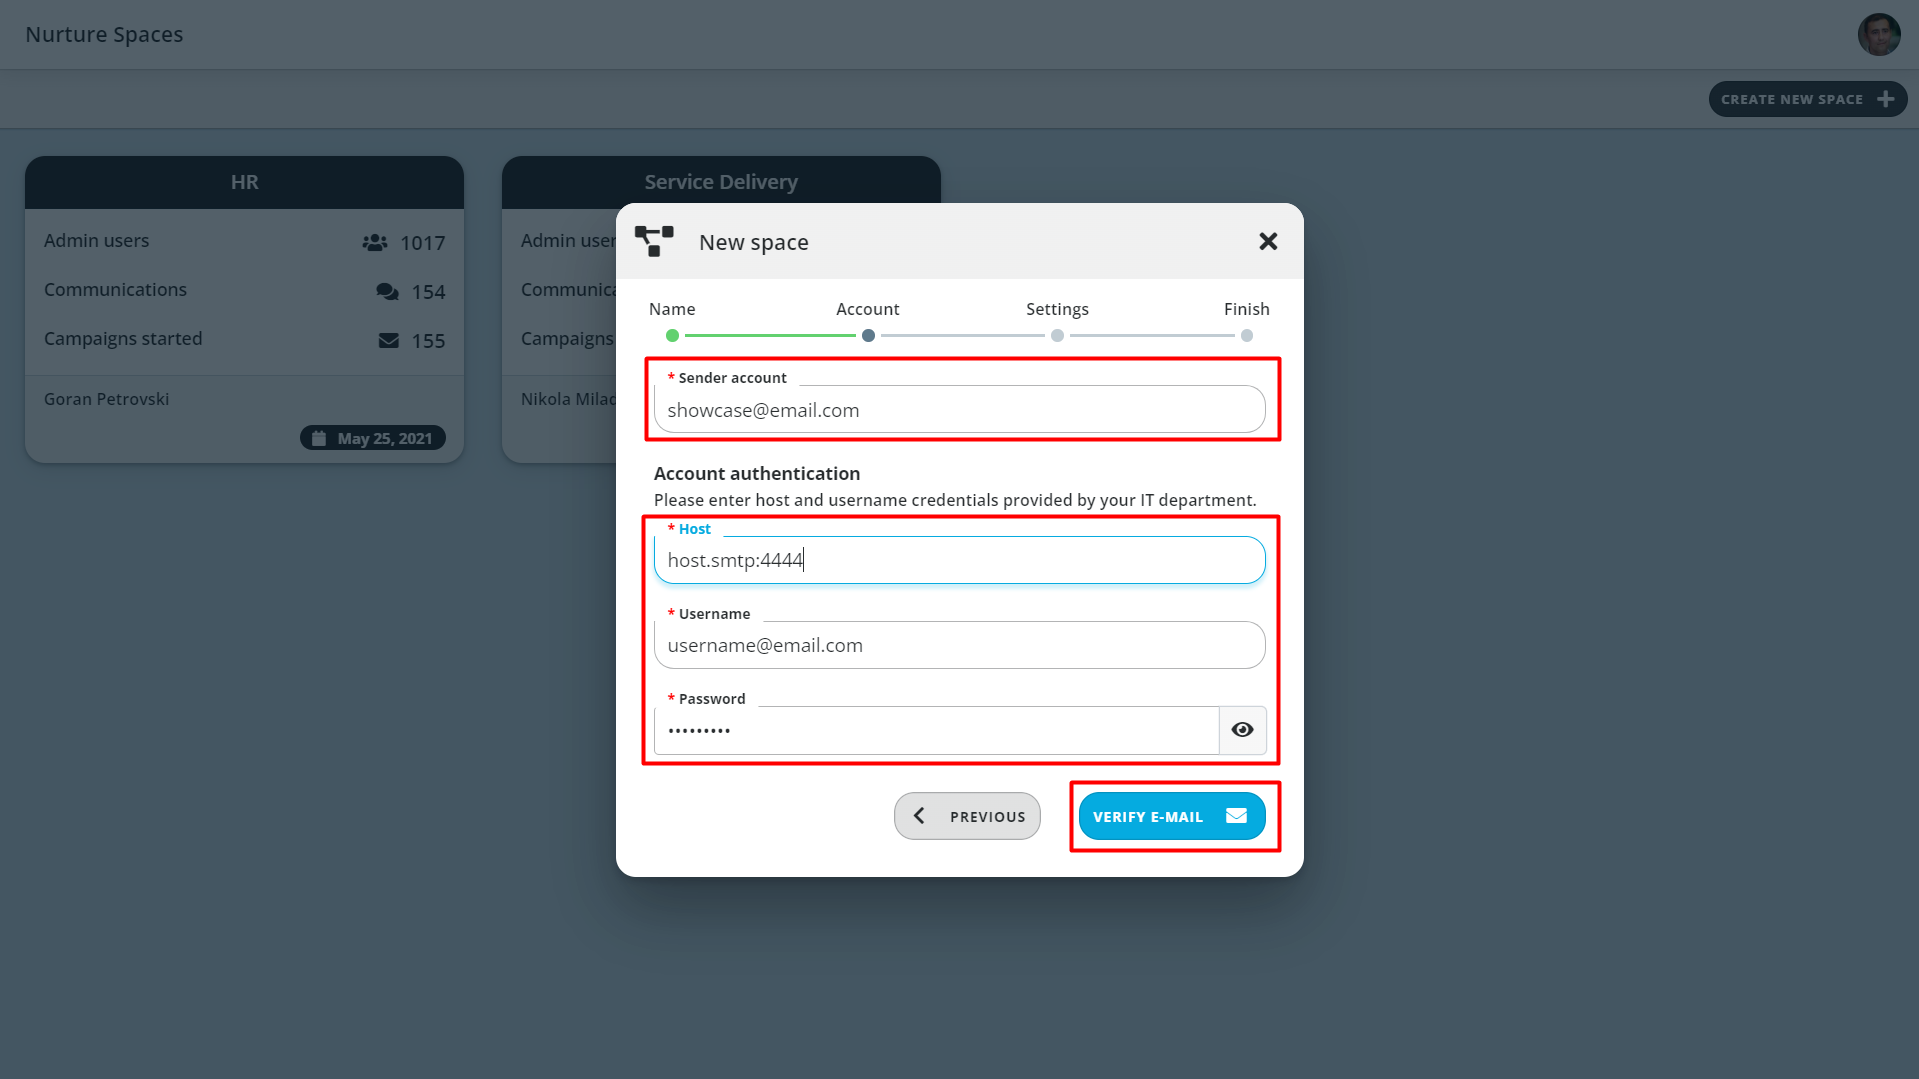
Note: sender account, host, username and password should be provided by your IT department.
- If your credentials are correctly entered, once you will click on verify email you will get a ' Verification was successfully completed' message. You can now click Next and proceed to the next step.
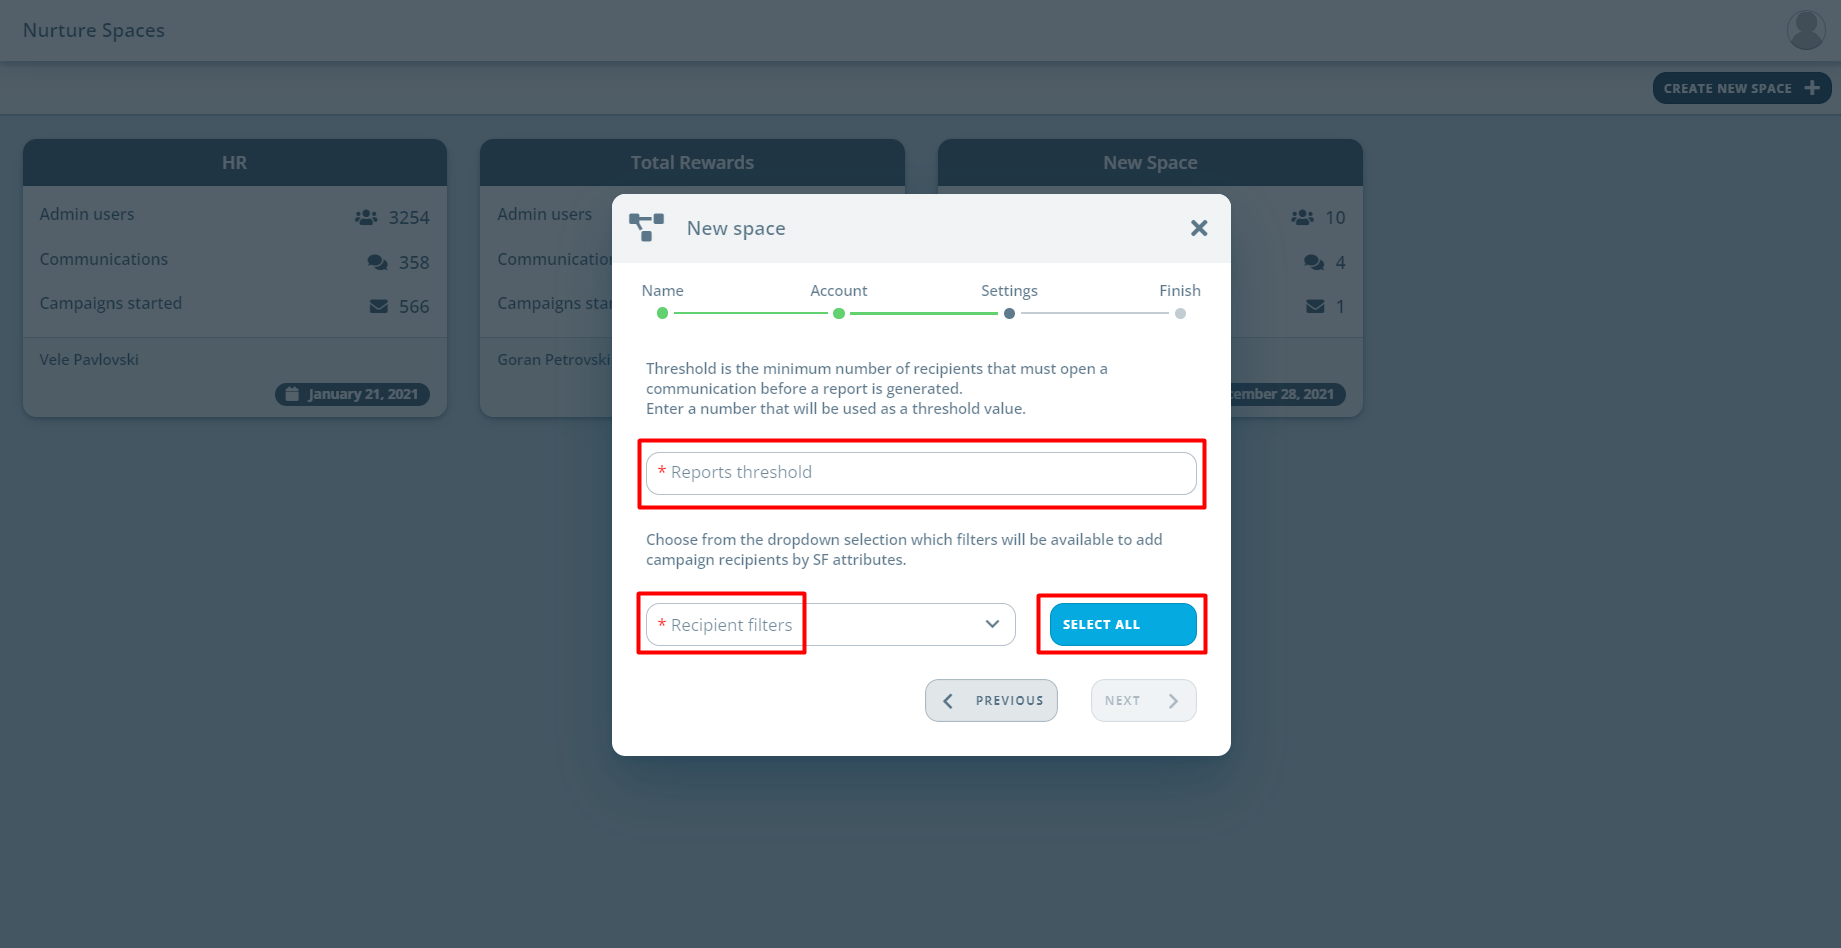
- The third step is to set the reports threshold and to choose which filters will be available for sending campaigns. If you want, you can click on select all button which will make all filters available.
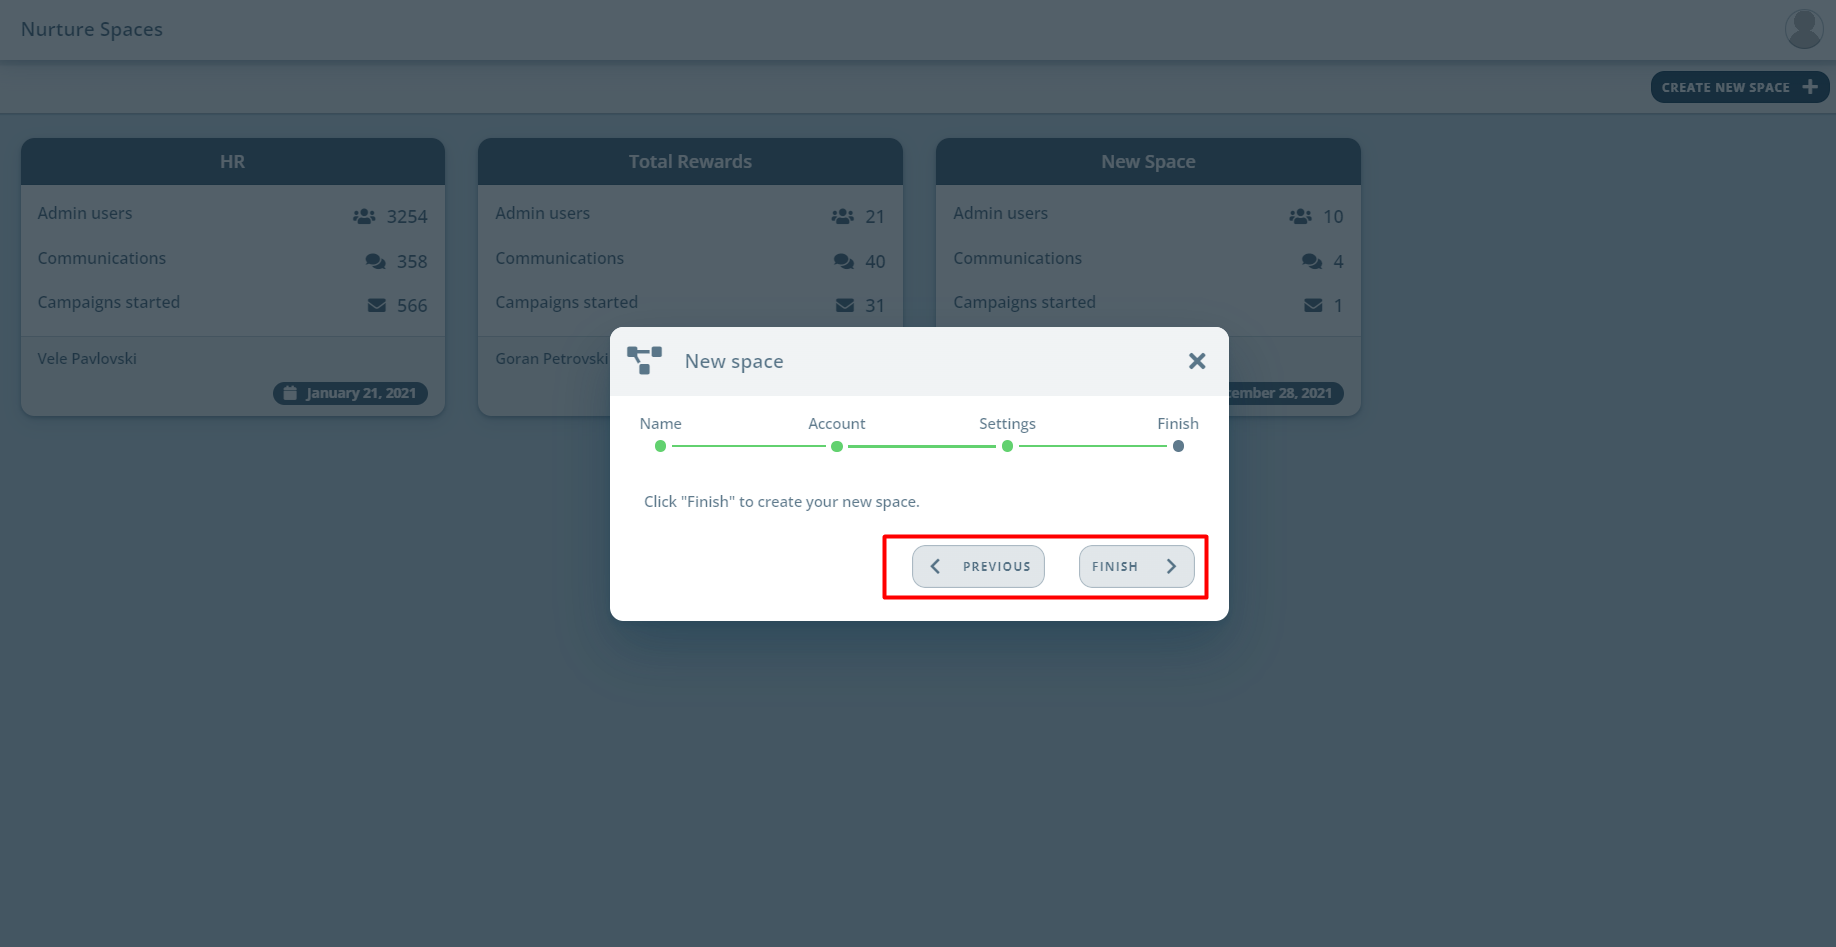
- The final step allows you to visit all previous steps (if you want to change something) or click finish to create the space.
- The space will be automatically picked and loaded.
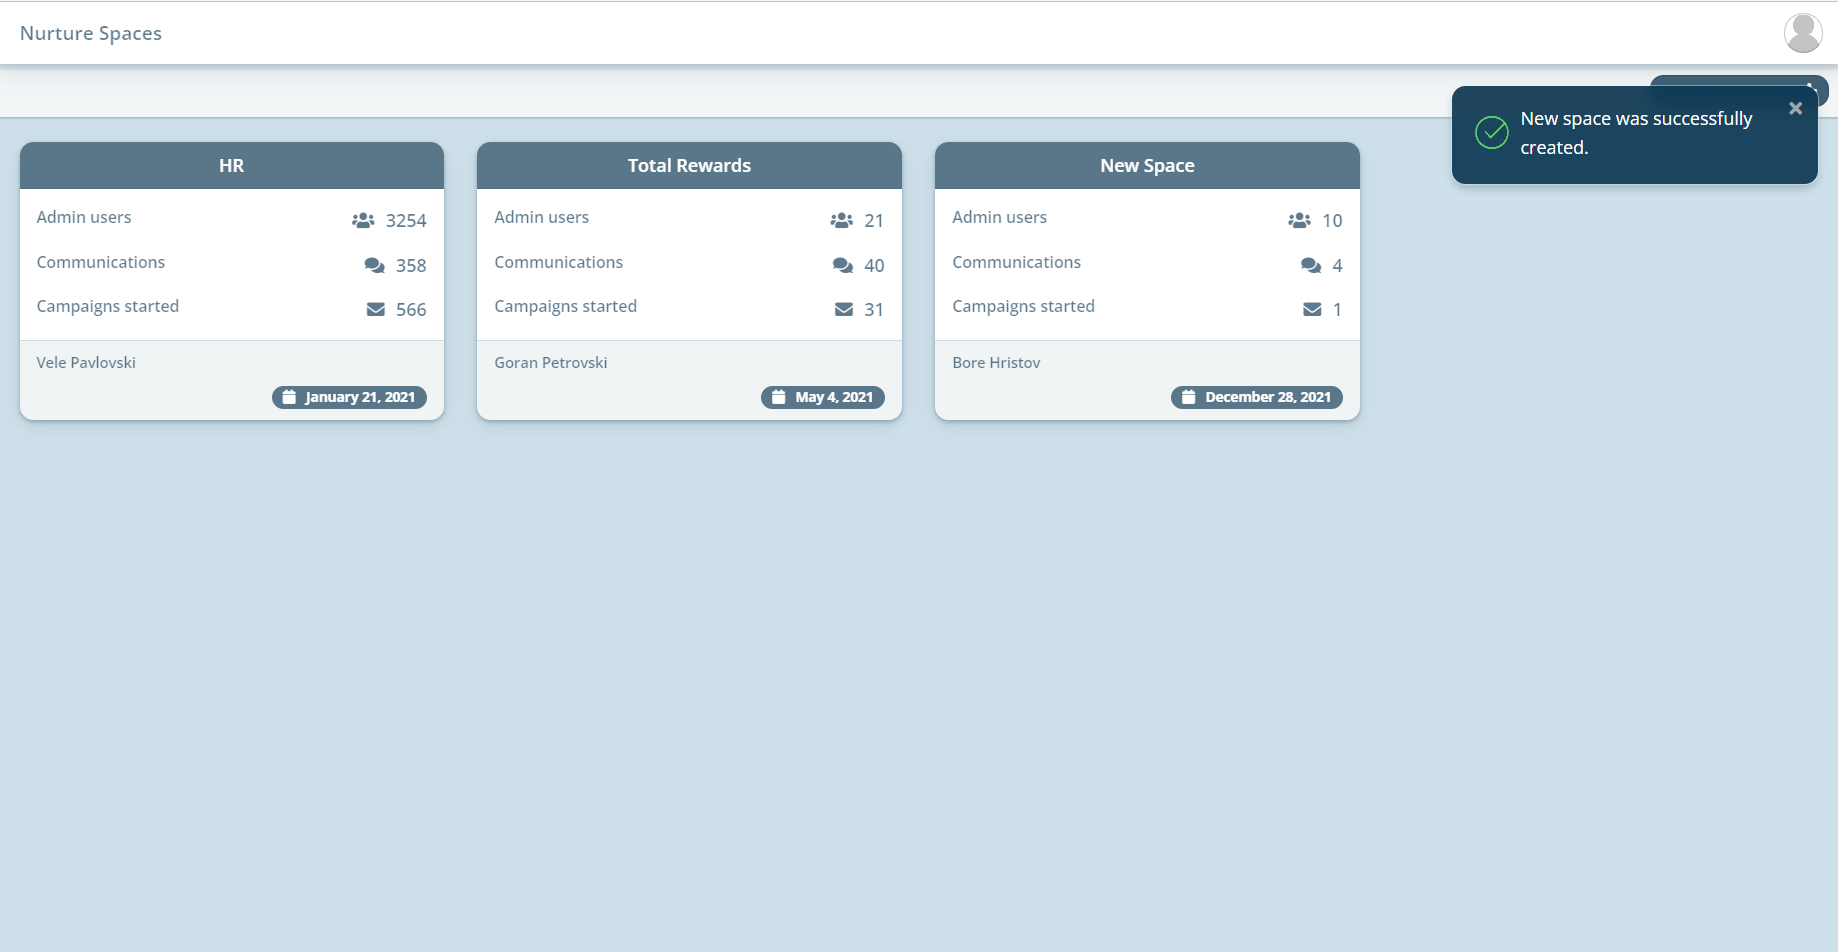
You will be automatically forwarded to the newly created space.
Note: Menu and theme in the new space will be set to the default style values. For any additional changes and features you might need, please contact your IT department.
If this article left your questions unanswered, please submit a Support Form, and we can clarify this topic.
.png?height=120&name=MicrosoftTeams-image%20(6).png)