.png?height=120&name=MicrosoftTeams-image%20(6).png)
Create communications for your colleagues using the web-based editor
Build stylish emails that fit your brand, and collaborate with your team using drag-and-drop communications and templates.
To access Editor, you should click on Editor on the left-side menu
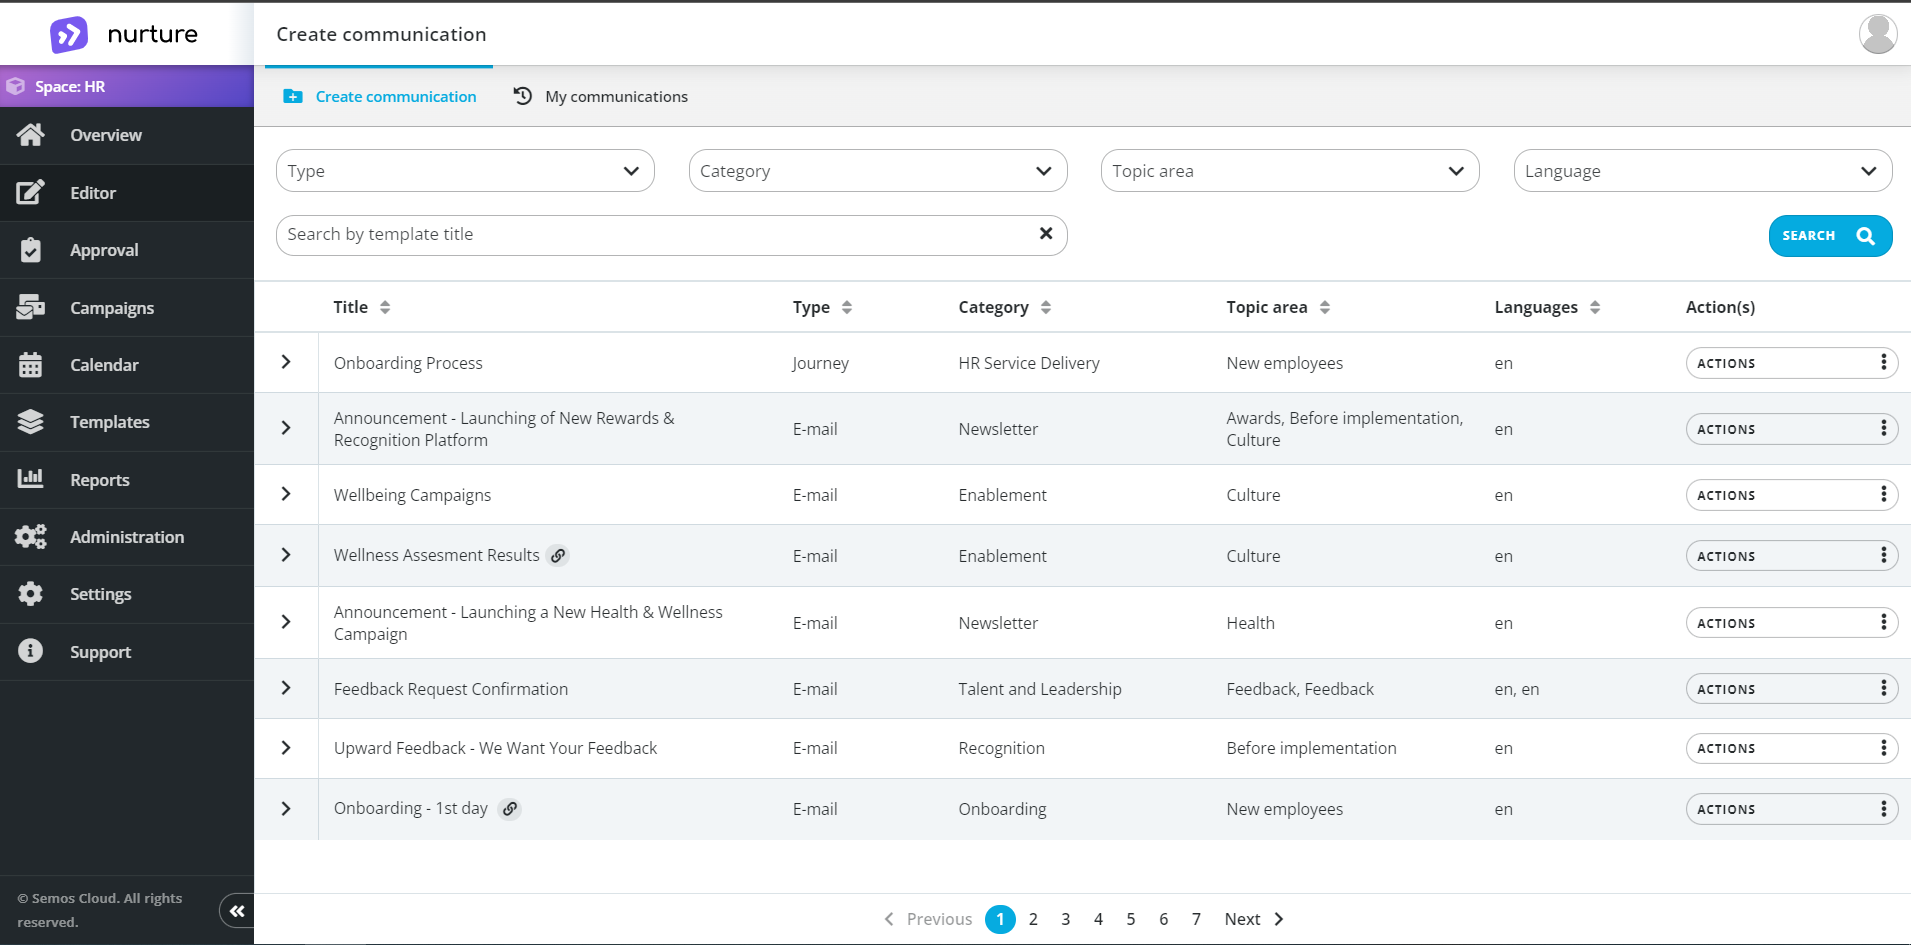
Image: Nurture - Admin center - Editor
Initially Create communication tab will open where all company-approved templates will be listed.
Use the search filters to find your desired template. Use the Actions dropdown menu to create your specific communication.
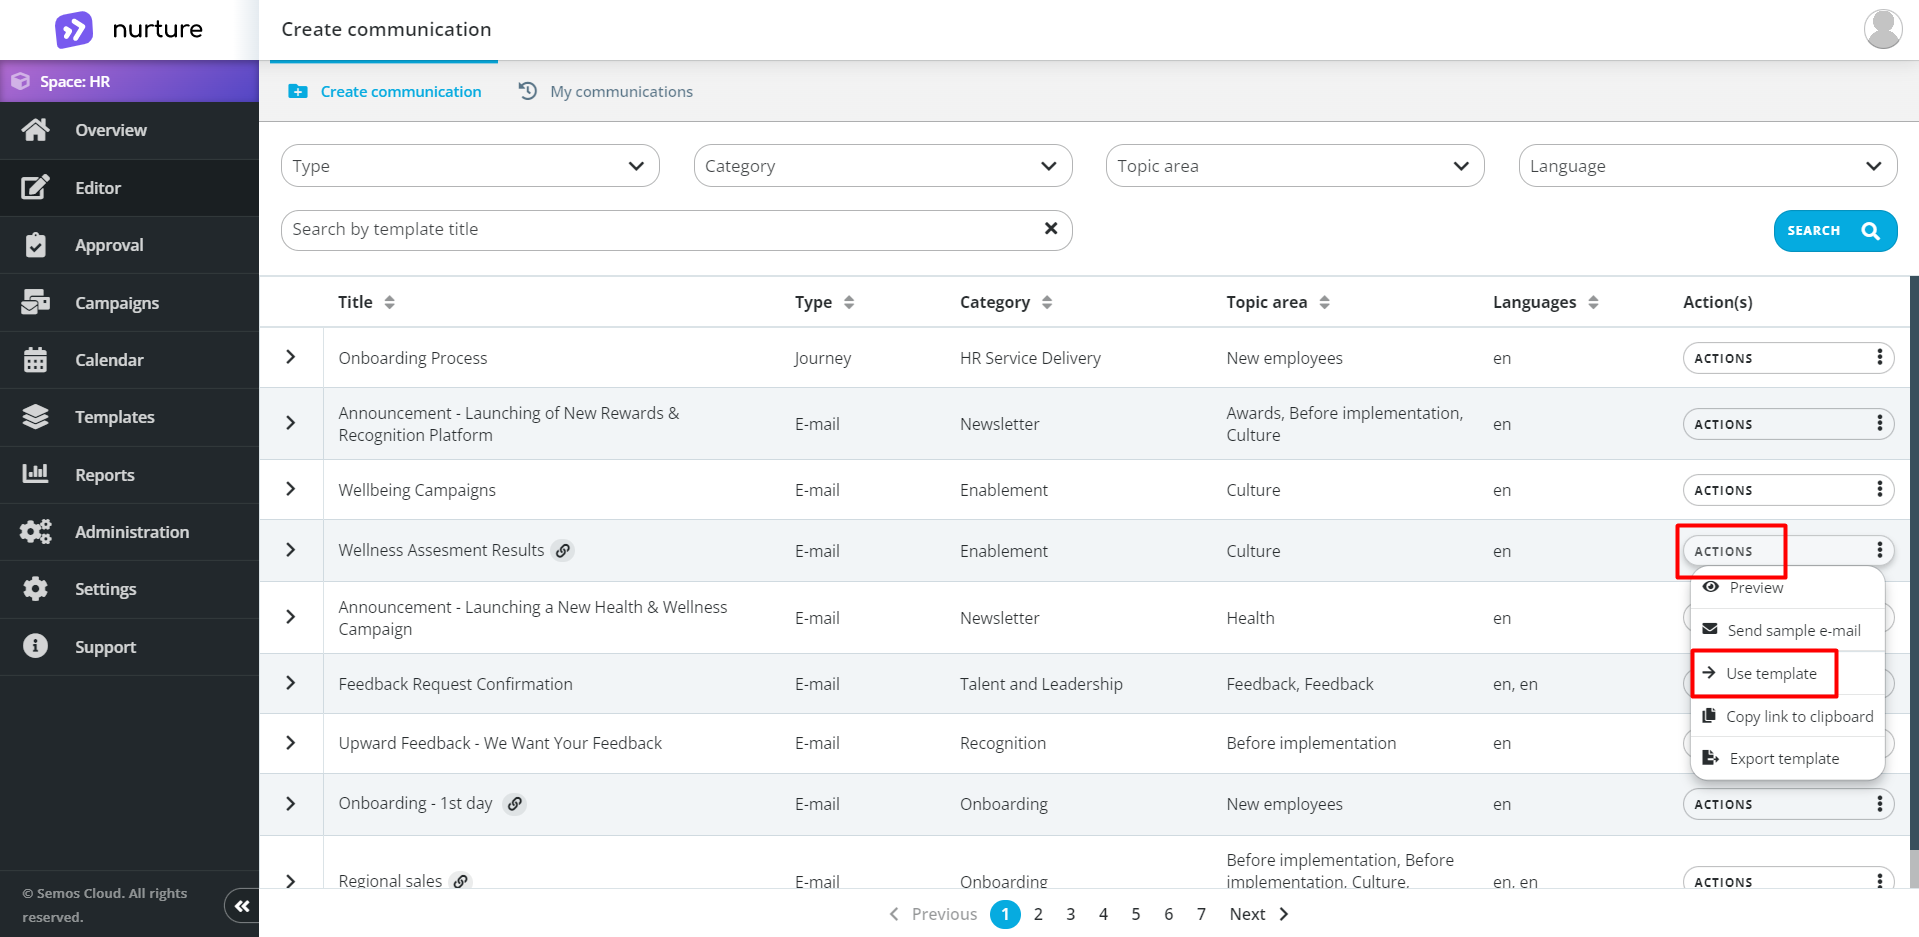
Image: Nurture - Admin center - Editor
You will notice that there are red asterisks, and to save the draft communication, you must pick a Topic area, Audience, Language, Title and Proposed date. After selecting all of them, you can click on the green Save draft button on the top-right corner, and then you will be redirected to the My communications subtab under Editor.
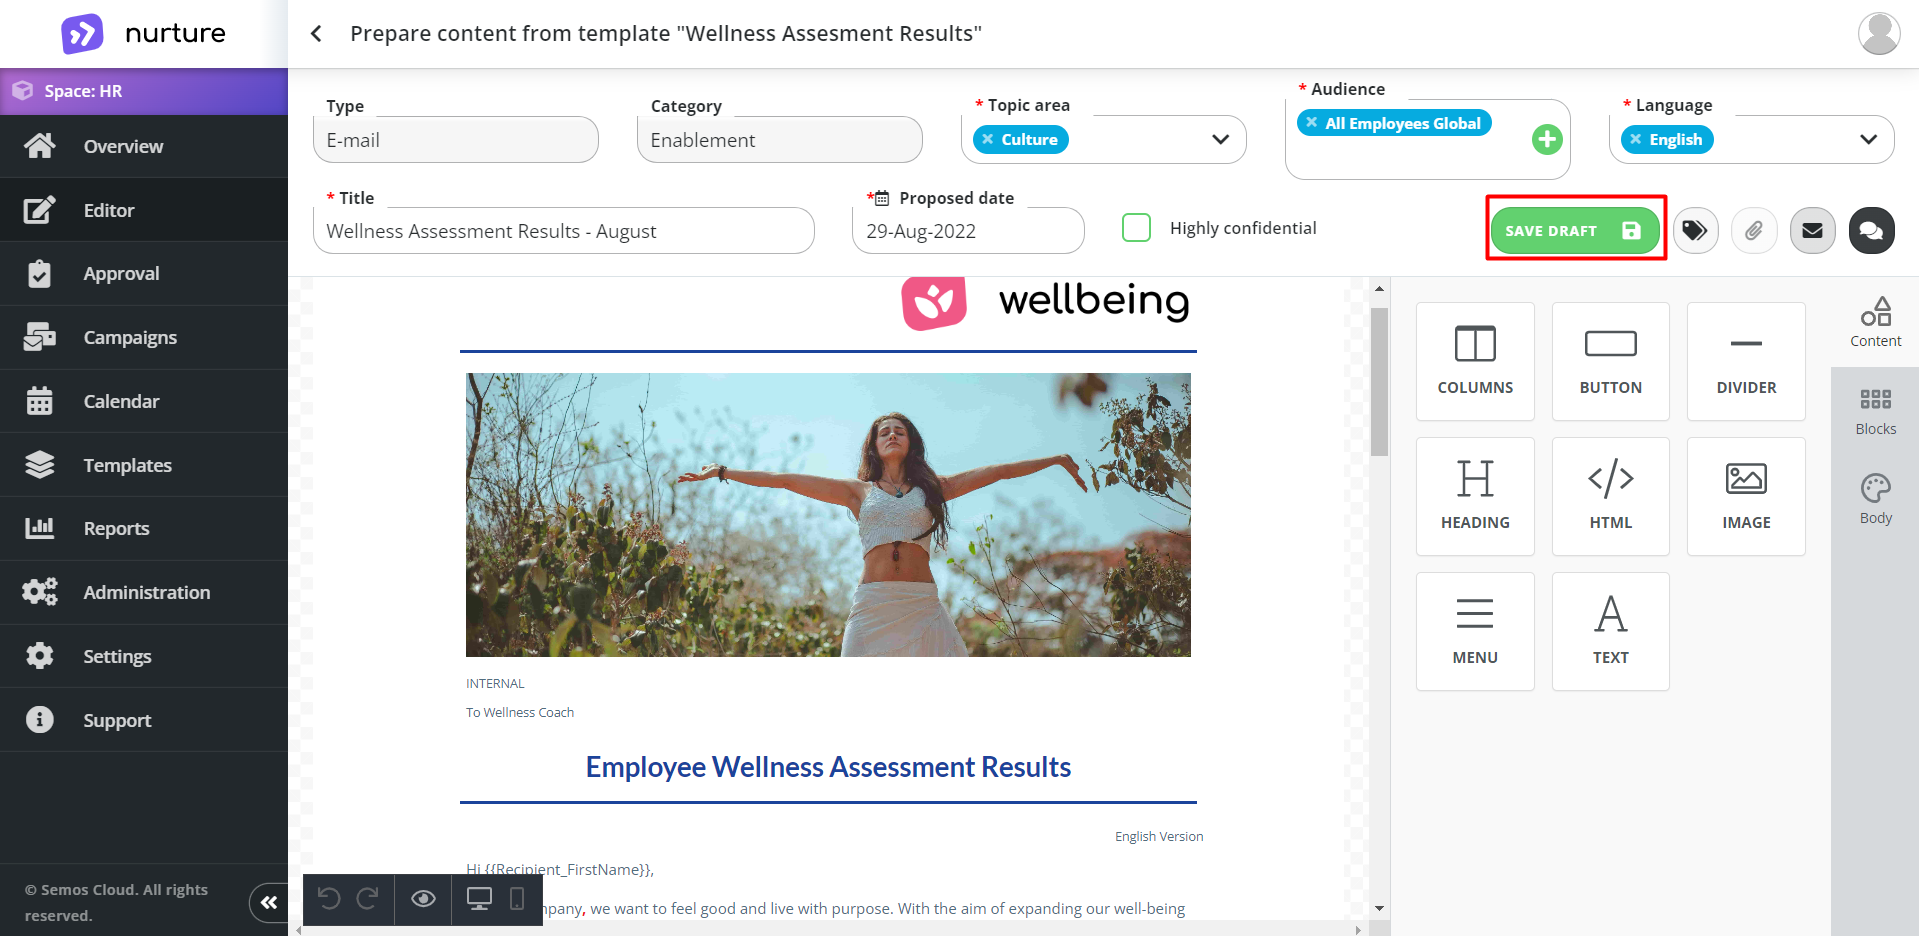
Image: Nurture - Admin center - Editor
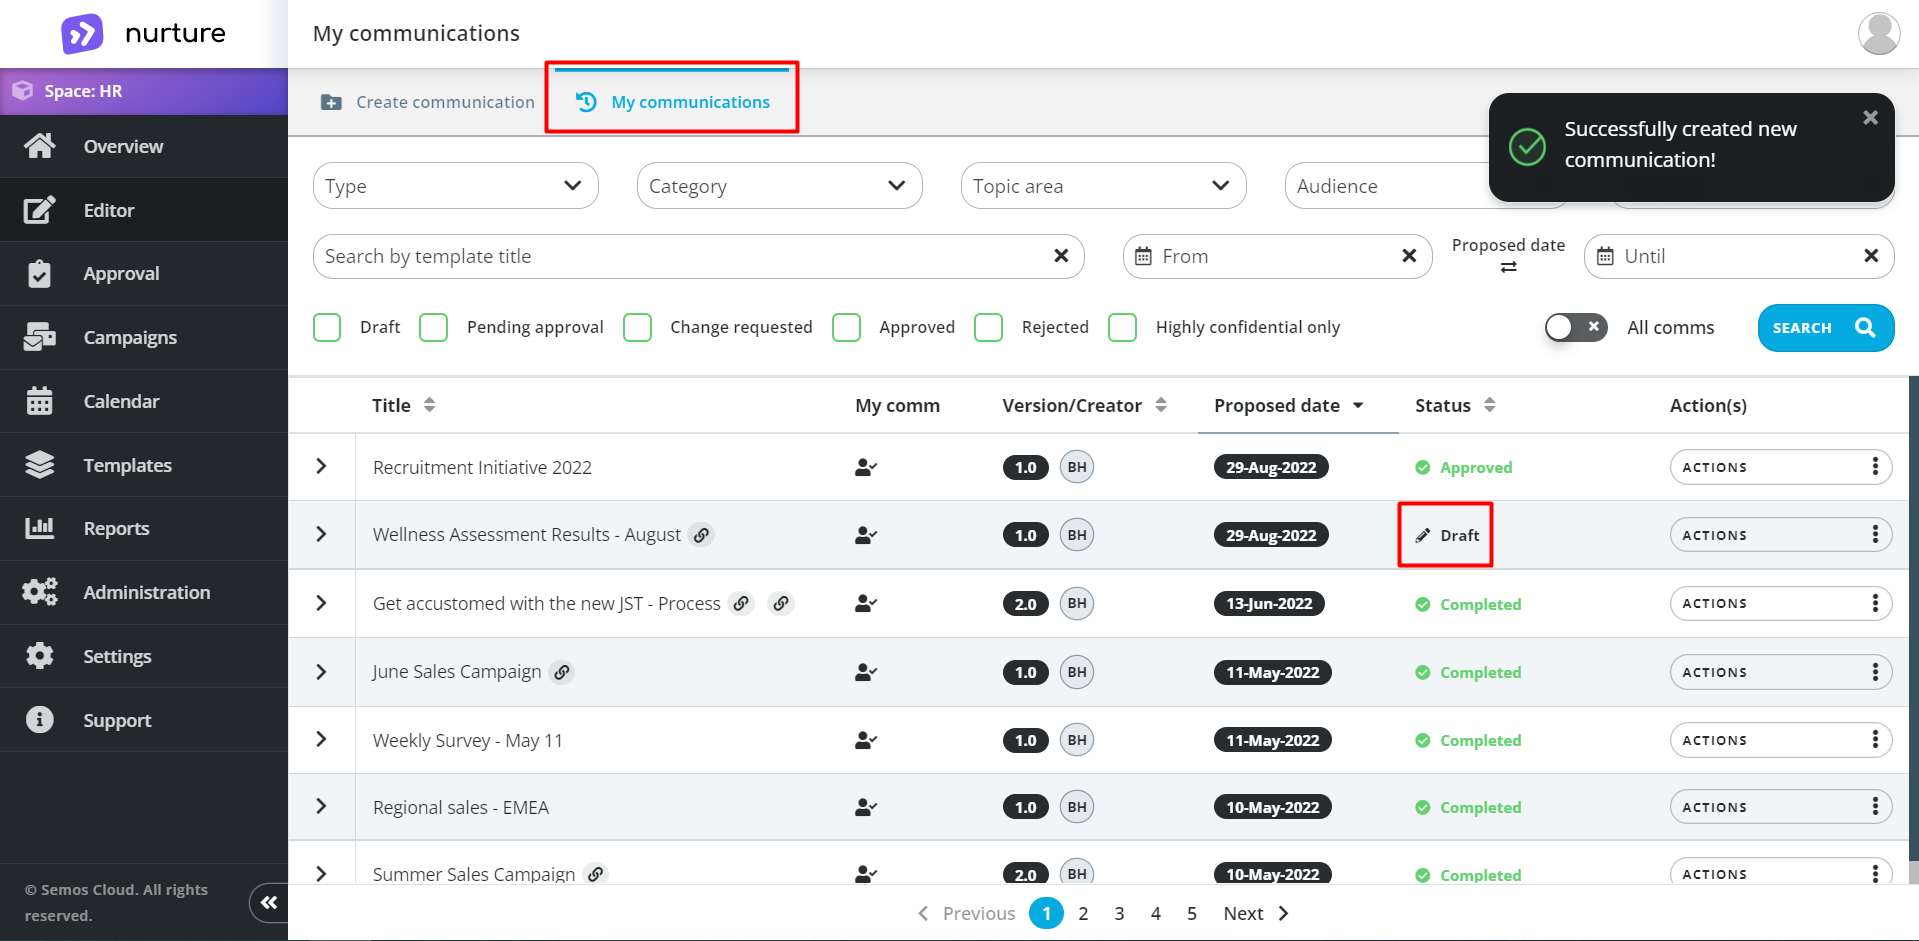
Image: Nurture - Admin center - Editor - My communications
When the communication is in draft you can click on Actions button, a dropdown menu will appear with multiple functionalities.
This menu allows you to go back to editing the communication by clicking on Edit, you can also Preview how the communication will appear in the mail or send a sample e-mail to a person.
You also have the option to create a copy of this communication by clicking on Copy communication or you can download it by clicking on Export template.
Creating communication can be made easier by assigning one or more collaborators by clicking on the Assign colleague [link]button from the dropdown menu or you can click on the arrow as shown in the picture down below, and then click on the “plus” button to add collaborator/s.
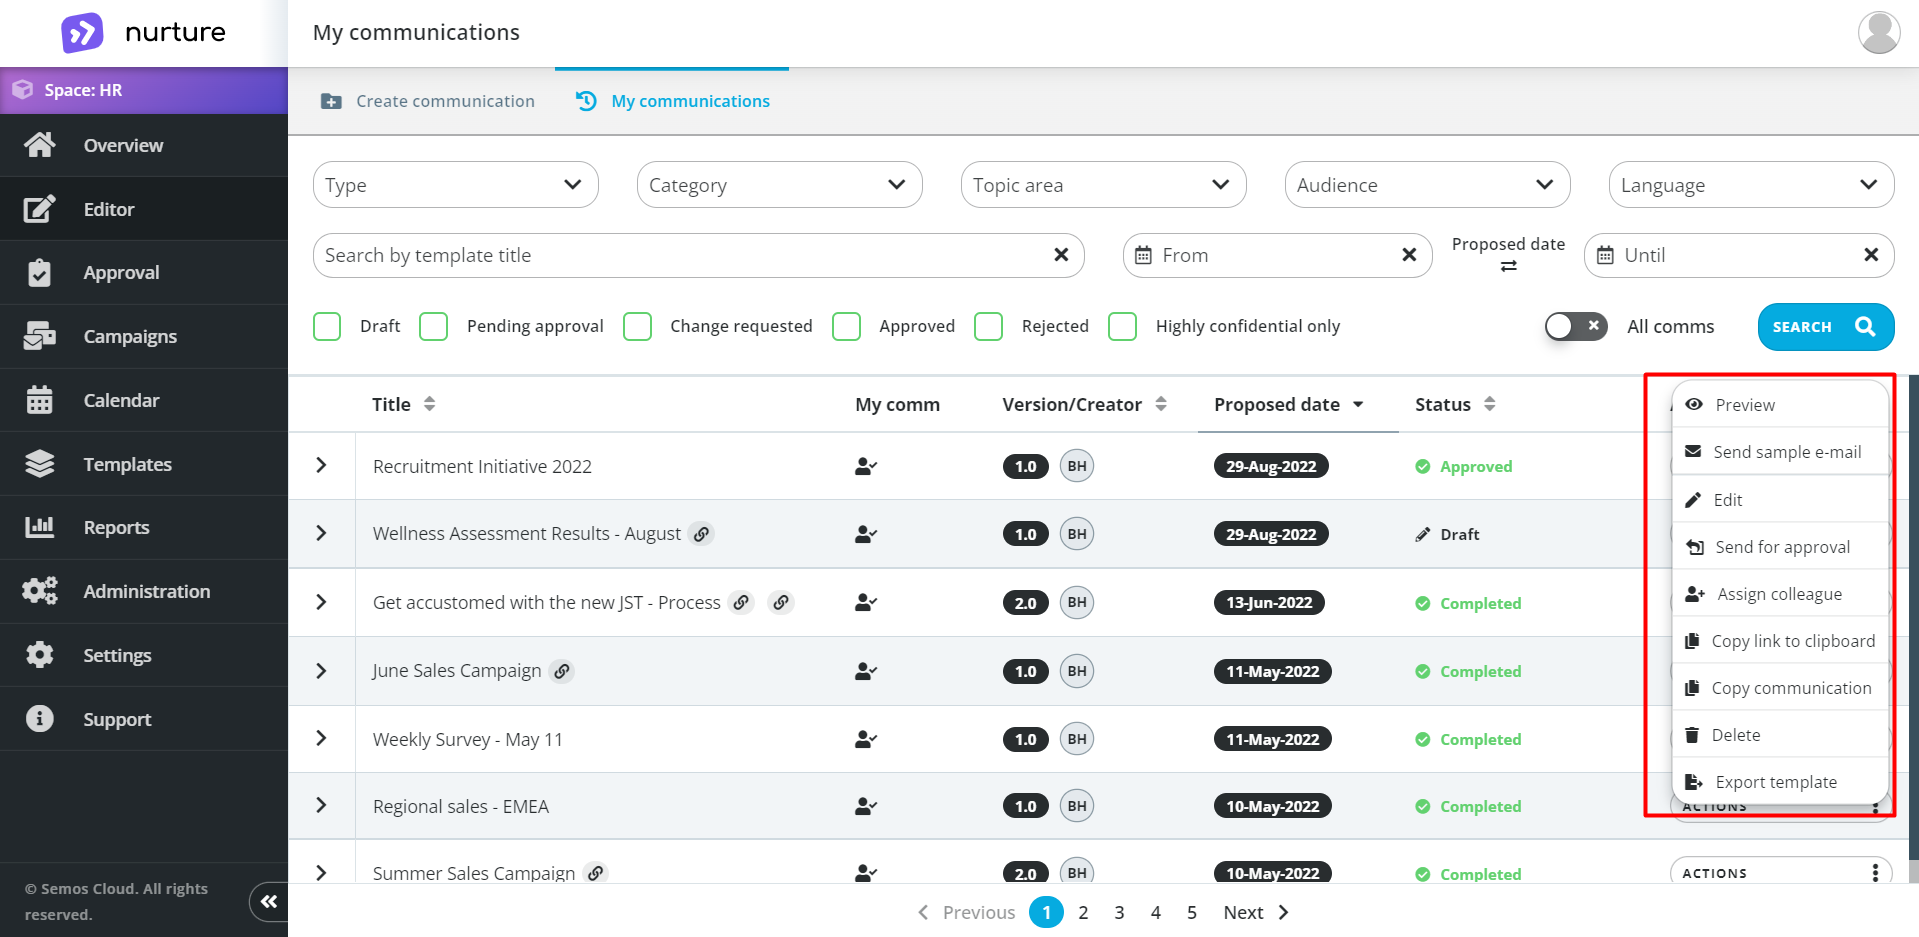
Image: Nurture - Admin center - Editor - My communications
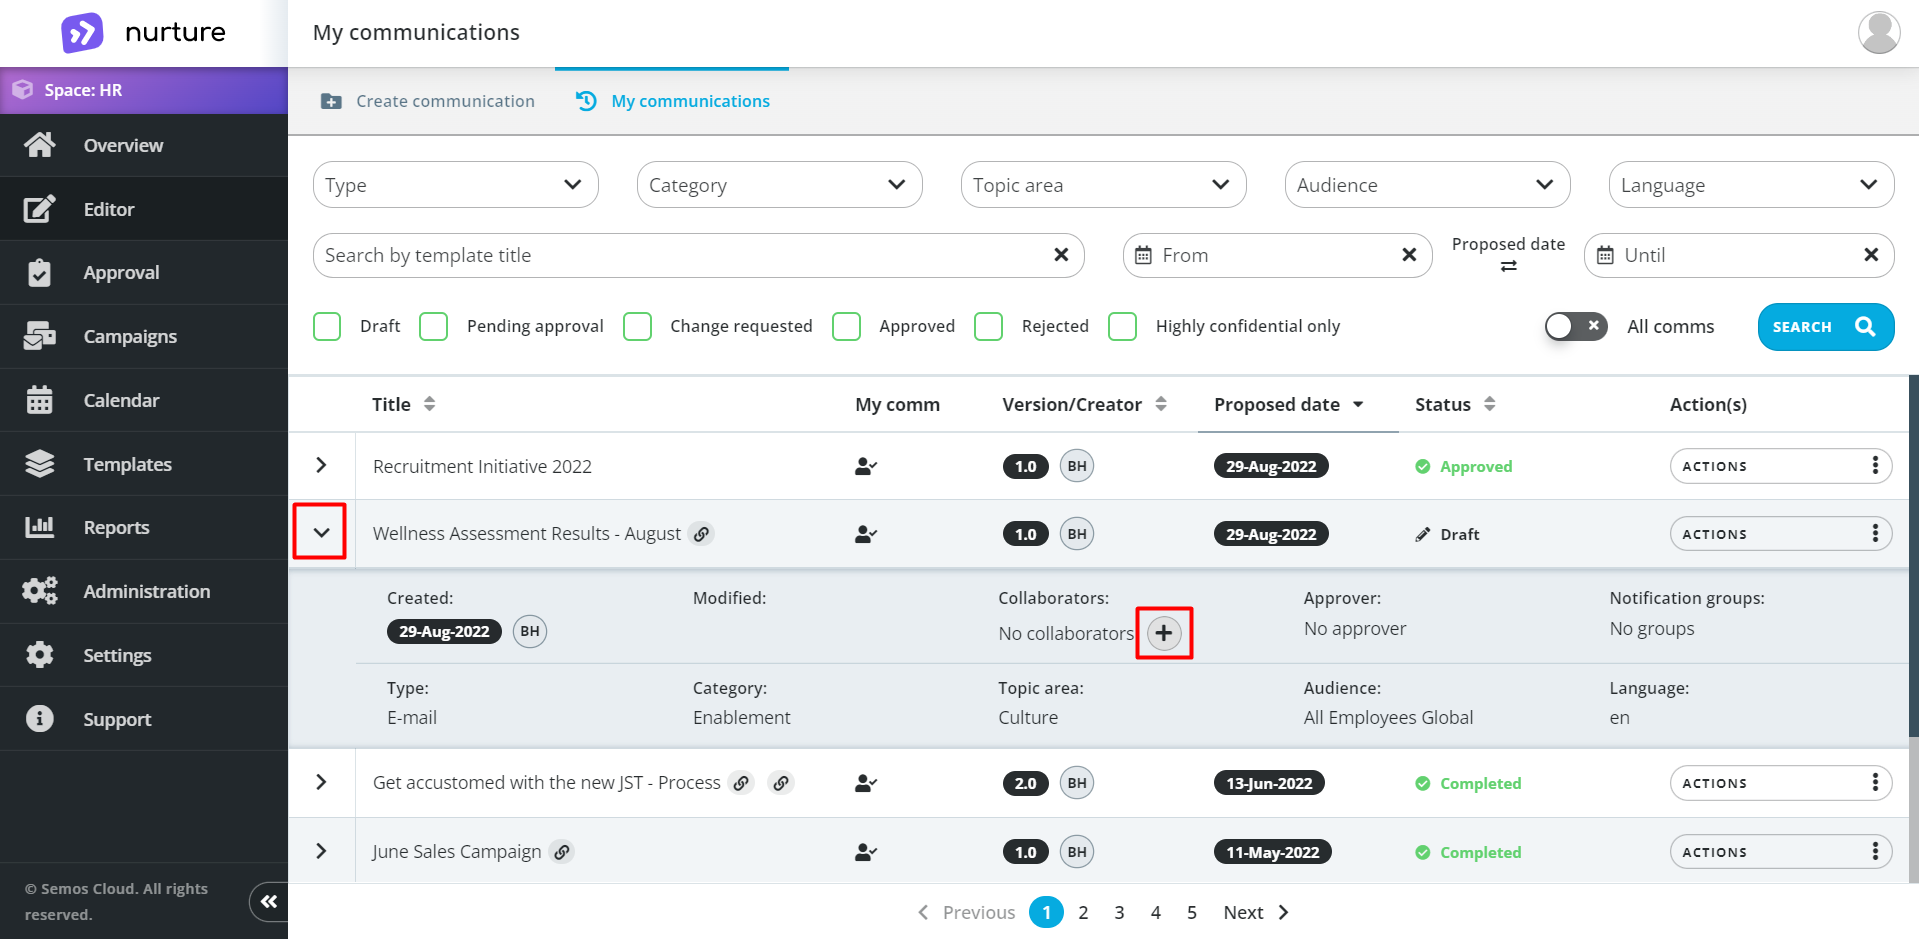
Image: Nurture - Admin center - Editor - My communications
When you are satisfied with your communication you can send it for approval by clicking on Actions -> Send for approval
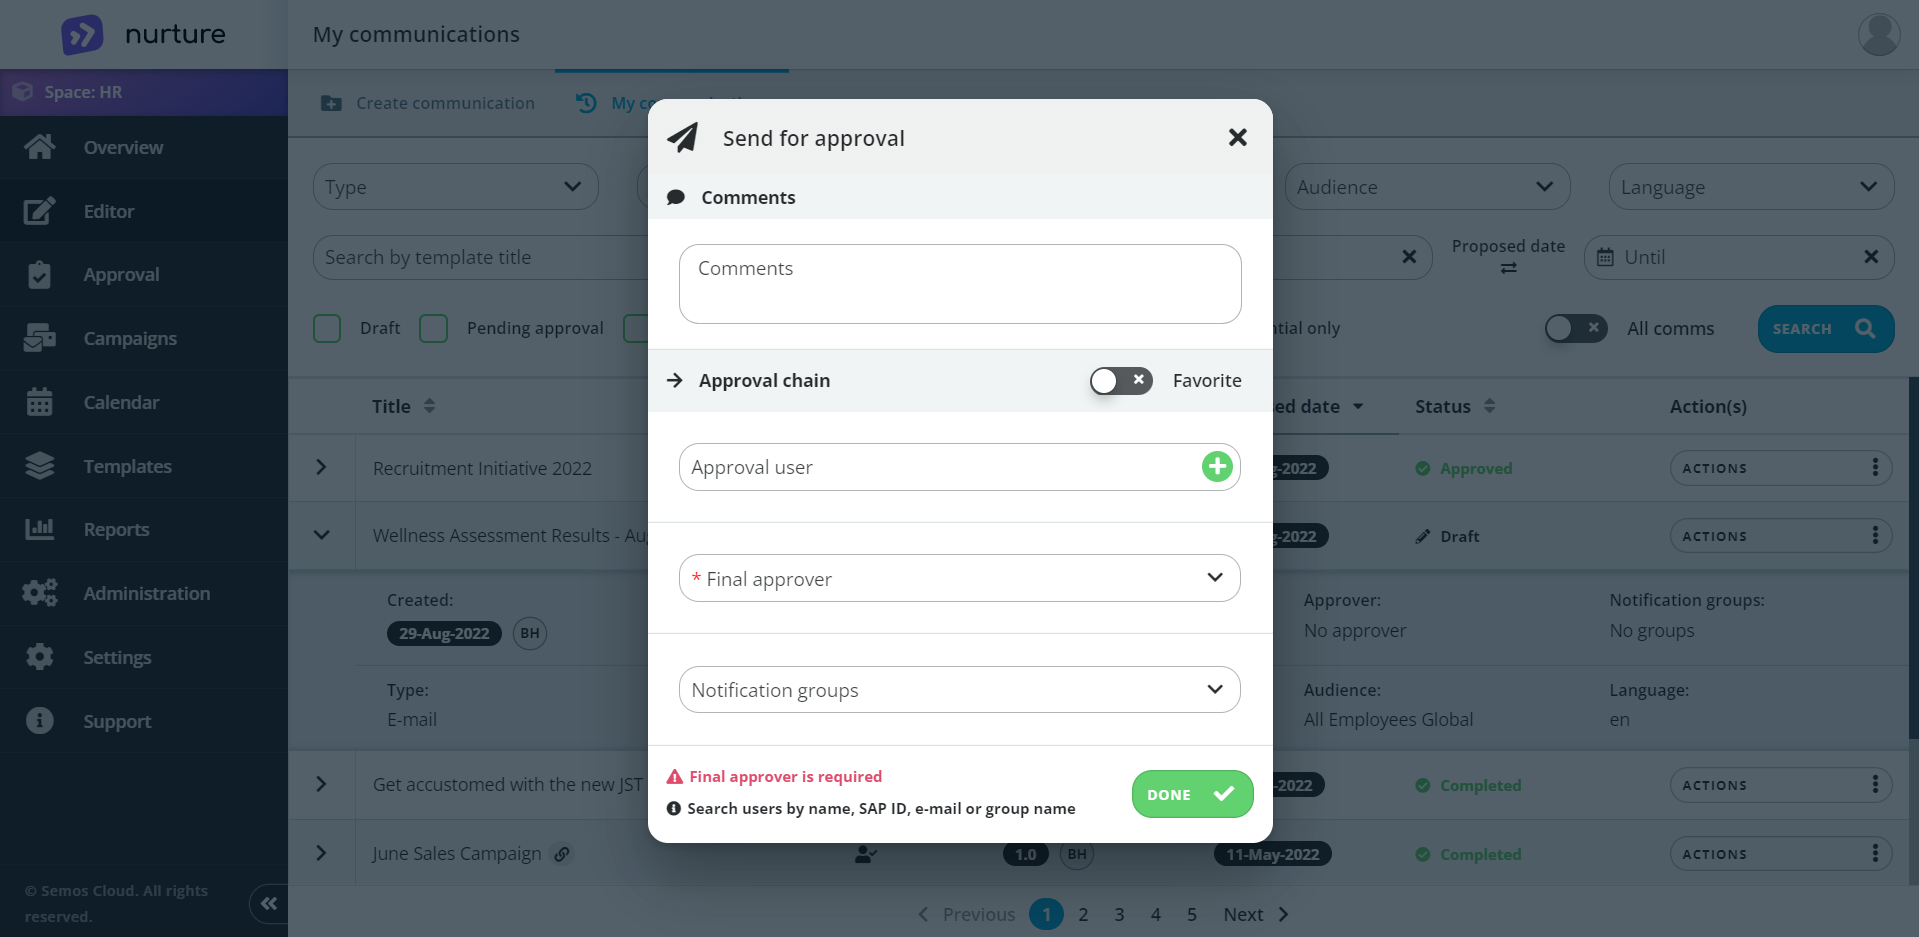
Image: Nurture - Admin center - Editor - My communications
Here you can add normal approvers via the Approval user section, add a Final approver’s group and you can also add Notification groups, but only the Final approver is required.
After you click on the Done button, the status of the communication gets changed to “Pending approval” and you get a pop-up message.
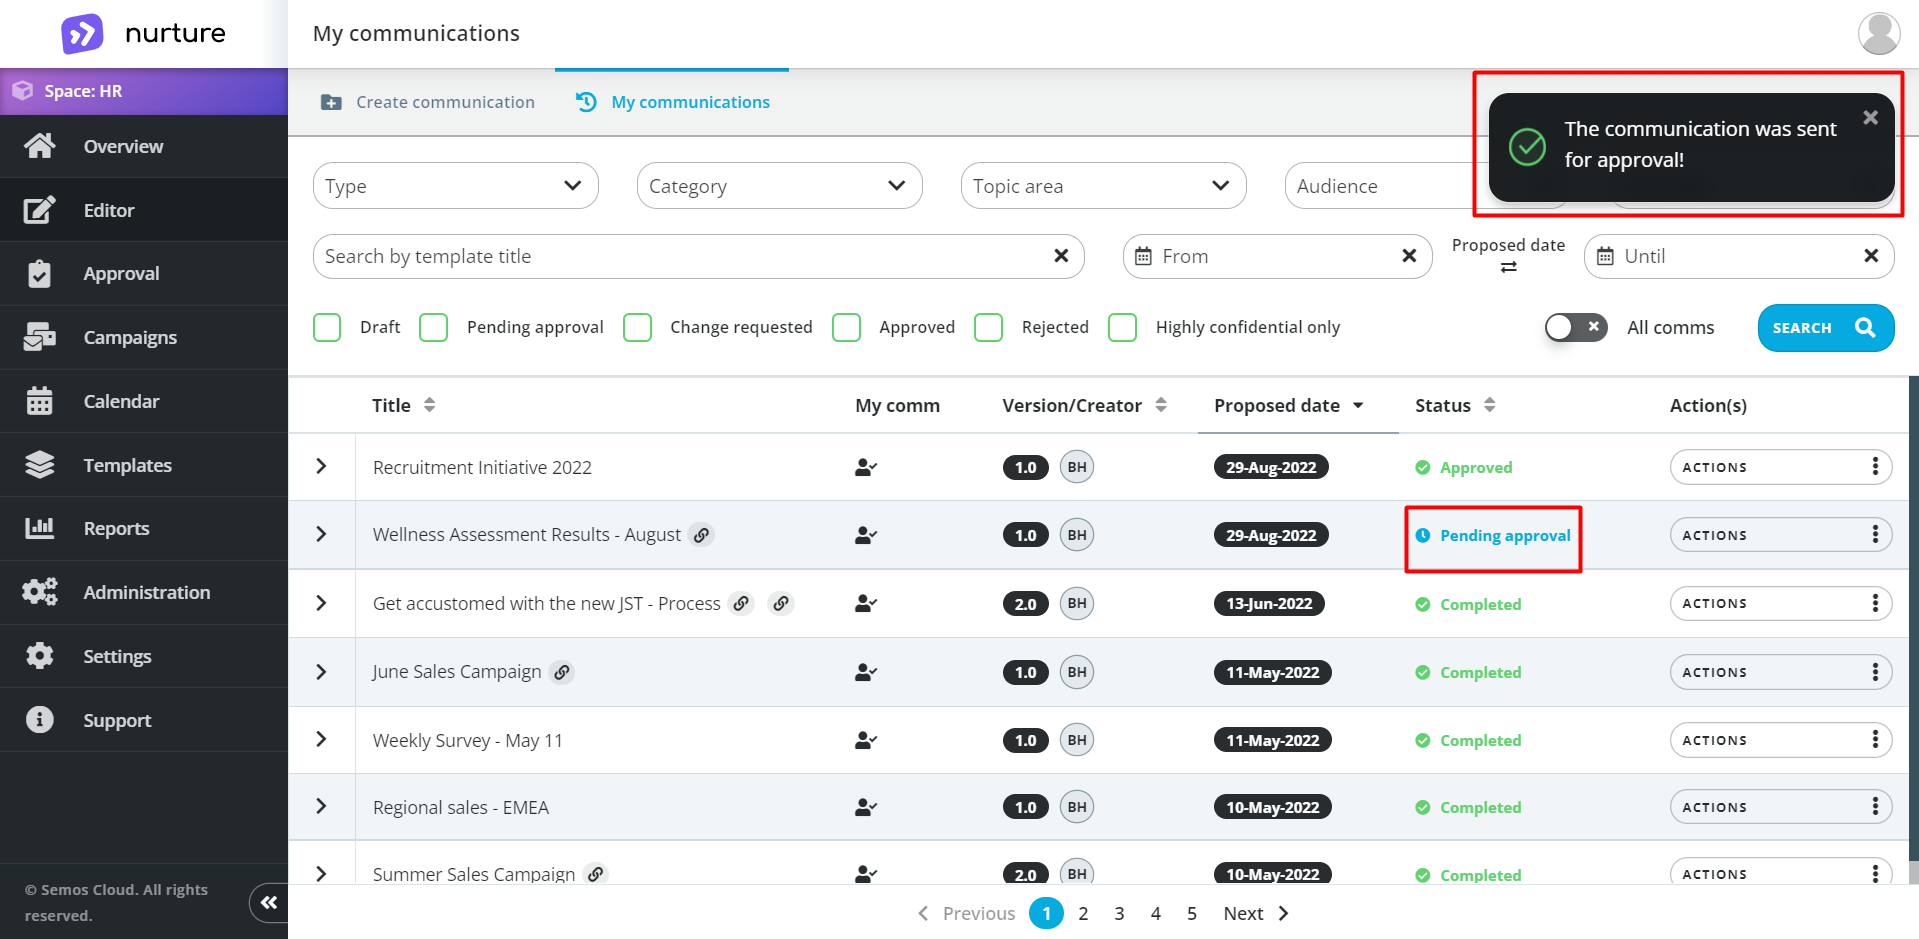
Image: Nurture - Admin center - Editor - My communications
Now we recommend taking a look at our other articles that are related to Content creation. If this article left your questions unanswered, please submit a Support Form, and we can clarify this topic.