.png?height=120&name=MicrosoftTeams-image%20(6).png)
Notification groups are useful to keep communication experts and stakeholders informed
Notification groups gives you the opportunity to create and manage notification groups and final approvers within the application.
To access the Manage Teams page, log in to the Admin Center of the Nurture application.
From the left-side panel, click on Administration and then Define groups tab.
Log in to Nurture -> Administration -> Define groups
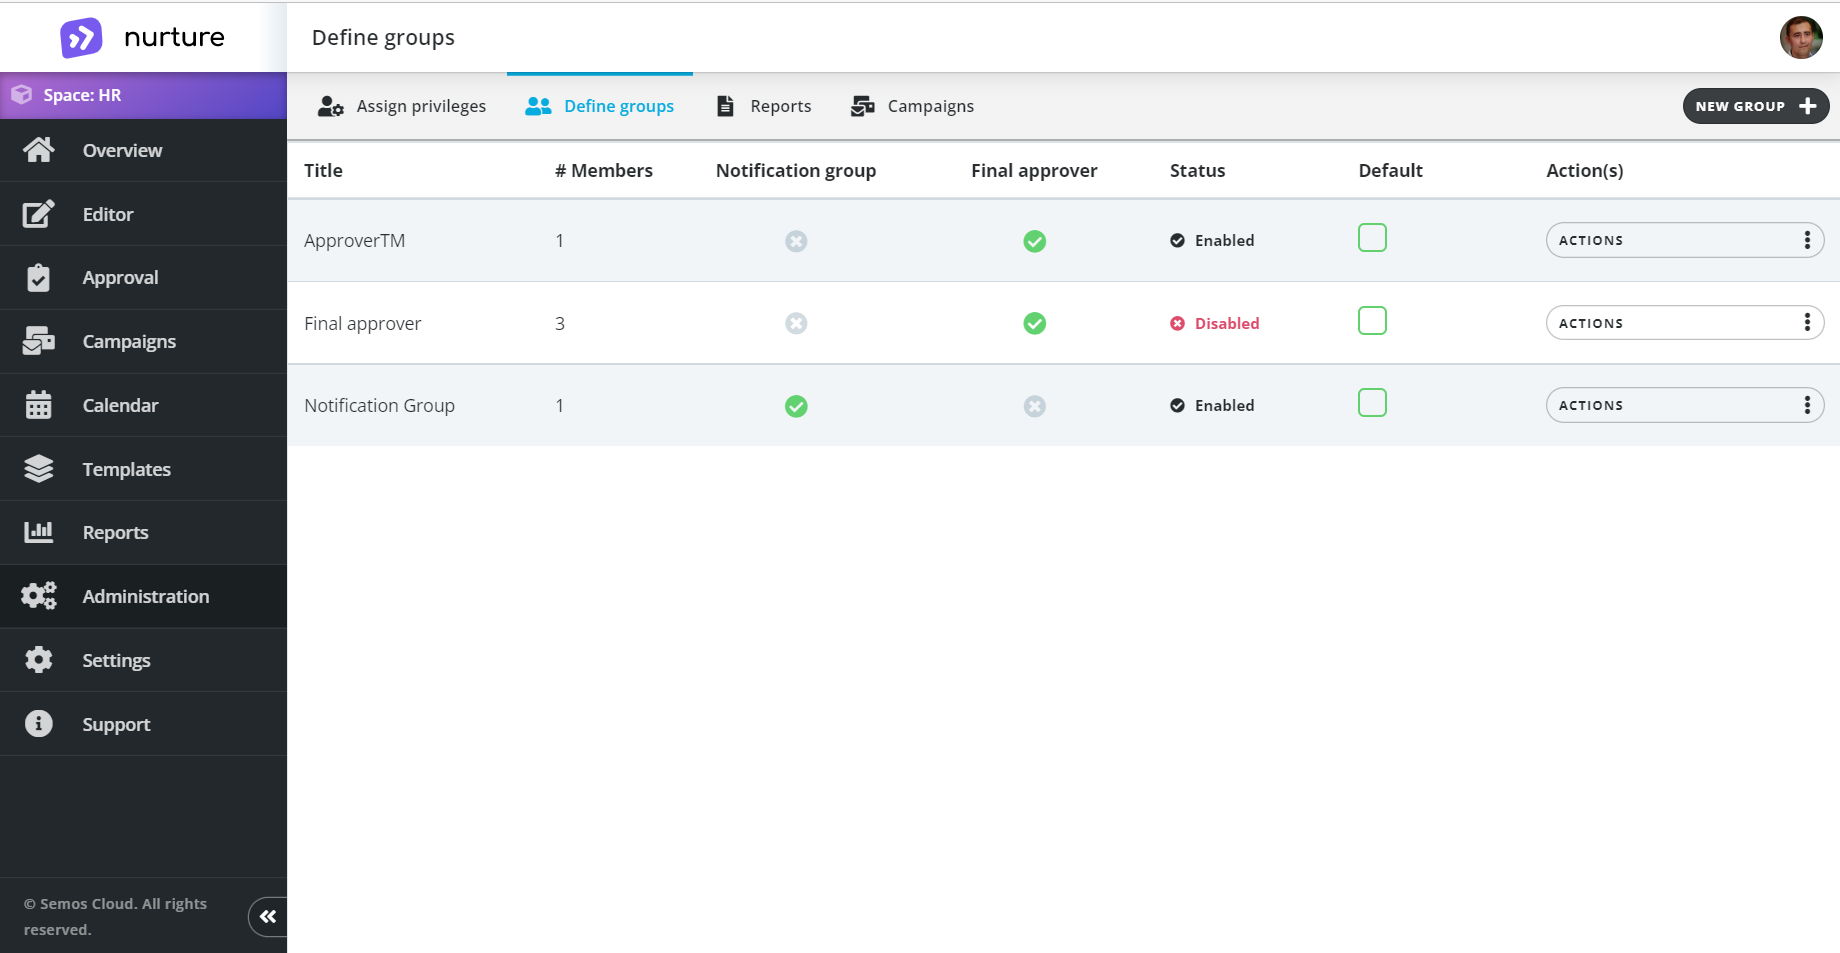
You can see all groups listed on this screen, together with additional information and statuses. You can see the group title, number of members and whether the group is a Notification group, Final approver or a Default group.
From Define groups tab you can:
- Create a new group
- Edit an existing group
- Define group purpose
- Set an existing group as default
- Disable an existing group
- Delete an existing group
Create a new group
You can create a new group by clicking on the “new group” button on the top-right corner:
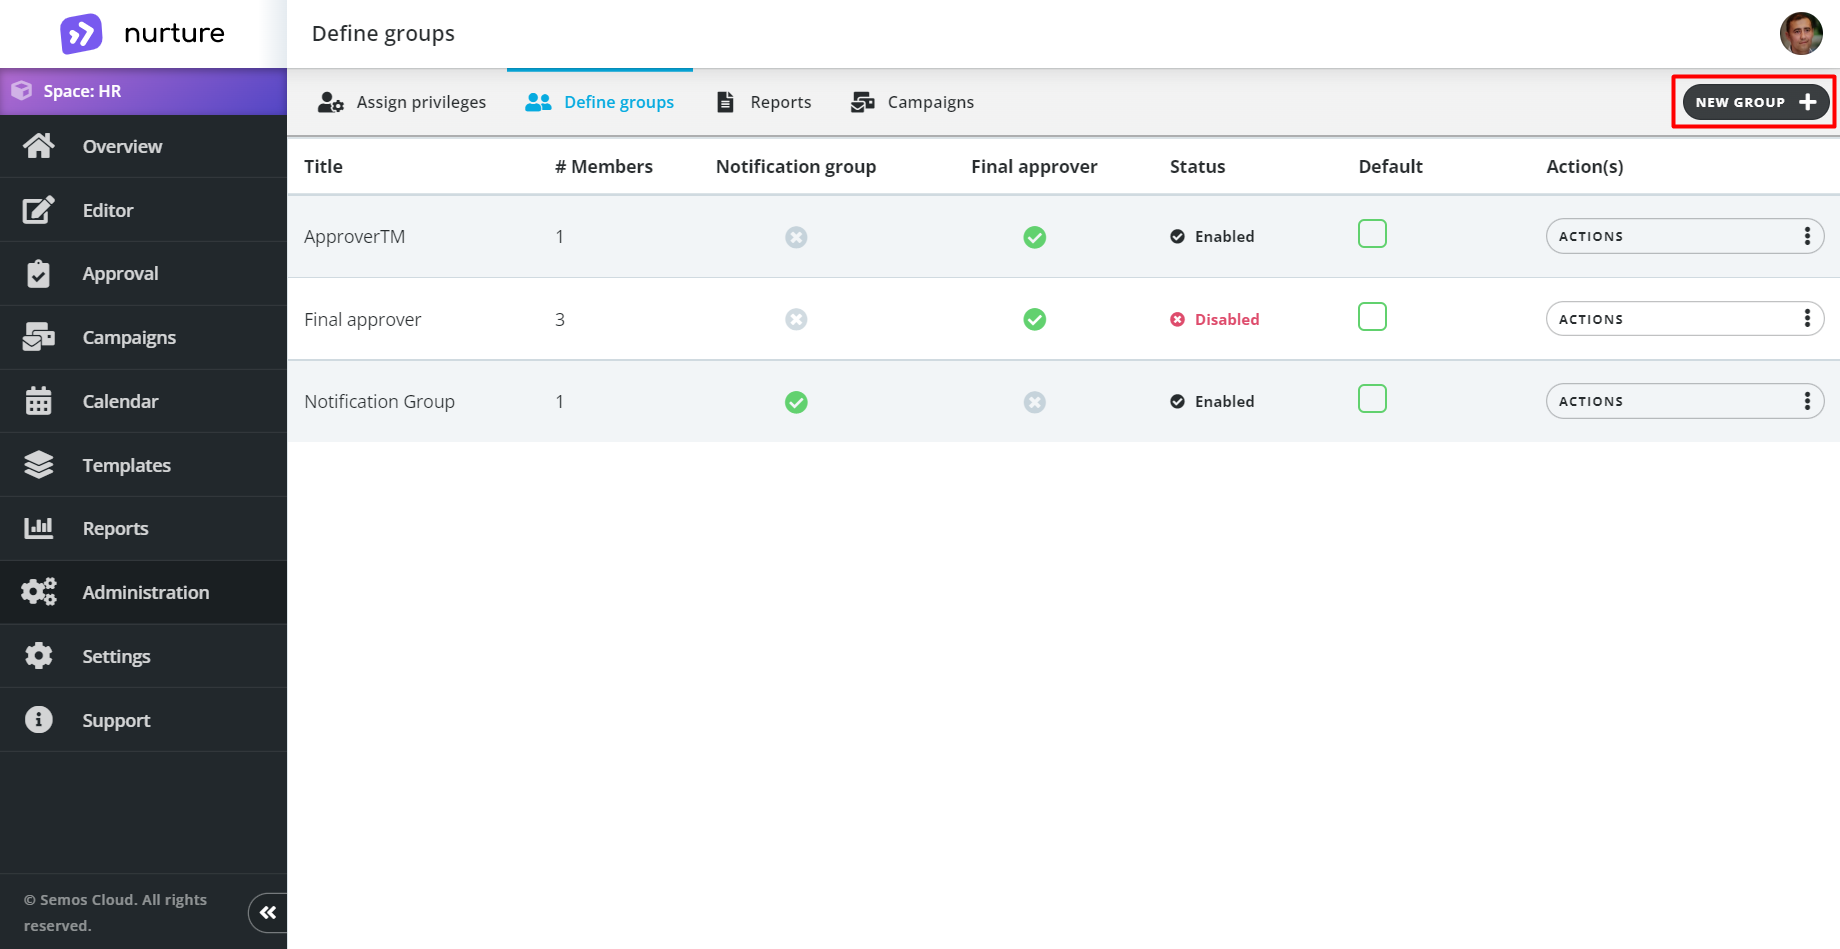
Image: Nurture application - Administration - Define groups
Here you are asked to type in a group title, add group members and select whether this group will be a Notification group or Final approver (define the group's purpose).
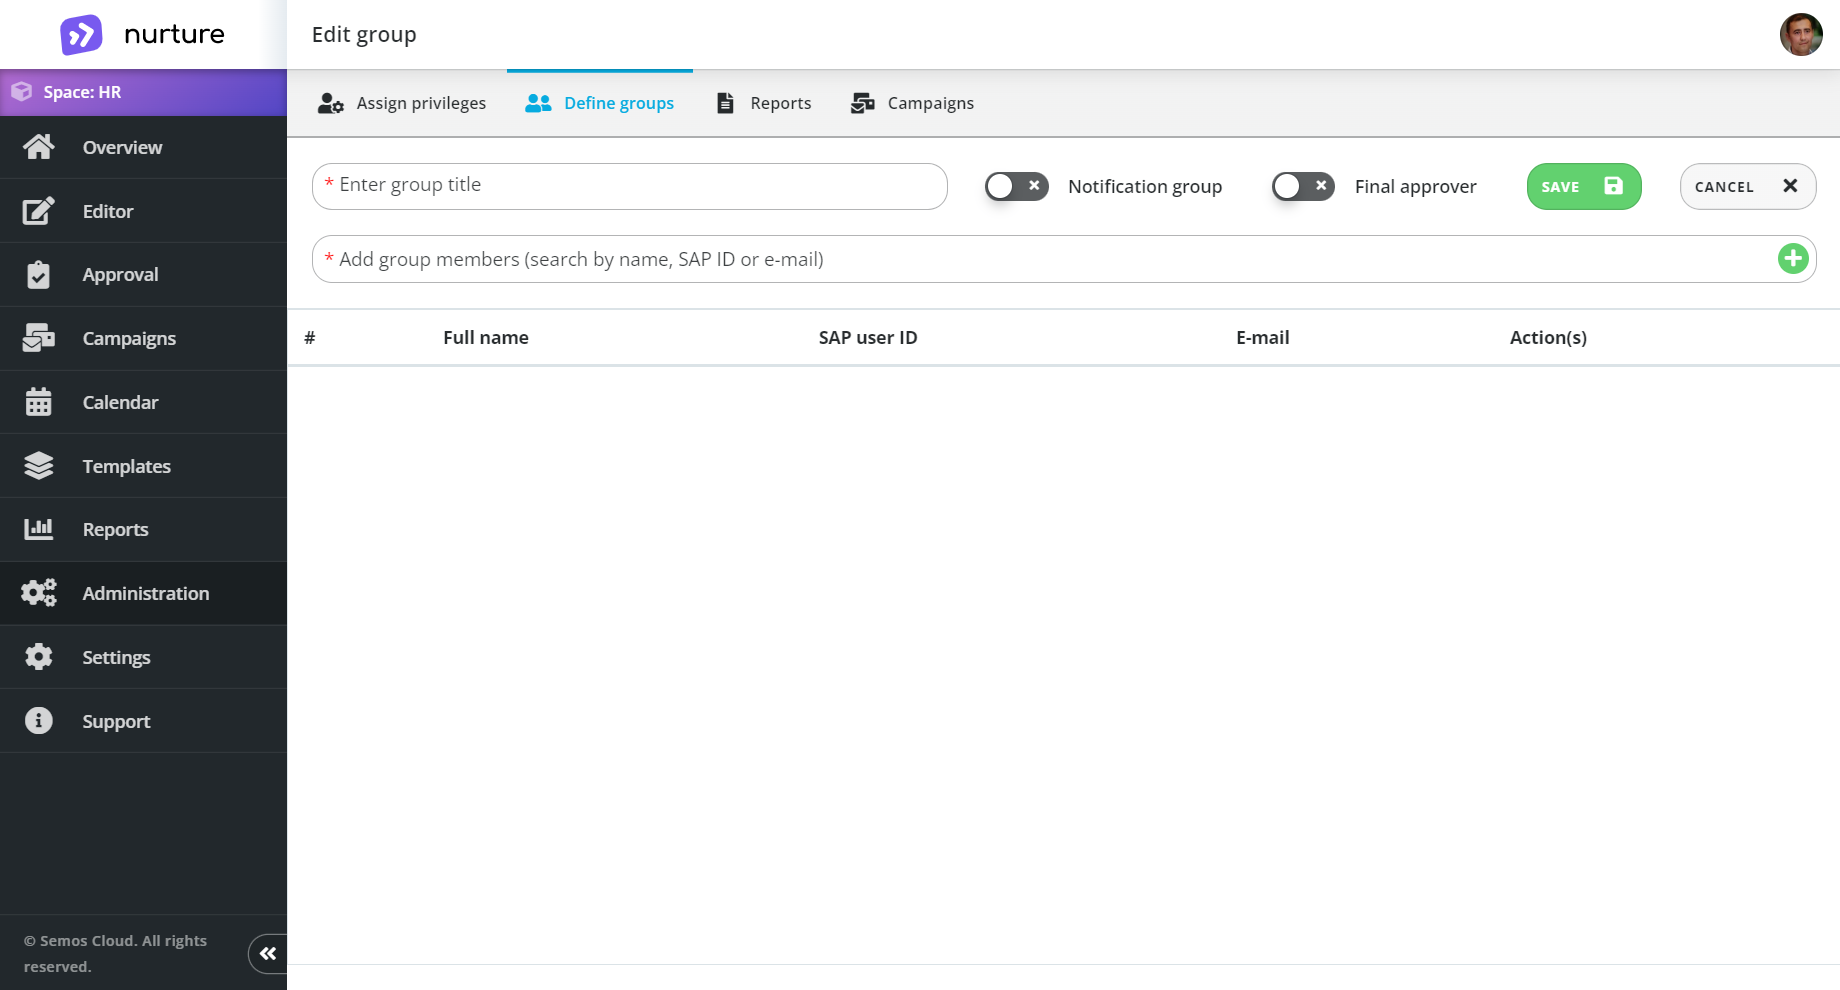
Image: Nurture application - Administration - Define groups - Group editor
Once you start filling your information, this screen should look something like this.
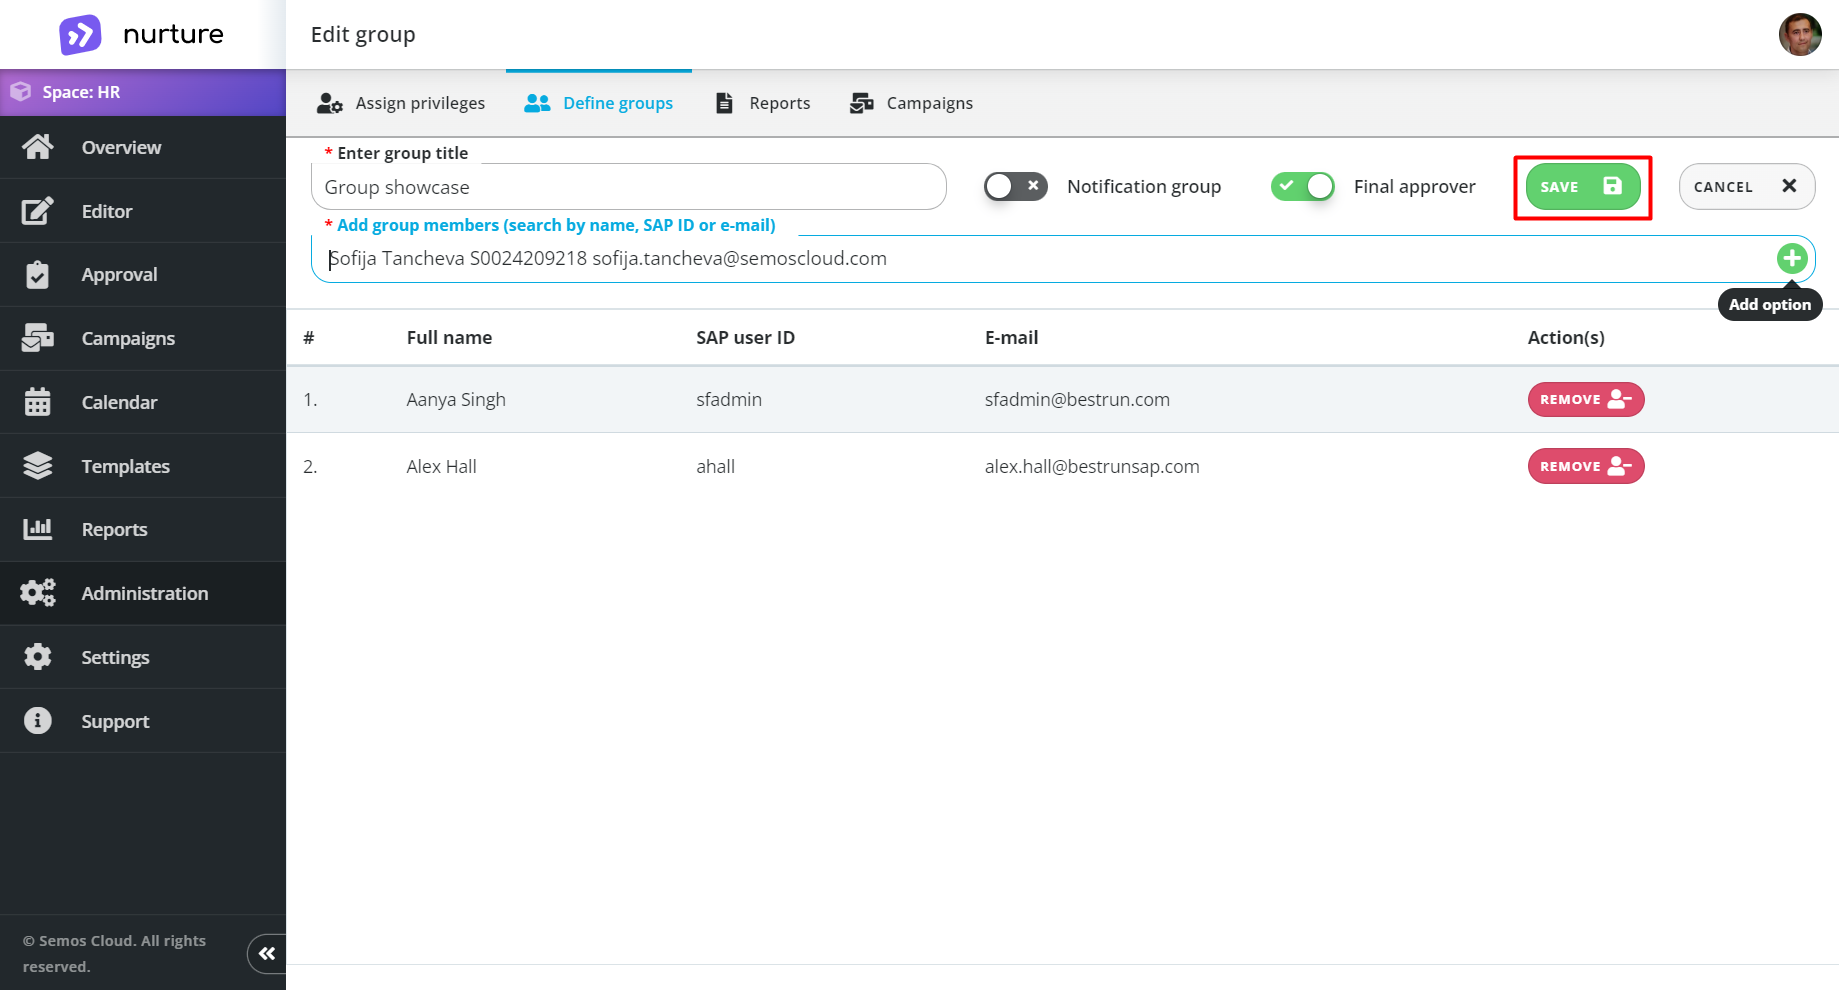
Image: Nurture application - Administration - Define groups - Group editor
Once you are done, click on the “Save” button.
You will get a pop-up message saying that the new group has been successfully created.
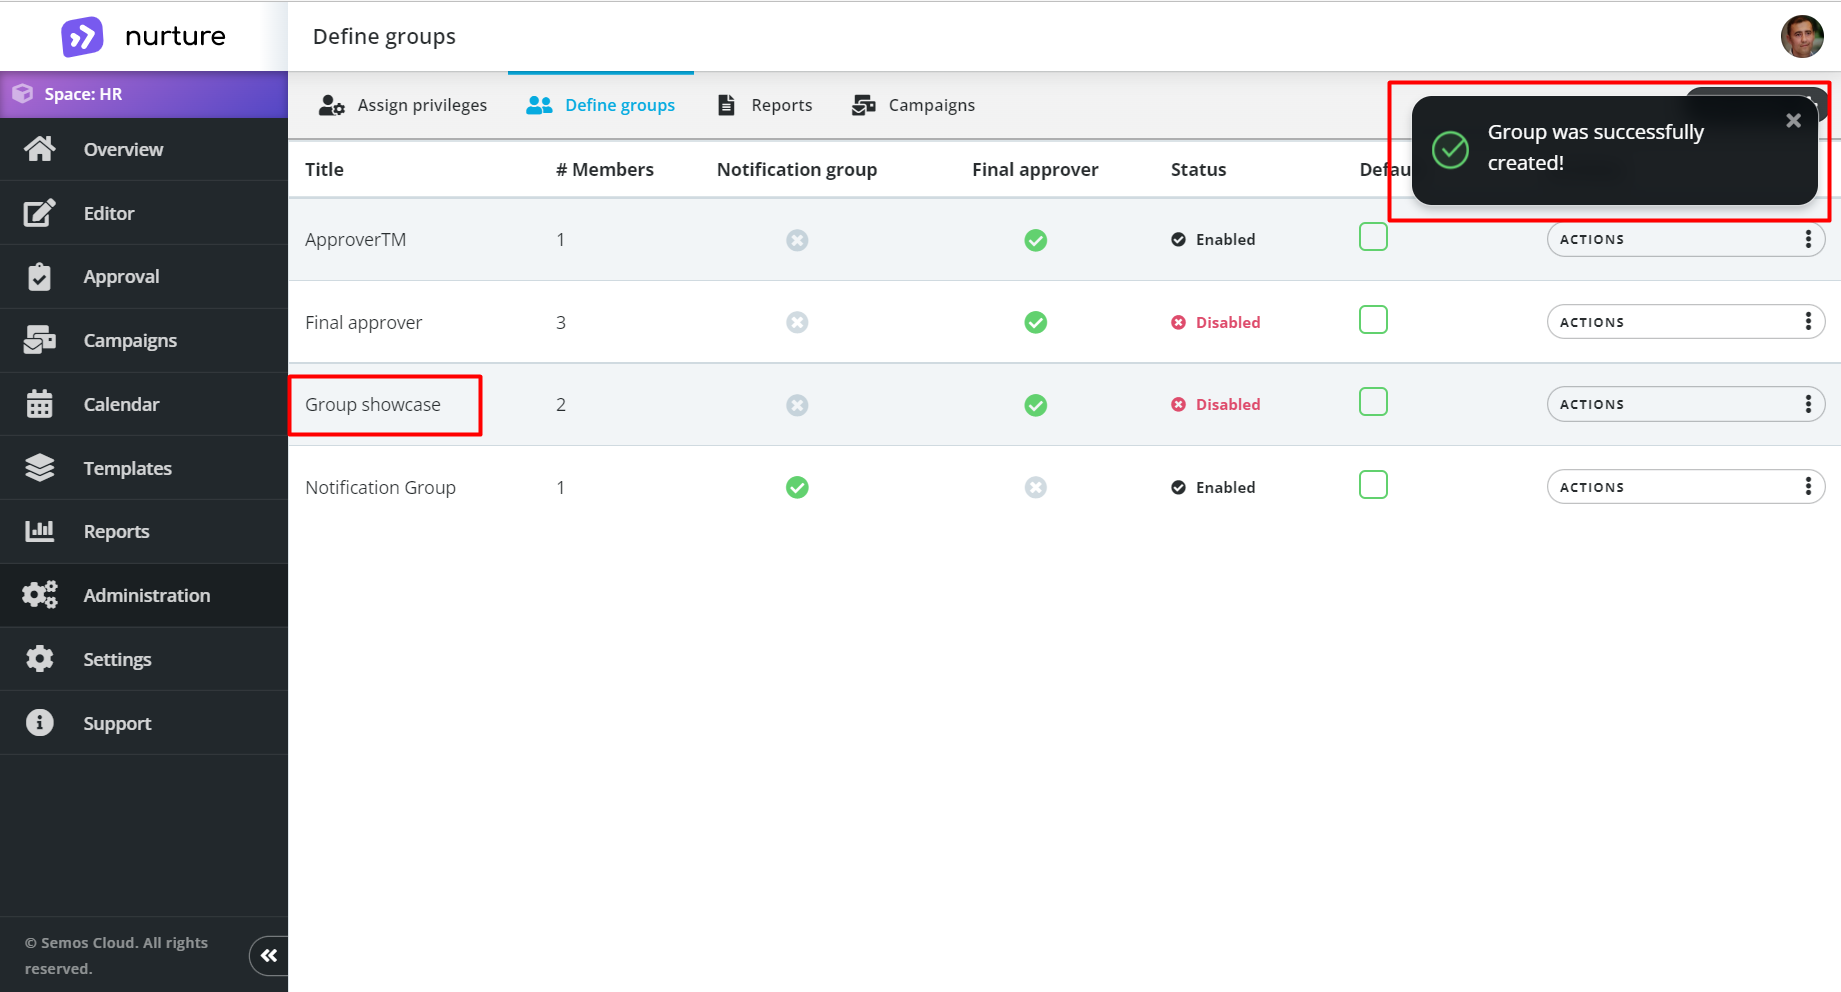
Image: Nurture application - Administration - Define groups
Edit an existing group
You can edit any of the existing groups by finding the group, click on the three dots next to the Actions button and select Edit from the drop-down menu.
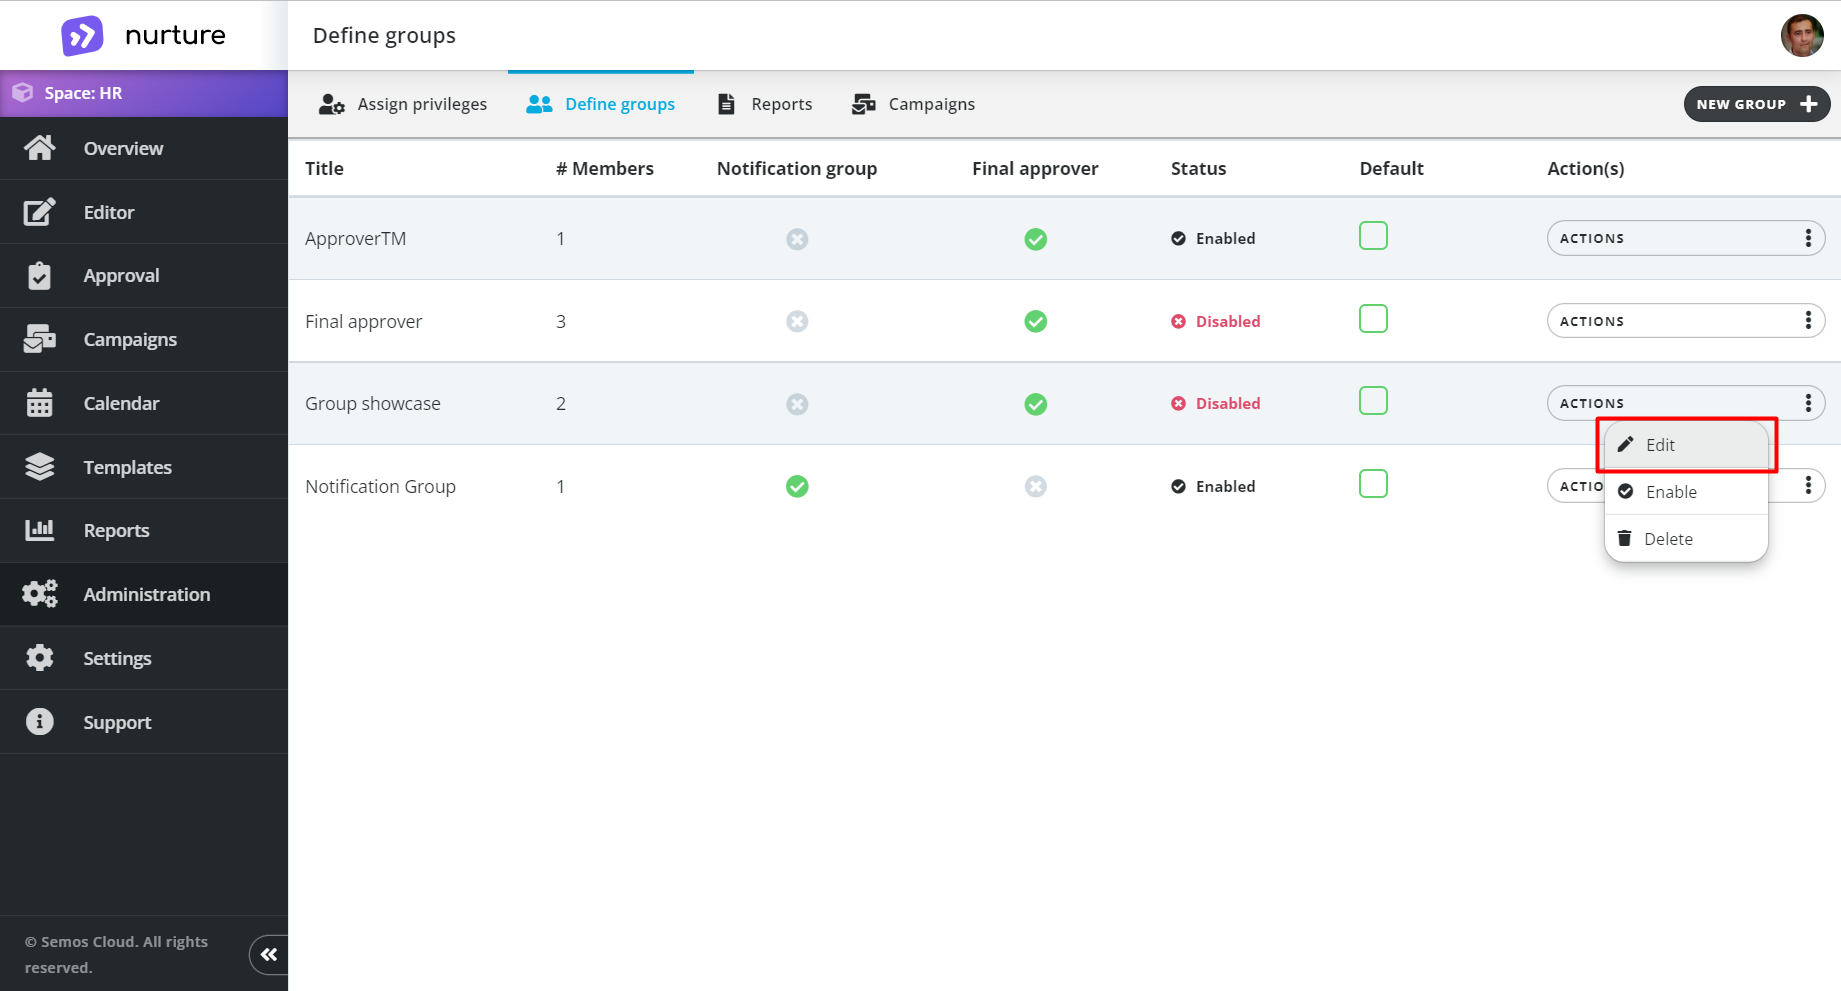
Image: Nurture application - Administration - Define groups
This will redirect you to the group editor screen. In this screen you can do the same actions as when creating a new group.
Define group purpose
Defining the group purpose helps in further usage of the group, and eases up the information flow. The group represents and acts as one entity.
For example certain users are experts who are responsible for the final quality check of the communication. They will consist your Final approver group.
The other example are employees who just want to stay informed of the communication progress. They will have access to the information in read only mode. Managers, or communication requestors would be a good fit for this group.
To set a group to be a final approver first the desired group, click on the three dots next to the Actions button and select Edit from the drop-down menu. Then turn on the Final approver switch to set the group as Final approver.
The same process is used to set a group as a Notification group.
Please note: It is not recommended to use one group as both a Final Approver and a Notification group.
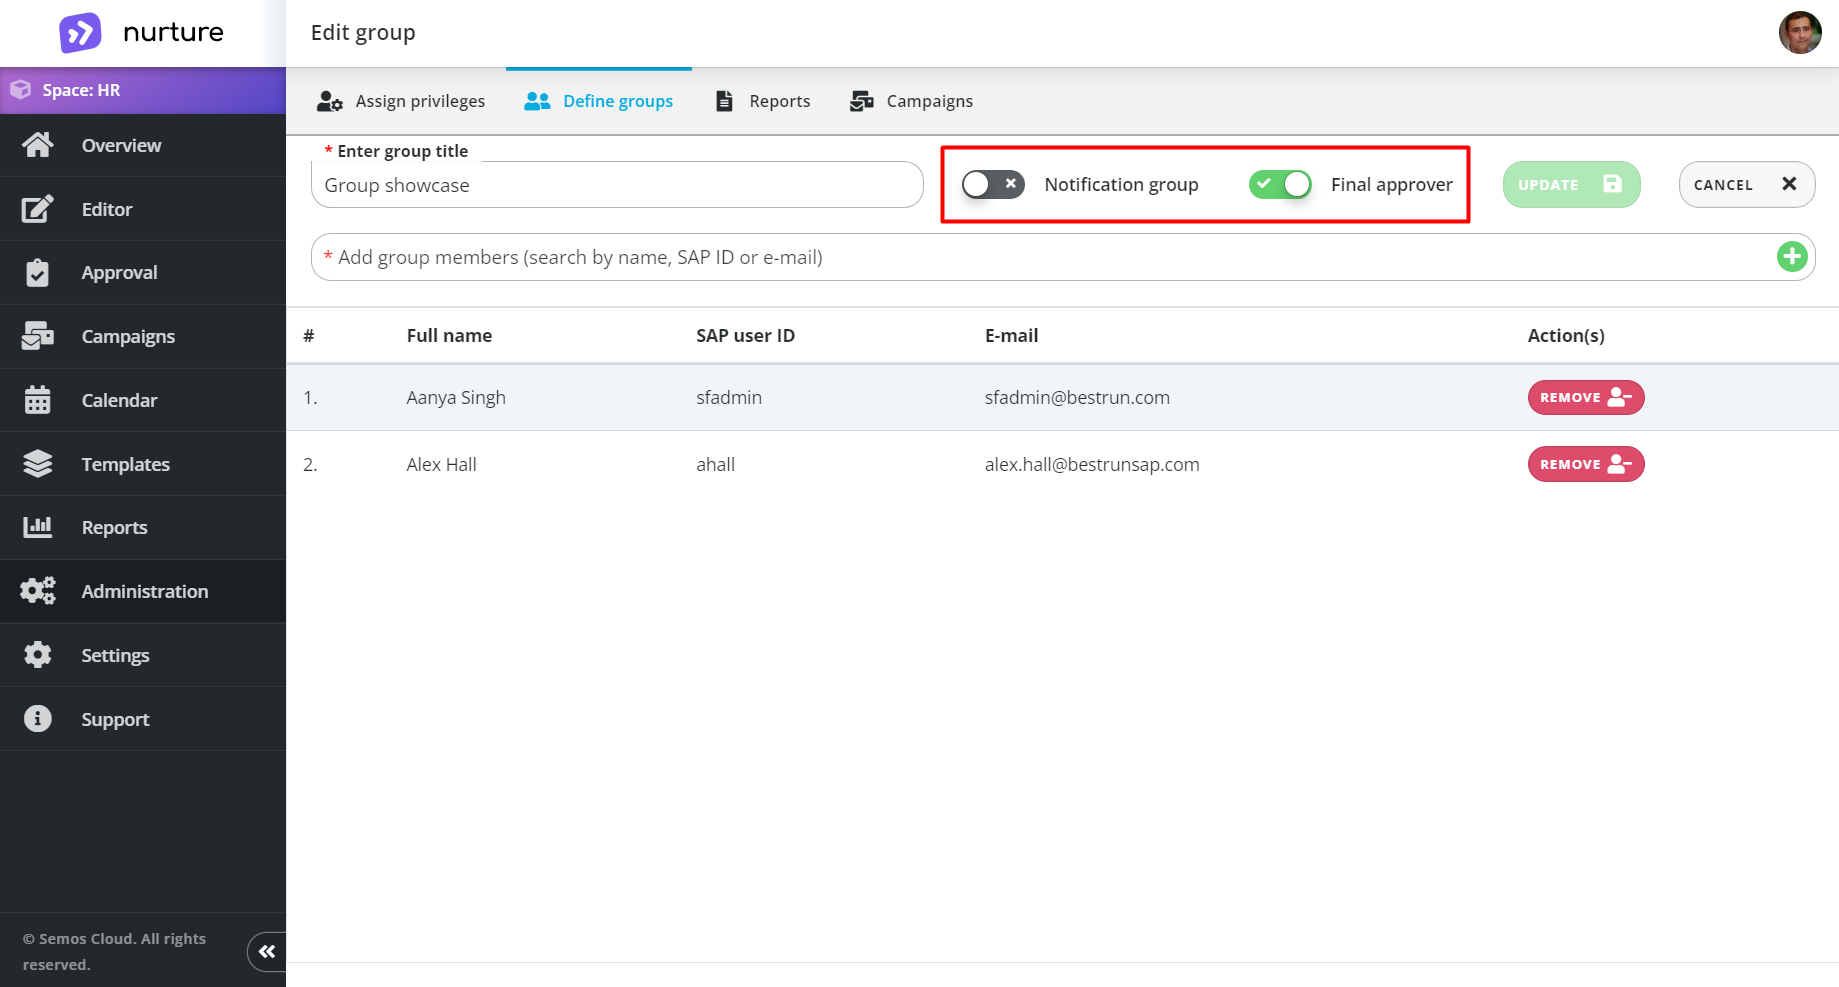
Image: Nurture application - Administration - Define groups - Group editor
Set an existing group as default
Set a group to be a default notification group or a default final approver for every approval chain.
Setting a group as a default can be used for both Notification groups and Final approver groups. This is useful if you want all Content Generators to use a specific Final approver and/or specific Notification groups.
To set the group as default, just click on the Default checkbox for the desired group. This will result when an approval chain is set, the default groups will appear accordingly.
You can have only one default Final approver. More on Approval chain can be found here.
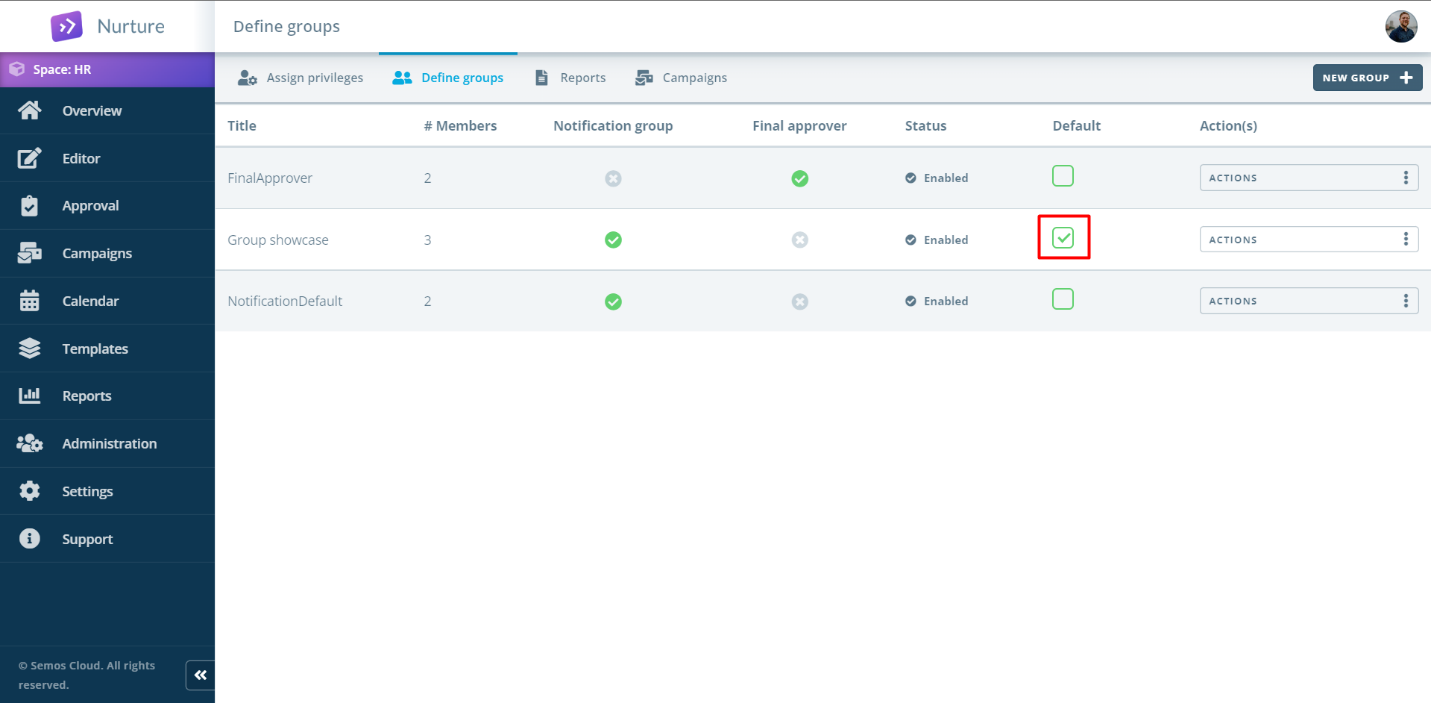
Image: Nurture application - Administration - Define groups
Disable a group
If you would like to disable a certain group so it is not available to the users, you need to disable the group. To do this first go to Nurture application - Administration - Define groups, find the desired group, click on the three dots next to the Actions button and select Disable from the drop-down menu.
After the group is disabled, it will persist, but it will not be available to participate in an approval chain.
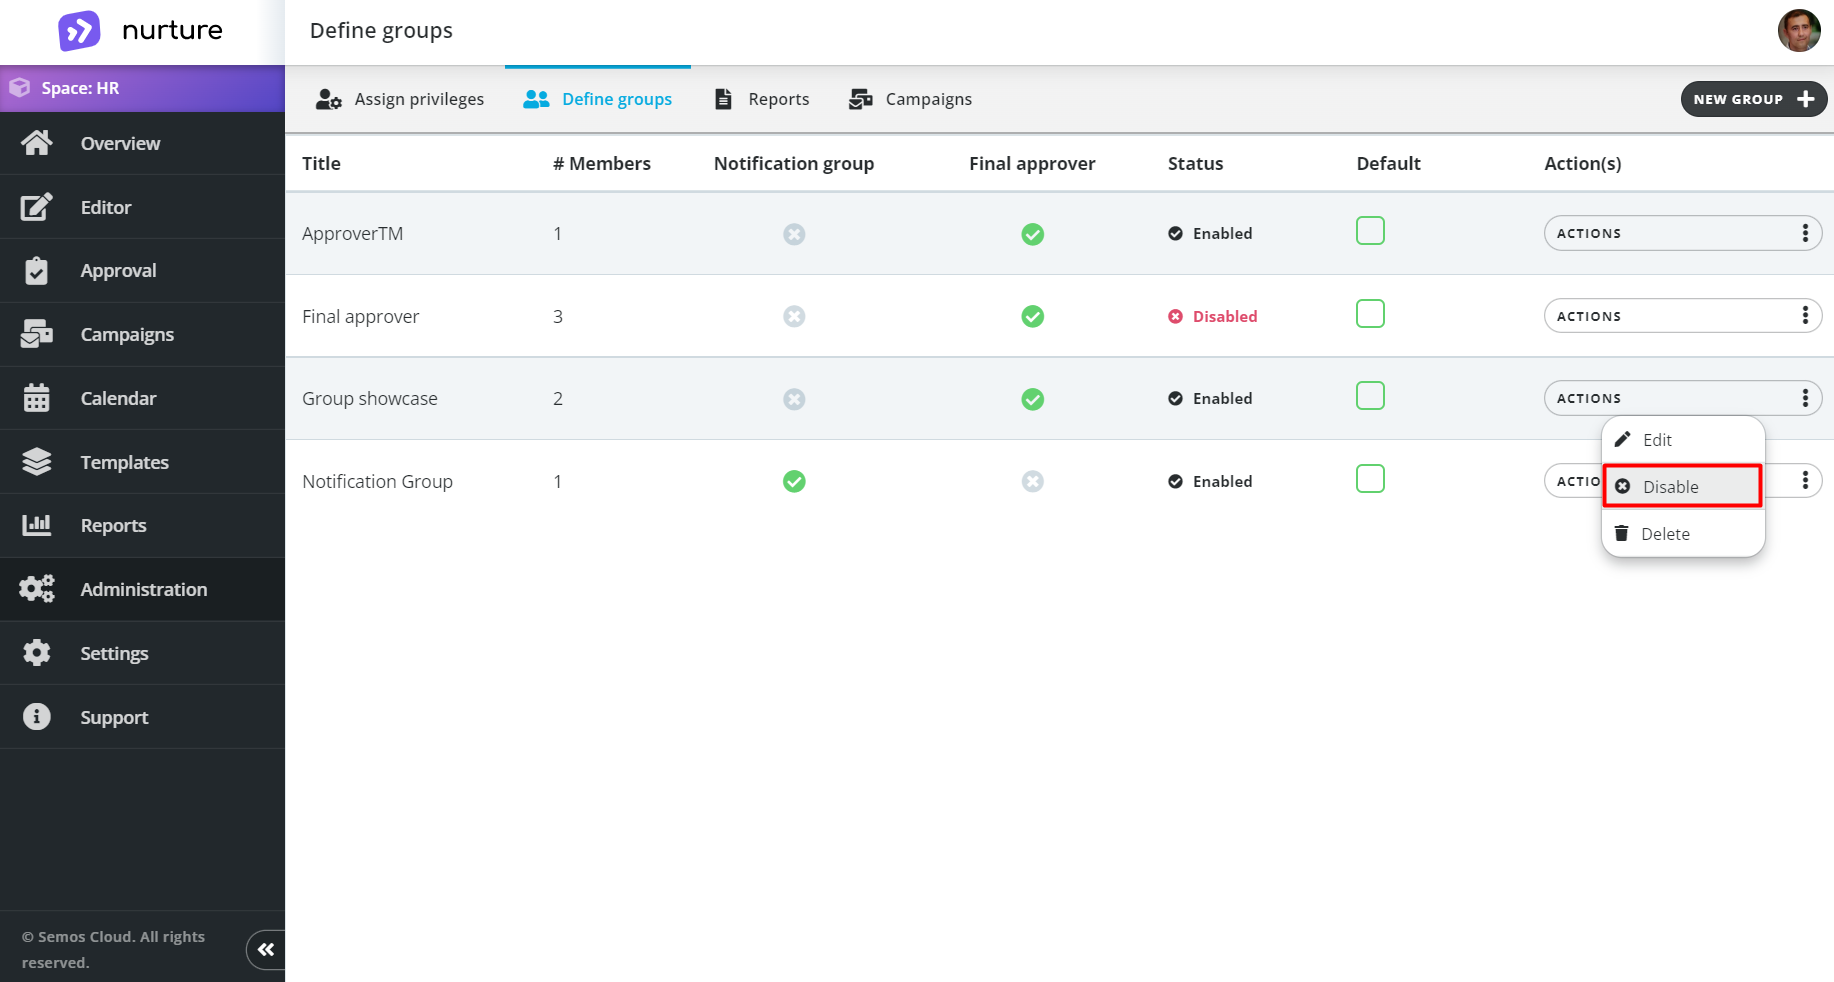 Image: Nurture application - Administration - Define groups
Delete a group
If you would like to delete a certain group so it is no longer available in Nurture, first you need go to Nurture application - Administration - Define groups, find the desired group, click on the three dots next to the Actions button and select Delete from the drop-down menu.
This action cannot be undone.
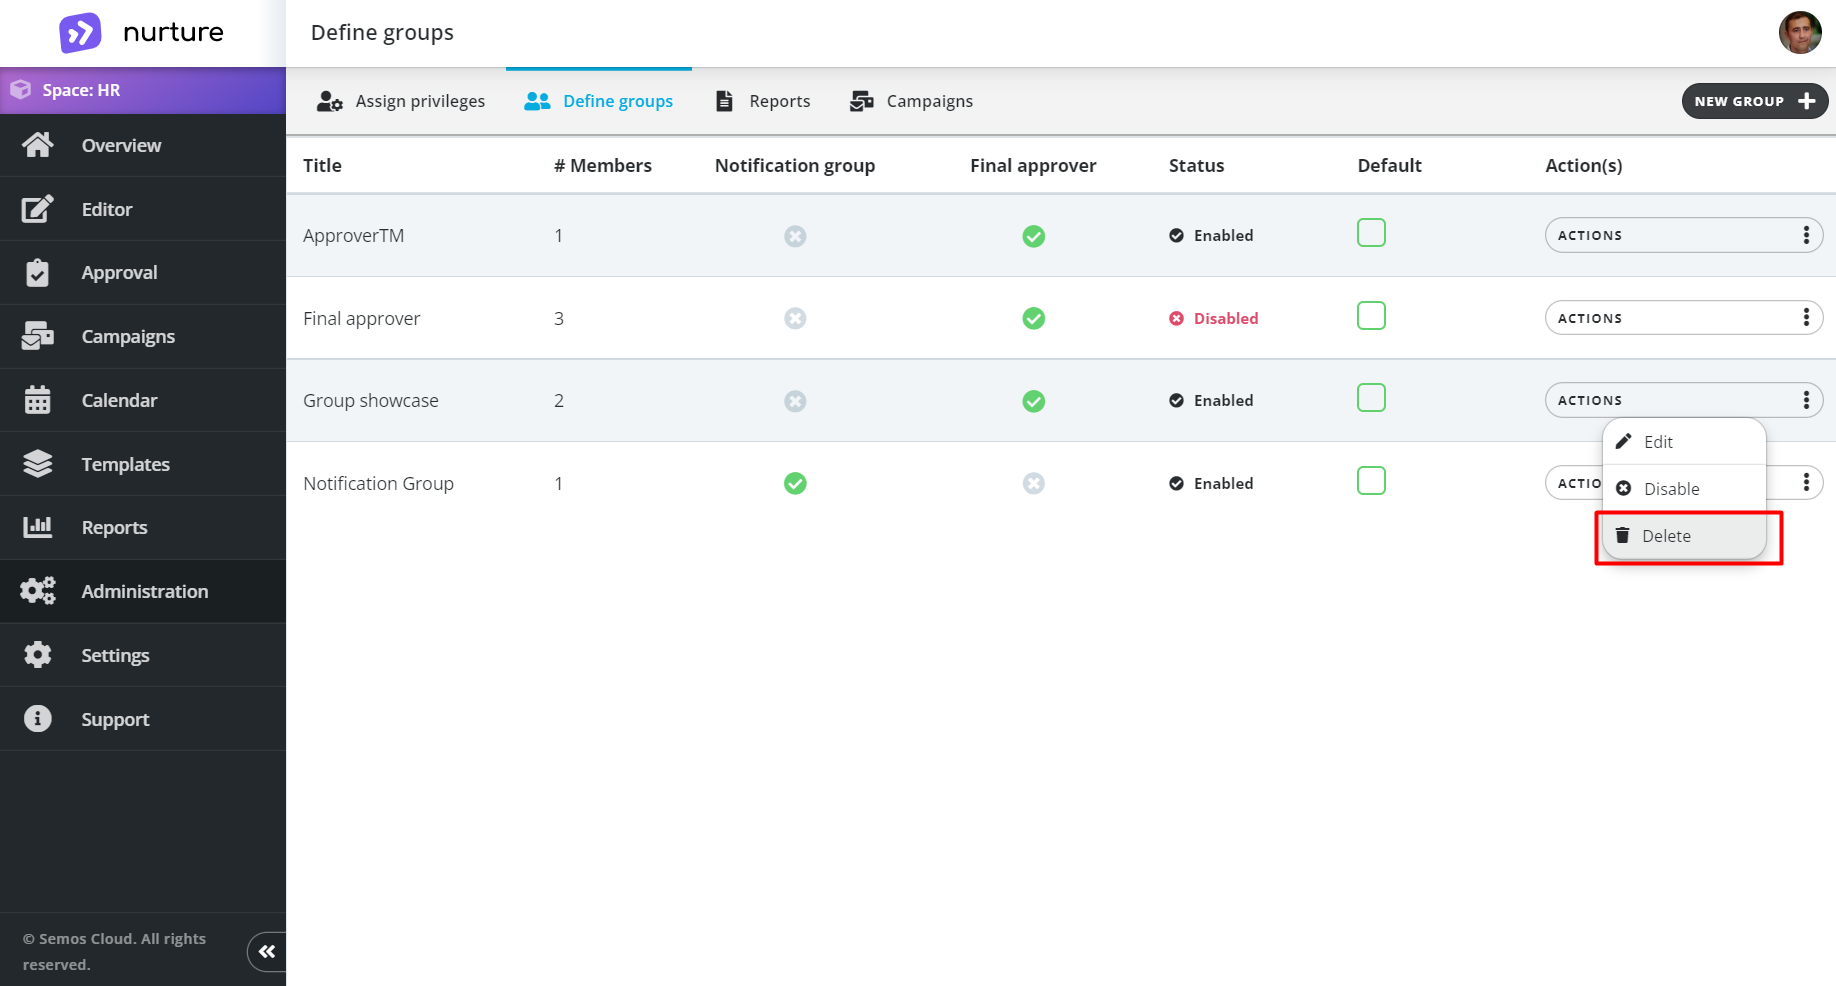
Image: Nurture application - Administration - Define groups
If this article left your questions unanswered, please submit a Support Form, and we can clarify this topic.